Table of Contents
Every month, millions of homeowners face the same frustrating reality: opening an energy bill that seems to climb higher regardless of their conservation efforts. The culprit behind these escalating costs often lurks in the spaces you can’t see your attic, walls, and crawl spaces where inadequate insulation, especially the lack of effective blown-in insulation, allows your hard-earned money to literally disappear into thin air.
Common Signs Your Home Needs Better Insulation

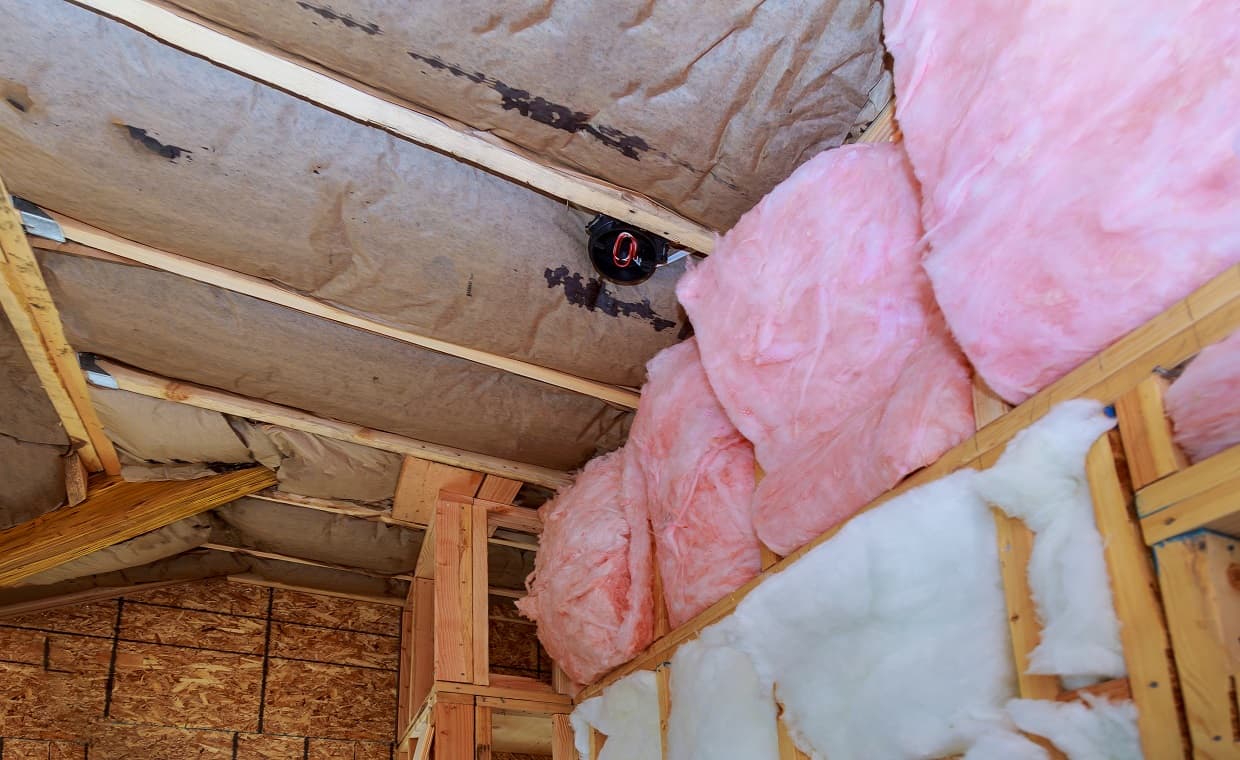
Temperature inconsistencies throughout your home signal insulation problems before your energy bill does. Rooms that feel freezing in winter despite cranking the thermostat, or spaces that become unbearably hot in summer, indicate thermal bridging and insufficient coverage. Ice dams forming on your roof edges during winter months reveal heat escaping through your attic, while drafts near electrical outlets and baseboards suggest gaps in your thermal envelope.
Physical signs include higher-than-normal energy bills compared to similar-sized homes, HVAC systems that run constantly without achieving desired temperatures, and uncomfortable hot or cold spots that force you to avoid certain areas of your home during extreme weather.
Why Homeowners Consider Blown-In Insulation as a Solution
Blown-in insulation has gained popularity because it fills gaps and irregular spaces that traditional batt insulation simply cannot reach effectively. This loose-fill material conforms to joists, pipes, and electrical boxes, creating a more complete thermal barrier. Many homeowners appreciate that it doesn’t require removing existing insulation and can significantly boost R-values in attics and wall cavities.
The material settles into place naturally, reducing thermal bridging that occurs with improperly installed batts. For older homes with unique architectural features or irregular framing, blown-in options provide superior coverage compared to rigid panels or rolls.
The Appeal of DIY vs. Professional Installation Debate
The DIY appeal stems from perceived cost savings and the satisfaction of completing home improvements independently. Many homeowners assume renting equipment and purchasing materials will cost significantly less than hiring professionals. Online tutorials and home improvement shows make the process appear straightforward, leading confident homeowners to tackle insulation projects themselves.
However, professional installation offers expertise in proper air sealing, moisture management, and achieving optimal R-values for your specific climate zone. The decision often comes down to balancing upfront costs against long-term performance and potential safety concerns.
Multi-Zone Installation: Whole-House Comfort in Three Days
The Rodriguez family chose professional installation for their ranch home’s complete thermal envelope upgrade. The project included attic, wall cavity, and crawl space insulation using different materials optimized for each application.
Professional coordination meant simultaneous work in multiple areas without disrupting daily routines. Specialized equipment allowed efficient installation while maintaining quality control throughout. The three-day timeline included air sealing, moisture barrier installation, and final testing to ensure proper coverage and R-values.
Total investment of $5,200 delivered whole-house comfort and 45% energy savings compared to their previous winter bills.
Breaking down the True Cost per Square Foot: DIY vs. Professional
Understanding actual costs requires looking beyond material prices to include all expenses, time investment, and potential quality differences that affect long-term performance and savings.
DIY Material Costs and Equipment Rental Reality
DIY blown-in insulation materials typically cost $0.75 to $1.50 per square foot depending on insulation type and R-value requirements. Cellulose averages $0.90 per square foot for R-38 coverage, while fiberglass runs $1.20 per square foot for equivalent performance. However, material costs represent only part of the total investment.
Equipment rental adds $100-200 for weekend projects, while safety equipment (respirator, protective clothing, lighting) costs $150-300. Many homeowners underestimate material quantities, requiring additional purchases that increase per-square-foot costs by 15-25%. The blown-in insulation cost per sq ft varies significantly based on project complexity and regional material availability.
Professional Installation Pricing: What’s Actually Included
Professional installation typically ranges from $2.50 to $4.50 per square foot for blown-in insulation, depending on access difficulty, existing conditions, and regional labor costs. This pricing includes comprehensive services: pre-installation assessment, proper air sealing, material delivery, professional-grade equipment, installation, cleanup, and performance verification.
Many professional services include warranties covering material performance and installation quality for 10-25 years. Additional value comes from expertise in identifying and addressing underlying issues like moisture problems, inadequate ventilation, or electrical concerns that DIY approaches often miss.
Hidden Expenses Most Homeowners Don’t Calculate
DIY projects frequently encounter unexpected costs that professional estimates typically include. Access improvements, additional lighting, ventilation upgrades, and structural repairs can double initial budgets. Time investment represents significant hidden costs—most DIY insulation projects require 2-4 full days compared to professional completion in 4-8 hours.
Potential mistakes carry long-term costs through reduced energy savings, comfort issues, or safety hazards requiring professional correction. Insurance considerations may affect coverage for DIY electrical or structural work performed without proper permits.
Where DIY Projects Usually Go Wrong (And Cost More Than Expected)

Even well-intentioned DIY insulation projects encounter common pitfalls that compromise performance and increase long-term costs. Understanding these issues helps homeowners make informed decisions about tackling insulation projects independently.
Inadequate R-Value Coverage and Thermal Bridging Issues
Achieving consistent R-values throughout insulation areas requires experience and proper equipment. DIY installations often result in uneven coverage, with some areas receiving excessive material while others remain inadequately insulated. Thermal bridging occurs when structural elements conduct heat through insulation gaps, significantly reducing overall thermal performance.
Professional blowing equipment maintains consistent material density and coverage patterns that handheld tools cannot match. Proper installation techniques ensure uniform settling and long-term performance that maintains specified R-values over time.
Safety Hazards and Equipment Mishaps
Attic work presents serious safety risks including falls through ceilings, electrical hazards, and respiratory exposure to insulation materials. DIY projects often lack proper safety protocols, protective equipment, or emergency procedures. Equipment malfunctions can cause injuries or property damage when inexperienced operators handle powerful blowing machines.
Professional installers carry insurance coverage and follow OSHA safety standards that protect both workers and homeowners from liability and injury risks.
Uneven Distribution and Settlement Problems
Proper blown-in insulation requires understanding material characteristics, settling rates, and installation techniques that achieve optimal coverage. DIY installations frequently exhibit inconsistent density, excessive settling, or inadequate coverage around obstacles like electrical boxes, pipes, and HVAC equipment.
These distribution problems create thermal weak points that compromise energy efficiency and comfort. Professional installation includes techniques for achieving proper density and coverage patterns that maintain performance over time.
The Professional Advantage: Why Expertise Matters for Long-Term Performance
Professional installers bring specialized knowledge, equipment, and systematic approaches that consistently deliver superior results compared to DIY efforts. This expertise translates into better comfort, energy savings, and long-term value.
Proper Air Sealing Before Insulation Installation
Effective insulation requires comprehensive air sealing to prevent thermal bypass and moisture infiltration. Professional installers identify and seal air leaks that DIY approaches commonly miss, including gaps around electrical penetrations, plumbing runs, and structural joints.
Proper air sealing can improve energy efficiency by 10-30% beyond insulation alone. This critical step requires specialized materials, techniques, and knowledge of building science principles that ensure lasting performance.
Moisture Management and Ventilation Considerations
Inadequate ventilation and moisture control can negate insulation benefits while creating serious structural problems. Professional installers understand vapor barrier requirements, ventilation needs, and moisture management strategies appropriate for different climate zones and building types.
Proper ventilation prevents ice dams, condensation problems, and indoor air quality issues that can develop when insulation installation disrupts existing airflow patterns.
Quality Control and Performance Guarantees
Professional installation includes systematic quality control processes that verify proper coverage, R-values, and installation techniques. Many companies provide performance guarantees that ensure energy savings and comfort improvements meet specified standards.
Post-installation testing and documentation provide baselines for monitoring long-term performance and identifying potential issues before they become major problems.
Making the Right Choice for Your Home’s Thermal Performance

Deciding between DIY and professional insulation requires honest assessment of your skills, available time, project complexity, and long-term goals for comfort and energy efficiency.
When DIY Might Work for Your Situation
DIY insulation projects can succeed in specific circumstances: simple, accessible areas like detached garages or storage buildings, homeowners with relevant construction experience, and projects where budget constraints make professional installation impossible.
Success requires realistic timeline expectations, proper equipment, comprehensive safety planning, and willingness to invest significant time in research and careful execution.
Signs You Need Professional Insulation Services
Complex projects benefit from professional expertise: multi-story homes, historic buildings, areas with existing moisture or electrical issues, and situations requiring permits or building code compliance. Homes with HVAC equipment in attic spaces need professional assessment to ensure proper clearances and ventilation.
Time constraints, safety concerns, or lack of construction experience make professional installation the practical choice for most homeowners.
Calculating Your Return on Investment for Both Options
ROI calculations should include all costs, time investment, expected energy savings, and potential resale value improvements. Professional installation often provides better ROI through superior performance, warranties, and fewer long-term issues requiring correction.
According to the Department of Energy, proper attic insulation can reduce heating and cooling costs by 10-50%, with payback periods typically ranging from 2-8 years depending on climate zone and existing conditions.
Frequently Asked Questions about Blown-In Insulation Costs and Installation
01. What’s the average cost difference between DIY and professional blown-in insulation per square foot?
DIY blown-in insulation typically costs $1.50-2.50 per square foot including materials, equipment rental, and safety equipment. Professional installation ranges from $2.50-4.50 per square foot but includes comprehensive services, warranties, and expertise that often deliver better long-term value. The apparent savings of DIY often disappear when accounting for time investment, potential mistakes, and hidden costs that frequently arise during installation.
02. How long does professional blown-in insulation installation typically take?
Most residential attic insulation projects take 4-8 hours for professional installation, compared to 2-4 full days for DIY efforts. Complex projects involving multiple areas or additional services like air sealing may require 1-2 full days. Professional teams work efficiently with specialized equipment and systematic processes that minimize disruption to daily routines.
03. Can I add blown-in insulation over existing insulation, and does it affect the cost?
Adding blown-in insulation over existing materials is often possible and cost-effective, though existing insulation condition affects results. Compressed or damaged insulation should be removed first, while properly functioning insulation can serve as a base layer. Professional assessment determines whether existing insulation helps or hinders new installation performance.
04. What factors cause the biggest price variations in blown-in insulation projects?
Access difficulty significantly affects costs, with hard-to-reach areas requiring additional time and specialized equipment. Existing conditions like electrical upgrades, moisture issues, or structural repairs can double project costs. Geographic location, material types, and R-value requirements also influence pricing, with premium materials and higher R-values commanding higher prices.
05. How do I know if my DIY insulation project was installed correctly?
Proper installation should achieve consistent coverage without visible gaps or compressed areas. Professional thermal imaging can identify problem areas not visible to naked eye inspection. Uneven temperatures, persistent drafts, or higher-than-expected energy bills may indicate installation problems requiring professional evaluation and correction.
Also Read: Top 6 Affordable Ways to Enhance Your Home’s Insulation


