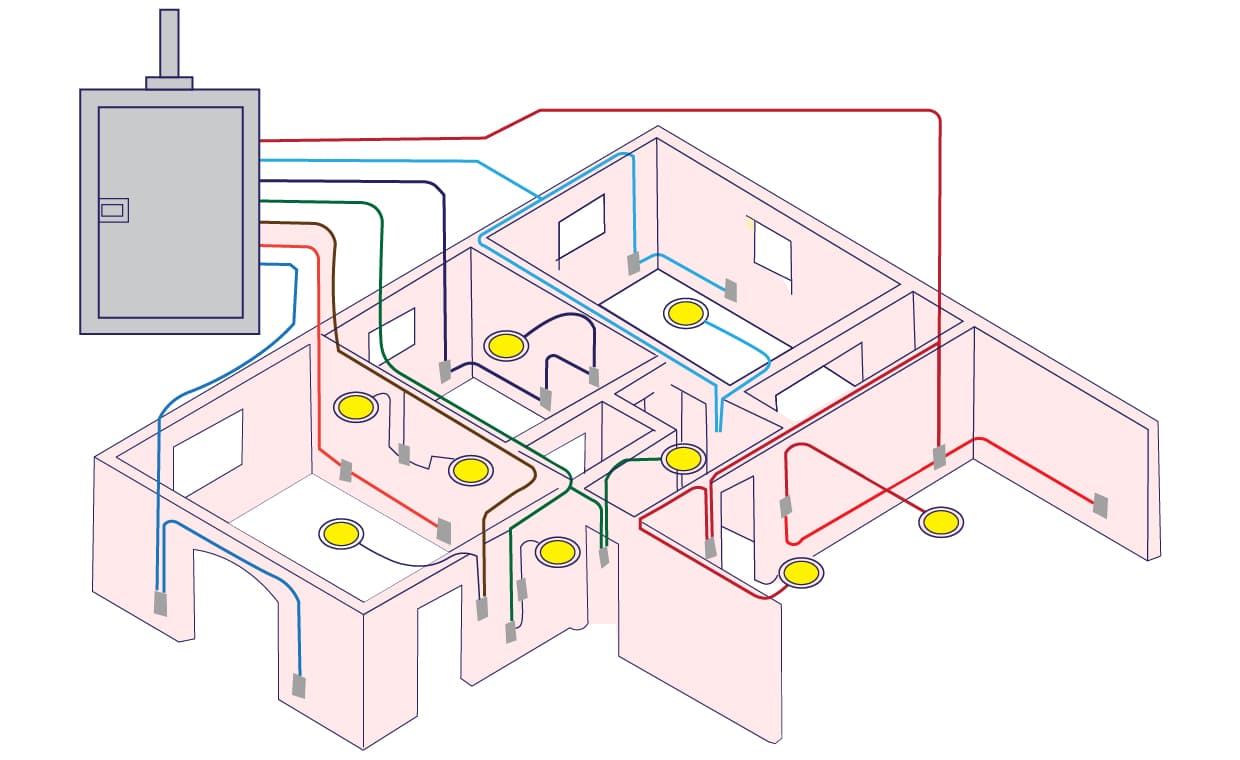
Each house should own a circuit map, also known as a wiring diagram. This is not only a boon for your electrician, but it also lets you connect or disconnect a new electric device from the circuit without affecting the other components in the circuit. In this blog, Gharpedia shares the process of a DIY electrical circuit map of a house that will serve you as a reference for any electrical issues and save you time and bucks.
How to Map Your Home Electrical Circuit?
Mapping a home electrical circuit does not have to be a tedious task. How about a utilitarian-cum-fun game for the next time you host a party? Go ahead and create an electrical map of your house that shows which lights, appliances, and receptacles are controlled by which circuit or fuse in your main service panel. How? Well, put one person in each room of the house, hand them a walkie-talkie and a circuit tester, and then go to the main service panel and start flipping circuits or removing fuses. Trust us, this will be simply hilarious!
Whether you opt for this fun activity or not, let us warn you that this chore is much easier if you have one or more helpers.

In case you’re wondering why in the world you should have an electrical map, then remember that you will occasionally need to shut off power to a certain light fixture or receptacle to repair or upgrade it. If you don’t know which circuit or fuse controls that fixture, it will take you a lot of time to figure it out. This is precisely why a home electrical circuit map is a mandate.
DIY Electrical Circuit Map of a House
Before embarking on the ‘circuit map DIY project,’ check your main service panel to see if a previous homeowner has already taken care of the house wiring diagram for you. Look for numbers next to each circuit or fuse and a list that correlates each number to a room or area it controls. If you don’t see a list like this, then you’ll have to make one yourself.
Before you start to map your electrical circuits, turn off anything that could be damaged from having the power turn on and off, like, computers and televisions. Then turn on every light and ceiling fixture in the house. A pair of walkie-talkies will make this job a lot easier. With them, you can stand at the main service panel and your helper can walk around the house and let you know what’s going on. Otherwise, you’ll have to yell back and forth or run to each room to see what exactly is happening!
Go to the main service panel and make sure the ground is completely dry. Open the panel with one hand while keeping your other hand at your side. Count the number of circuits or fuses from left to right or top to bottom and number them on a pad of paper. Then turn off the first circuit breaker or fuse. See what is turned off inside the house and make a note of it next to the number you assigned to that circuit or fuse. Remember to check the receptacles too. Have your helper try each one in the room by plugging in a radio, clock, or electrical tester.

It sounds like overkill, but some of the wiring gets downright goofy. Sometimes the receptacles in a room will be on one circuit while the ceiling fixtures are on another. Remember to check major appliances like ovens and dryers too, as they have circuits of their own (termed dedicated circuits).
Once you’ve gone through the entire house, you’ll have a list of what each circuit or fuse controls. Some main service panels have a grid on the inside of the door where you can create your house wiring layout diagram. If not, write the numbers you’ve assigned on pieces of masking tape and stick them on the flat metal area next to the appropriate breaker or fuse. This will make your life a lot more convenient whenever the need arises.
Tip: In case you can’t recruit a helper for this project, plug in a radio that you can hear at the service panel. You’ll know you’ve turned off the power when you can’t hear the music anymore!
So, are you fully geared up for creating a DIY electrical circuit map of your house?
FAQs
How to make a house wiring diagram?
First, draw the layout of your house and mark all the electrical outlets. Then draw lines representing wire routes. Use different colours for each circuit to keep them distinguished. That is it; your house wiring diagram is ready.
How to find circuits in a house?
Stand near the main panel and pull out one fuse. Now check all the outlets that lost power. That is your circuit connected to that fuse or breaker. Similarly, pull out another fuse and mark another outlet that lost power. Repeat this process till you remove all the fuses one by one, marking their outlets that lose power simultaneously.
How to plan an electrical circuit?
Find out the needs of every room and then note down about all the outlets and switches. Choose the right wire, fuse (circuit breaker), and wiring route for various outlets based on their capacity. Lastly, draw a map showing every circuit and connect it to the main electrical panel.
You may also like to check out the blog below:
Understand Home Electrical System Basics and How it Works
Author Bio
Huta Raval – An English Literature and Journalism Topper, Huta Raval has graduated from the L D Arts College, Ahmedabad. Post serving for 23 years in the NBFC and Public Library Sectors her desire for ‘writing the unwritten’ brought her to the creative field of content writing. Her clientele comprises of NGOs, Blogging Platforms, Newspapers, Academic Institutions, et al.


