


Is there anything better to warm up a room than a good old wooden floor? This timeless trend in interior design is somewhat hard to achieve without breaking the bank. Did you know that you can save up to $25 per square meter in labor costs by installing wooden floors?
Thanks to the huge advancements, many types of hardwood floors are now super easy to install. There is even an option to order factory-finished floors that can be installed straight out of the box. In this article, you will get to know all about how to get a professional look on your own!
DIY Wood Floor Installation
If you are a competent DIYer and you have the right tools and preparation, this is a workable project. Refer our step-by-step guide before you get started.
First Things’ First- the Tools!
Once you have decided to install hardwood floor yourself, you will need to get familiar with basic carpentry tools that we will list below. Remember that many of these circular saws and pneumatic staple guns can cost you a lot of money when purchasing in your local hardware shop. That is why it is a lot cheaper to get these same products from Amazon.
Working with these tools is not particularly difficult, but they do require precision. You do need to be careful when handling these tools.
What exactly do you need to start your project?
01. The Saw. Three Different Kinds of Saws.:
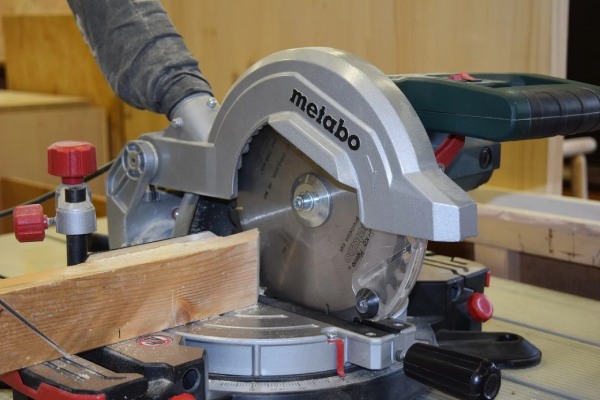
Mitre Saw
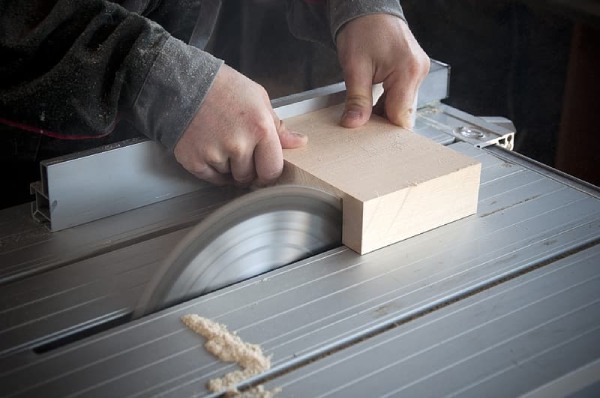
Table Saw
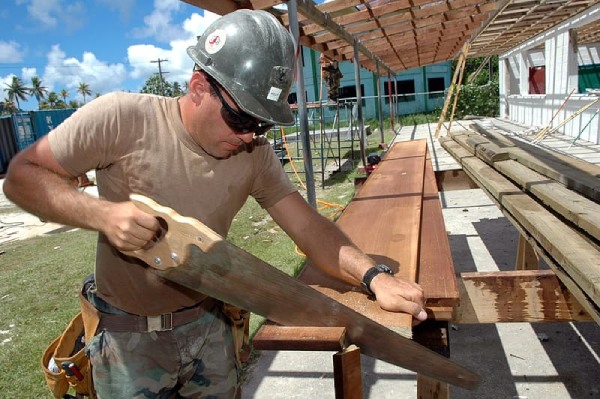
Hand Saw
- Mitre Saw will allow you to cut hard to reach angles such as the ones around doors.
- Table Saw – you are going to use the most to adjust the length of your planks. the most important trait of this saw its precision.
- Hand Saw – you will need for the baseboard and repair work.
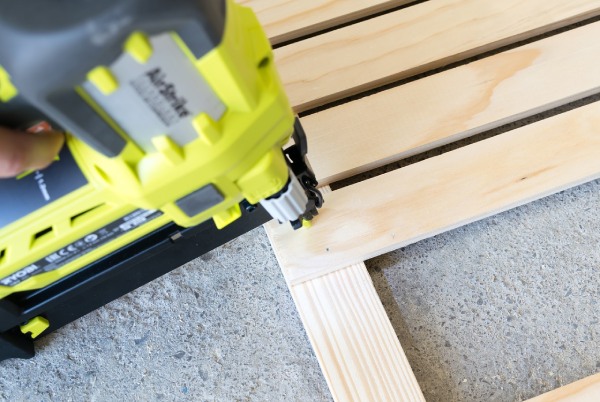
02. Nail Guns and a Compressor:
If you are not going to use floating floors (without nails or glue) Angled Manual nailer is the best mailer you can have because it nails in at a 45-degree angle, so pins are hidden in the wood.
Finishing Nail Gun, you will need to nail the wood on the edges.
A 5 gallon Air Compressor will provide you with air pressure for proper nailing.
You will also need a tape measure, pencil, and a carpenter square for measuring your planks. Tapping block and hammer, you will need to tap the planks closer together.
Most probably, you have some of these tolls.
Wood Floor Installation Steps
01. Remove Your Old Wooden Floor:
Besides taking things into your own hands when installing the new floor, consider removing it yourself. You already have all the tolls, it just requires little of your time and can save you some money.
The most efficient way to get rid of the old wooden floor is to first cut it with a circular saw in the smaller sections. You can do this by cutting perpendicular to the wood placement direction.
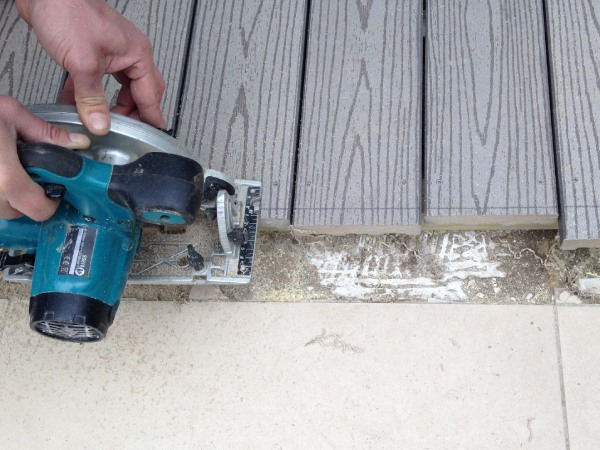
Make sure your floorboard is dry and clean once you remove all the wood. Since the subfloor board is exposed, you can run cables for phone or sound systems, which can be impossible once the new floor is set up.
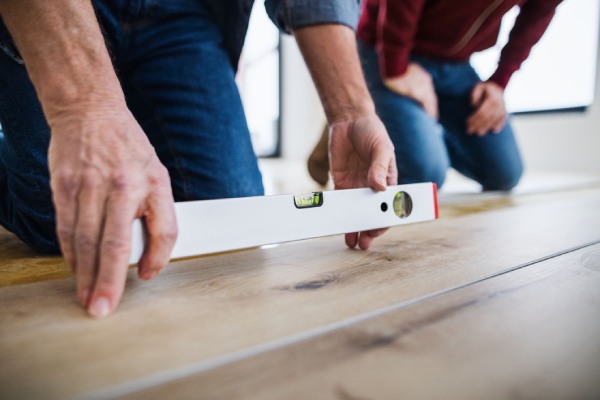
02. Prep Your Subfloor:The secret of getting that professional look of your wooden floors is doing the right kind of preparation for your subflooring. No matter what type of floor you are installing, your subfloor must be dry, clean, and perfectly leveled.
- If your previous floor was glued to the subfloor, you need to remove any remaining glue, wax, paint adhesives with a sender.
- If your previous floor was floating or nailed down, you need to clean it using the vacuum cleaner.
- Check the moisture of your floors by using the moisture meter. When getting your new floor, check the instructions to see desirable moisture levels. If your subfloor’s wet level is too high, be sure to contact the professional.
- Make sure to prep the doorways by using the handsaw to cut down the edges.
- check the floor levels using the tool level. Today level tools can be found on our smartphones. All you need to do is download the app. the floor should not vary more than 3/16 inches every 10 feet.
03. Consider the Type of Wood and Style you are Going for:First and foremost, before buying any floor, you need to take detailed measurements. The best way to do this is by measuring the length time’s width of the room to get the square footage. Add 5 to 10% to this number so that you can have enough material to replace any damaged boards.
The second thing you need to think about is the wood color. While the darker floors give a nice fancy touch to the interior, the light wood floor visually enlarges and brightens the room. If you have a small apartment, be sure the light wood will work better for you.
The third thing you need to think about is material. There are several wood floor materials you can choose from, depending on your budget. Let go over some of them.
Oak is one of the most durable materials you can get for a good price (starting from $2 per square foot). These dark grain floors go well with any interior. It is a better choice for houses than apartments. If you do want to have an oak floor in small spaces instead of a classic brown look, you may consider getting a whites gray color to match your interior and open up your living space.
Maple is latte like hardwood with a less grain in its structure. It is material extremely durable because it is used in basketball courts. The price is higher, and it can get up to $20 per square foot high-quality maple floors.
Hickory looks like oak, but it is harder and resistant to scratches, making this a perfect floor if you have pets. The cost is somewhere between $5 to $10 per square foot.
The final thing you should do is look up the prices online. Many times you can get a better deal by buying and ordering these fours online.
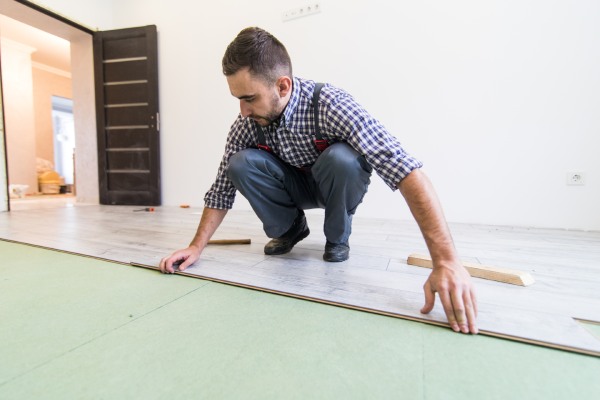
04. Assemble your New Wooden Floor:
It is important to avoid sand and refinish your wood floors yourself. It often turns disappointing. That part you should leave to professionals because it will not save you a lot of money.
When you get your flooring, let it acclimate to the room temperature and humidity for at least three days.
The wooden floors can be assembled by nailing, gluing, and floating. Assembly by floating is by far the easiest way, but it can be pricey, and when not put together in the right direction, the floor can move.
Here is a step by step guide of wood floor installation what you need to do.
01. Make sure you have prepared your floor before assembling your new hardwood floors.
02. Always work from the corner until you get to the door.
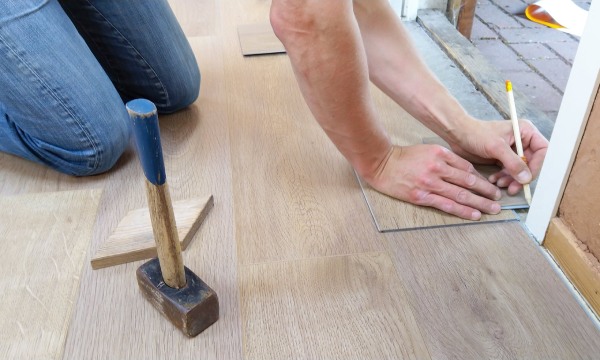
03. Make sure to first set spacers for the extension gap (the gap between wall and plank) about ¾ inches from the wall.
04. Run the first plank row following the length of the room.
05. Face nails it to the ground ½ inches from the tongue, starting about 3 inches from the plank ends. Stagger the joints every 6 inches in between. Don’t let joints line up in between unless there are at least two rows apart.
06. Tap the next piece by using a tapping block and hammer. The last plank in one row should be measured, and then the cut using a table saw.
07. The second row should be aligned with a first row using the block and hammer and then blind nail it every 6 inches.
Hopefully, by now, you are a little more confident about getting yourself into a bit off carpentry work. Just remember, if you choose a quality floor and follow all the instructions, there is little to go wrong with this project. Choosing to do your wooden floors can be a great bonding experience for your family, and you can always feel proud of yourself once the people start coming and noticing your shiny new floors.
You may also like the following articles –
Solid Wood Flooring: All You Need to Know
Top 8 Benefits of Installing Hardwood Floors in Your Home!
Image Courtesy: Image 7
Author Bio
Maja Ivkovic – I am Maja Ivkovic, a thirty-three-year-old DVM living and working in Serbia. I have a lot of experience working long shifts in a small practice with dogs and cats. I love writing for MGC Decks, researching and learning new skills. My main field of interest is internal medicine of pets. I am passionate about cardiology, endocrinology, ultrasound scanning, hematology, and cytology. I am, also a pet parent of three senior dog ladies, three cats, and 22 y old horse.


