


Are you planning to add a second sink in your bathroom? But the problem is confusion. Still you’re wondering how to go for it? Don’t worry; you’re at the right place. By the time you’ll be reading the last part of this article, you’ll be able to decide and plan the job like a pro. But before that, have you ever thought about the reason for which you are planning to install the second bathroom sink?
Why Should You Add a Second Bathroom Sink?
If you have a big family in your home, and there are numbers of people trying to get to school or work at the same time, your bathroom may face a rush-hour traffic jam. However, installing a second sink would help you lessen the jam and increase the efficiency of this area.
Another convenient factor about adding a second sink in your bathroom is the cost efficiency of the plan. The second basin installation doesn’t require a big budget usually since the two sinks would be connected to the same drain and supply lines. So, you don’t have to buy any plumbing rough-in to your home as they already exist.
What You Will Need For Second Bathroom Sink Installation?
Installing a second sink in your bathroom is not a rocket science. You only need the materials and equipment below, and then you’re set to go.
What Kind of Materials are Required to Add a Second Bathroom Sink?

What Kind of Tools/Equipment are Required to Add a Second Bathroom Sink?

How to Add a Second Sink in a Bathroom: Step-by-step Guide
01. Mark the Holes of the Sink
To determine the shape and the size of the hole in the countertop,
- Measure the sink’s underside.
- Using the measurement provided by the sink’s manufacturer, mark the countertop for cutting.
- Ensure that both sinks are well aligned and there is proper space between them. For comfortable use of the two sinks, there should be at least 24 inches distance between them.
- After having the measurement, use a marker to mark the hole cutting outline.
02. Cut the Hole in the Sink
- Using a 1/2- or 3/8- inch drill bit, drill a hole via the counter- ensure that the hole is large enough to fit a jigsaw blade.
- After drilling the hole, insert the jigsaw blade into the hole and then cut it out with the saw.
- Test fit the new sink to ensure that it fits well in the hole.
03. Mount the Faucet
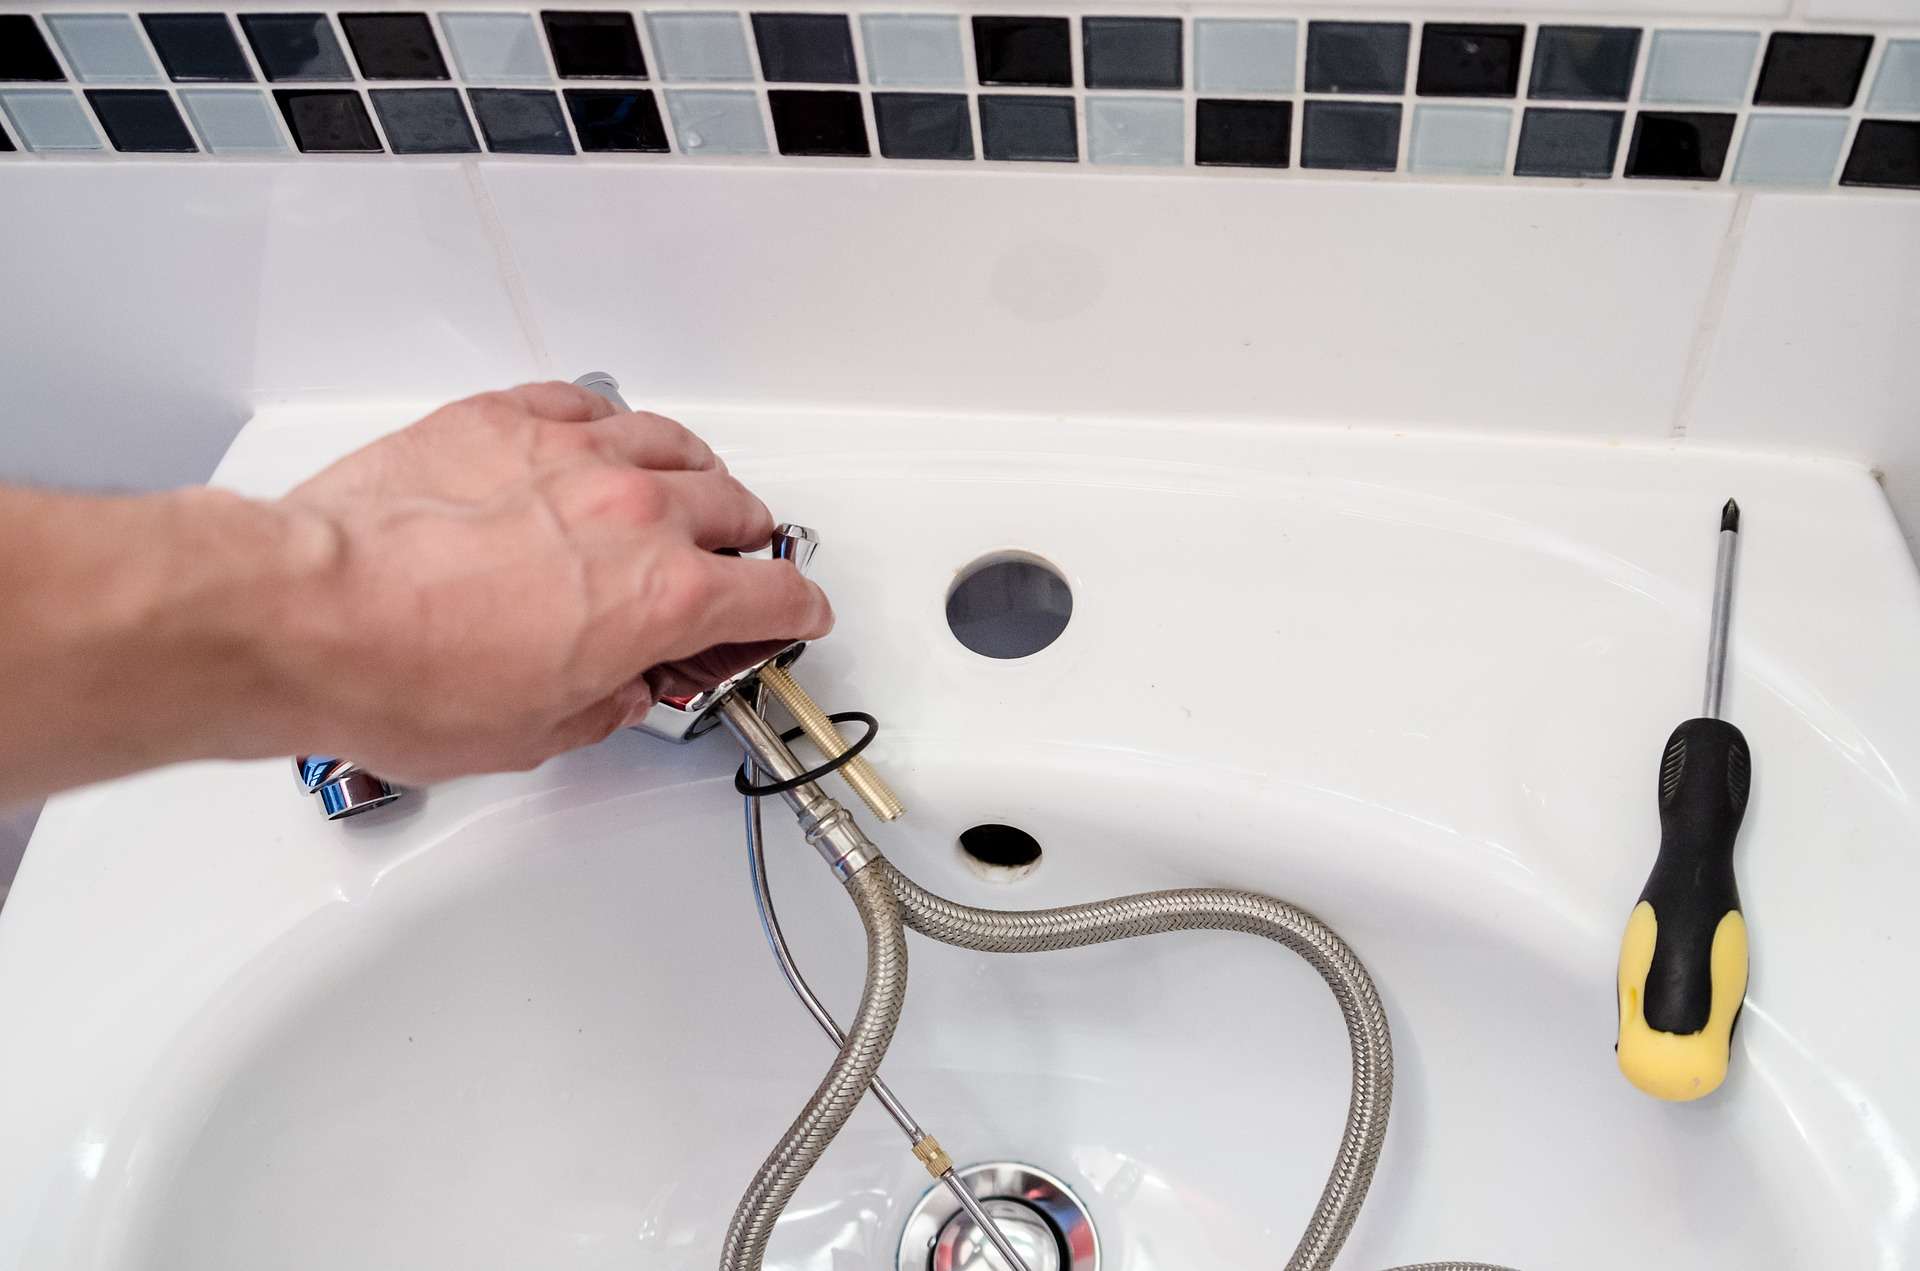
Install the drain fitting and the faucet in the sink. Are you wondering about “how”? Read here.
- Insert the sink in the opening of the cut-out.
- Insert the faucet tailpieces through the sink holes.
- From the sink’s underside thread, the mounting nuts onto the tailpiece.
- Using tongue-and-groove pliers, tighten the mounting nuts.
With some faucets, you’ll have to apply the plumber’s putty’s thin layer between the sink. However, other faucets have a rubber or foam gasket, and that you can fit without the use of putty needless.
04. Add Tubes for Water Supply
- To the cold and hot tailpieces on the faucet, attach flexible tubes for the water supply.
- Ensure that the tubes can stretch from existing shutoff valves to the sink location.
- Use an adjustable wrench to tighten the supply tubes to the tailpieces.
05. Fix the Drain Assembly
Here you have to follow the manufacturer’s instructions: However, the general steps are,
- Fix the drain fitting from the sink to the drain assembly.
- Insert the drain assembly into the drain opening and thread a mounting nut into the tailpiece fittings underneath the sink.
- Use the tongue-and-groove pliers to tighten down the tailpiece securely. Some mounting nuts and tailpieces are made of plastic. So don’t over tighten them as you can break the parts.
- If there’s any plumber’s putty that might have squeezed out around the drain fitting flange, wipe it gently using a rag.
06. Install the Sink
Now you have to use the manufacturer’s guidelines;
- Insert the sink into the cut-out of the countertop.
- Apply a silicone caulk bead around the cut-out opening and place the sink into place.
- Between the countertop and the sink’s rim, run a caulk bead around the seam.
- Use a damp rag to wipe away any excess caulk.
07. Disassemble the Drain of the Old Sink
To enable the old sink’s drain trap configuration to accommodate the two sinks, you have to adapt it. You might be wondering how it is done? Okay, follow the steps below:
- Place a bucket underneath the old sink P-trap.
- Now use the tongue-and-groove pliers, disconnect the drain trap and the drain pipes.
- Remove the extension of the tailpiece that drops from the P-trap and the existing sink.
- Also remove the trap arm that runs into the drain opening in the wall.
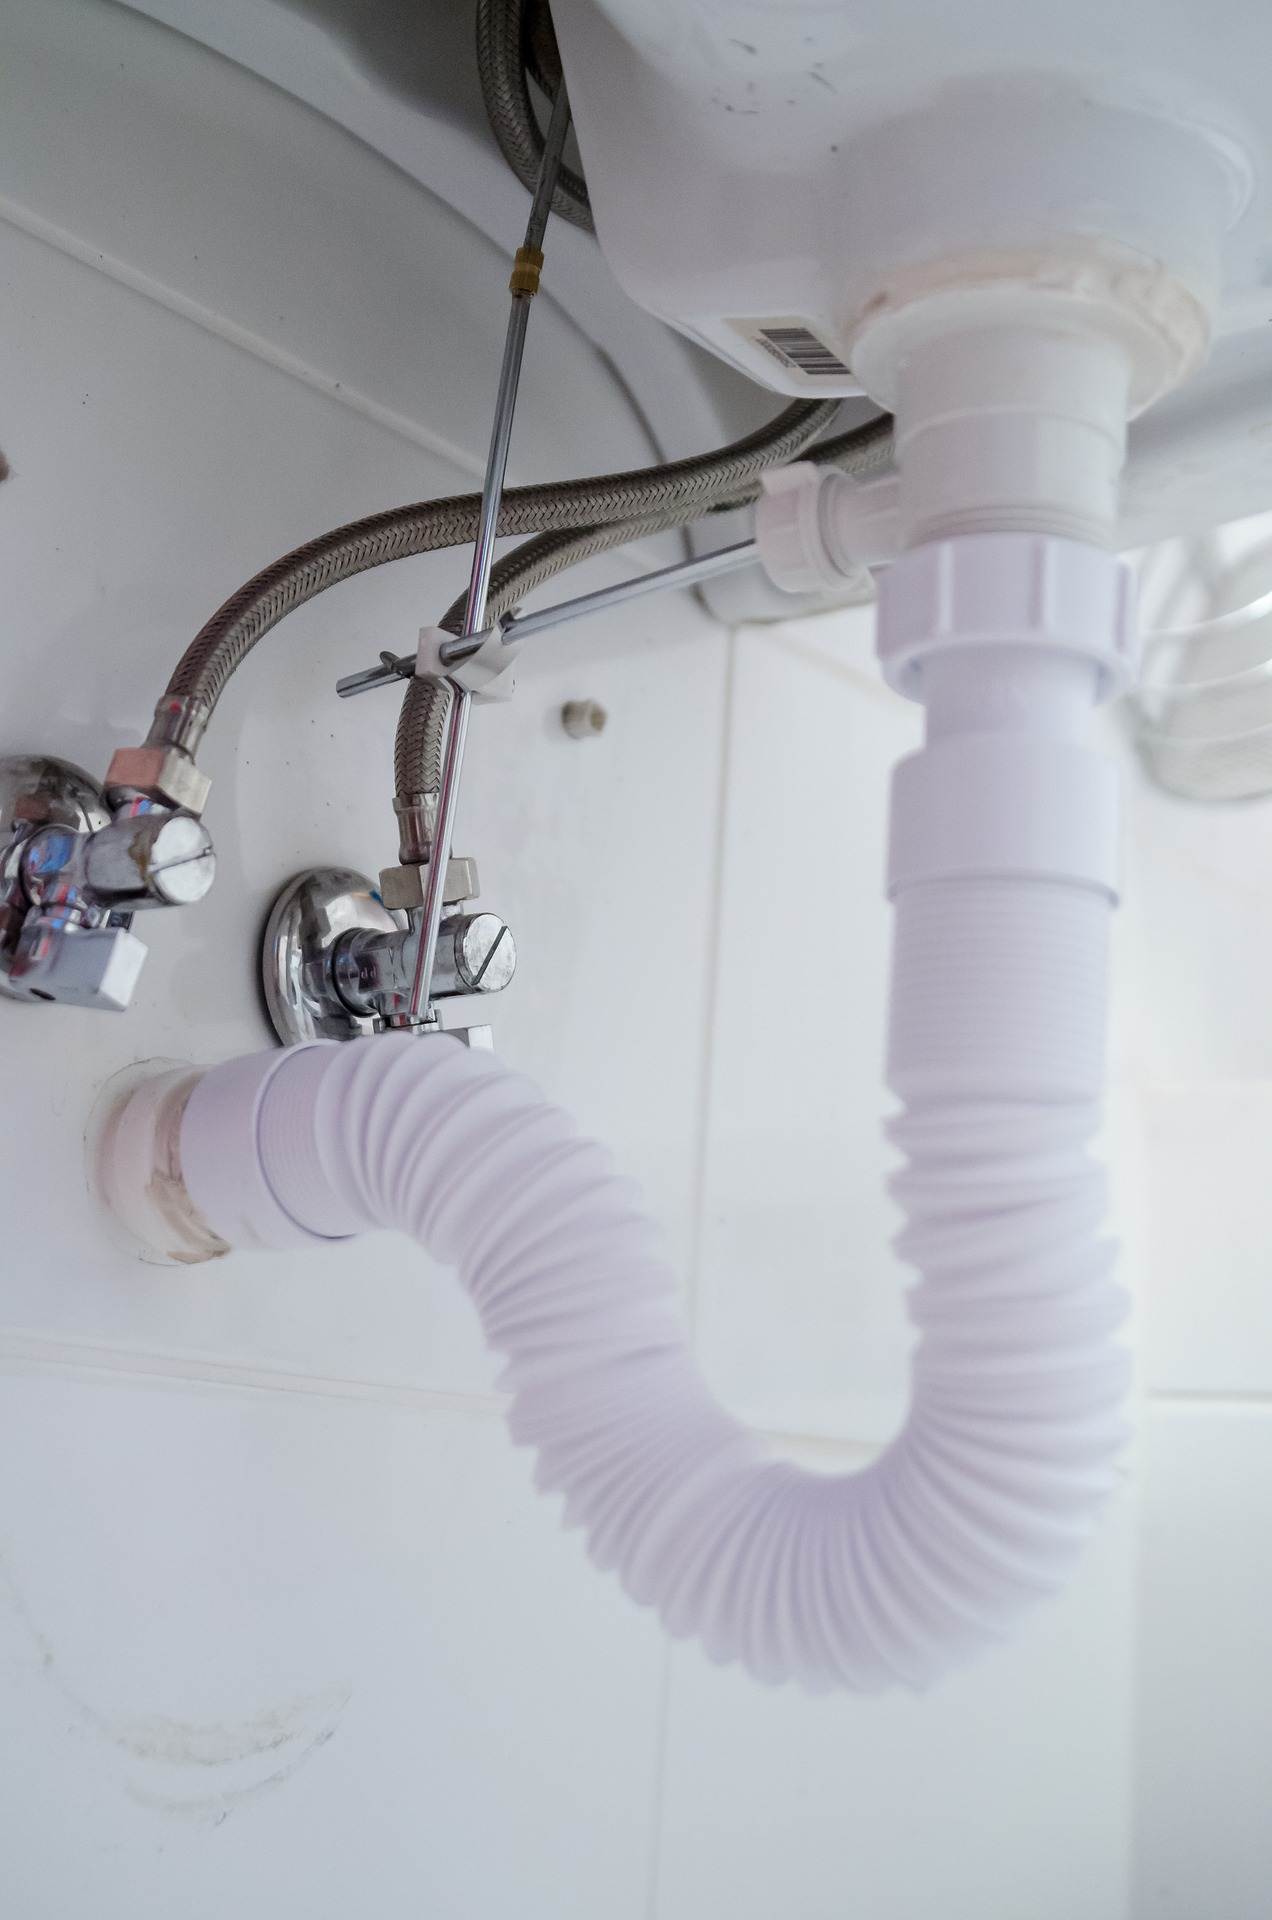
08. Assemble the New Drains
The drain trap configuration consists of 90-degree elbows on each drain tailpiece bottom, which meets between the sinks at a tee-fitting.
- Join the outlet of the P-trap to the drain opening with a trap arm pipe in the wall.
- For proper drainage, ensure all the horizontal pipe sections pitch downwards at a slope of ¼ inch per foot.
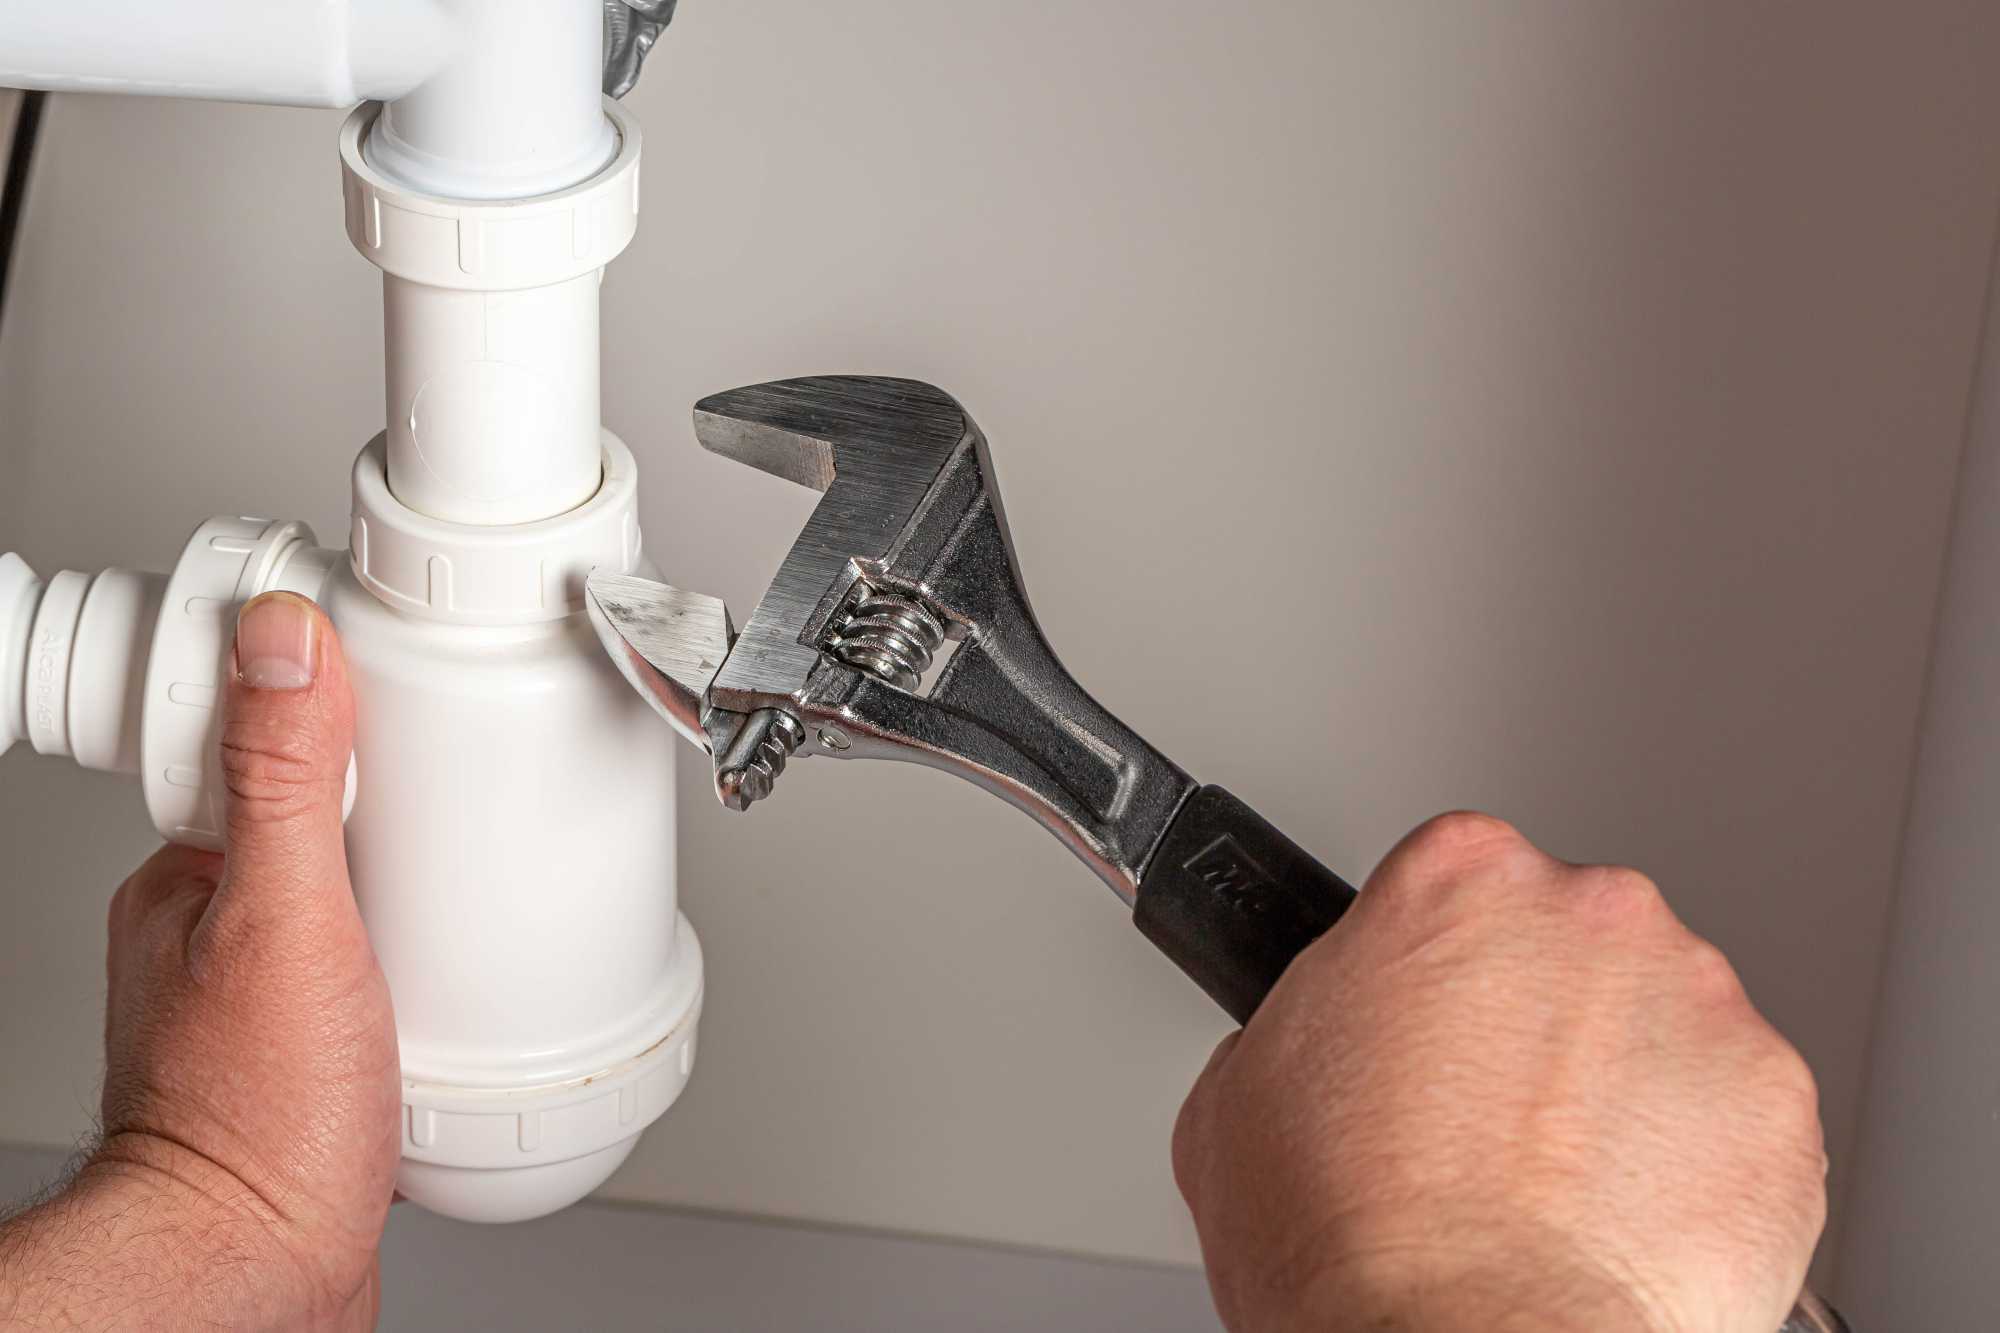
- After ensuring that the PVC drain pipes are well fitted, use tongue-and-groove pliers to tighten all the slip joint connections.
09. Take Away the Old Shutoff Valves
- At the main shutoff valve, shut the water off and place a bucket underneath the water supply valve, located under the existing sink.
- Using an adjustable wrench, detach the supply tubes, which serve the existing sink. Here you will need two wrenches; one for holding the valve and the other one for loosening the supply tube mounting nut.
- From the water supply stub-outs, remove the fixtures’ shutoff valves. If the valves are soldered in place, use a hacksaw to cut off the valves.
10. Fix the New Shutoff Valves
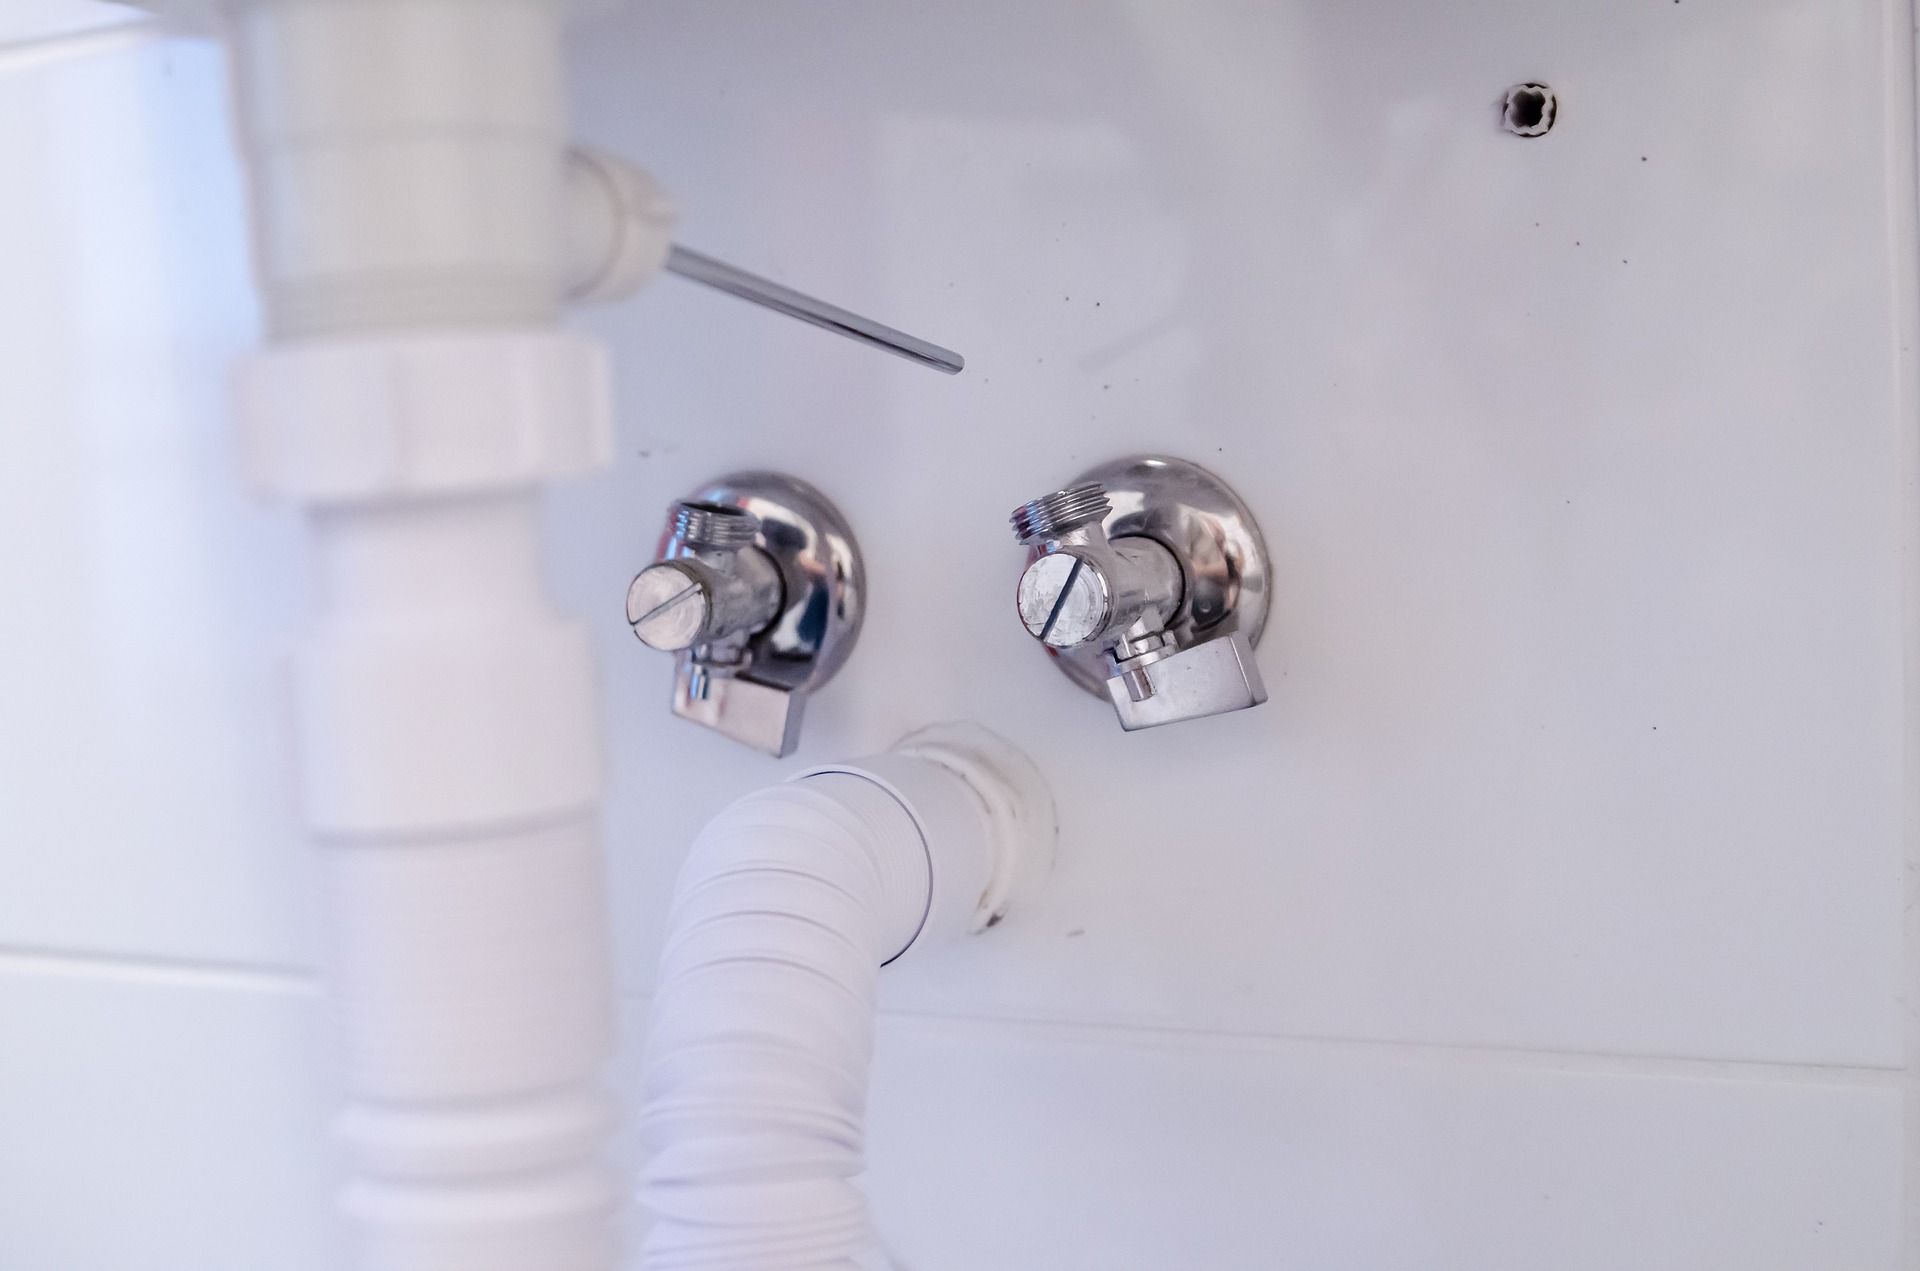
After removing the shutoff valves, attach the new dual-outlet shutoff valves by following the manufacturer’s guidelines.
11. Connect Tubes of the Water Supply

Now use an adjustable wrench, and attach the free end of every faucet supply tube (from the two sinks) to the proper valve. Ensure to match the cold-water supply properly to the cold-water shutoff valve and hot to hot.
12. Check for Leaks
Now open the main water supply valve and the fixture shutoff valves to test the faucets of both the sinks. Check for leaks if any both in the drain and water supply fittings. If there’s any leakage in the connection, tighten it. Usually, it requires a very small tightening to stop the leaks. After successfully installing a second sink, pat yourself on the shoulder for the work well done. Kudos!
Thank you for reading. Similar to the above article, you may also enjoy the following one. Here’s a link –
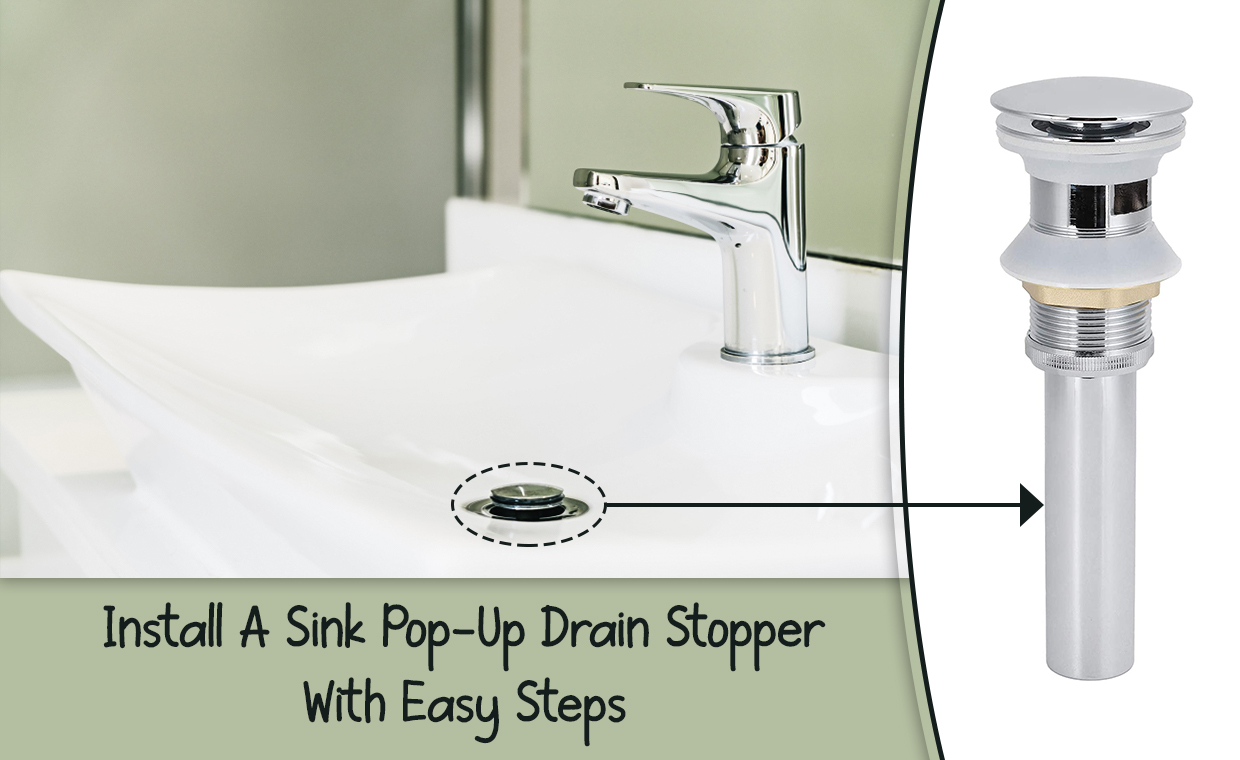
Image Courtesy: Image 2(a), Image 2(b), Image 2(c), Image 2(d), Image 2(e), Image 2(g), Image 3(d), Image 3(i), Image 7, Image 9
Author Bio
Fidelis Kinai – Fidelis Muti possess a bachelor’s in English and Journalism and have over four years of professional experienced writing and proofreading materials for print and online platforms, including newspapers, magazines, websites, blogs, and social media accounts. He also have over three years of experience as a marketing assistant and social media manager.
He is versatile and diligent and will produce exemplary content within time to meet your deadline.
He can deliver most work within 2-3 days; rush orders are accepted whenever possible. He is based in the Kenya but travel often and work for clients all over the world.


