Are you noticing a small pool of water growing under your kitchen sink? If yes, you should check your kitchen sink trap immediately – it might be leaking. If you leave the leakage unattended, the sheer possibility is you’ll start getting a foul sewage smells in and around your kitchen soon. The wastewater would also end up contaminating your home and it will start damaging your kitchen cabinets. Therefore, you need to act fast to prevent any mess from occurring.
What is a Sink Trap?
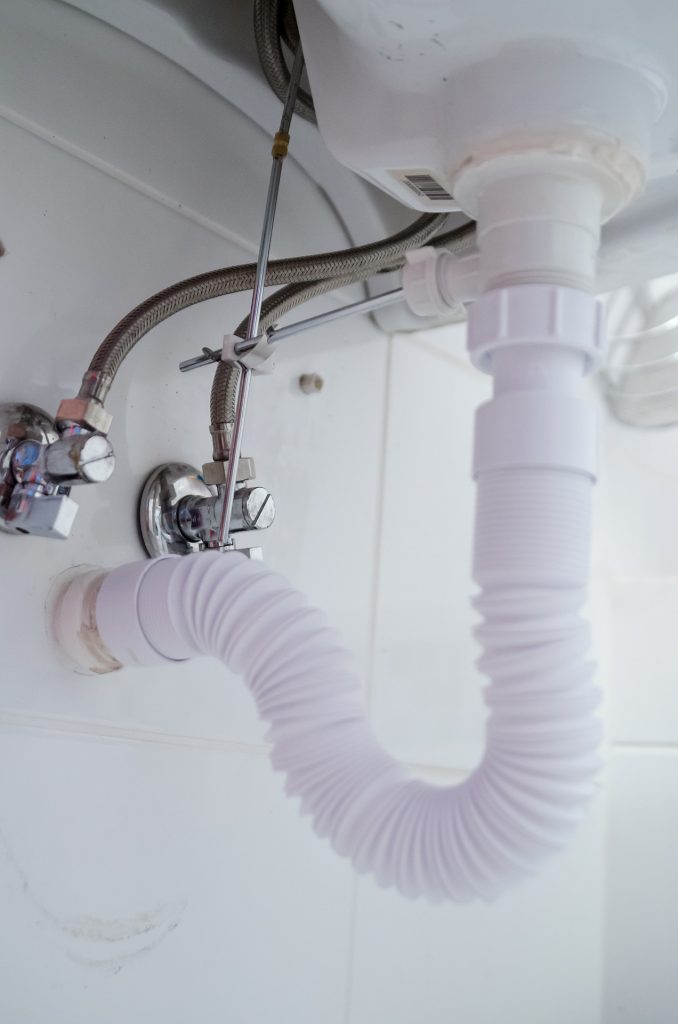
A sink trap is a curved part of the pipe underneath the sink that prevents bad odor from seeping through the drain into the kitchen.
What Causes a Leaking Sink Trap?
To know how to deal with a leaky sink trap, first you need to identify the cause triggering the leakage. The following are five common causes behind a leaky sink trap:
01. Worn-Out Washers:
Worn-out washers are one of the common reasons for creating a leaking trap. Whenever the faucet is in use, the washer is hard-pressed to the valve seat. The frequent friction leads to wearing out of the washer causing leaks around the spout.
Also, the washer may get coated with several mineral deposits, or it may turn cracked, or dried up causing water to seep through. In these cases, you have to replace the washers to fix the issue.
02. Improper Installation:
Sometimes an improper installation acts as the leading cause of the leaking of the P-trap. First, you should check if the washers are correctly installed. If not, that might be the problem, and in these situations, the washers need to be correctly installed or replaced to fix the leakage.
03. Corrosion of the Valve Seat:
A valve seat links the faucet and the spout for utilizing the compression mechanism. Unfortunately, due to frequent water build-up at the valve seat, it gets corroded with time, and causes leaking at the area around the spout.
Regular cleaning of the valve seat is highly recommended to prevent the risk of leaking sink trap. If possible, hire a professional plumber to do the job for you.
04. Clogged P Trap:
As earlier said, the main purpose of the P trap is to prevent the emission of the bad odors from leakage through the drains. Since it’s usually placed out of sight, it is not easy to identify the leak immediately.
Once the junk and small food particles start getting accumulated into it, these debris start hindering proper water drainage. This anomaly may lead to leaking issues.
Also, if your sink contains some metallic components, check if they are in right condition. Due to long uses, these components might get corroded and may cause the problem of leaking trap. If this is the situation, you should consider for replacing the entire trap.
05. Damaged O Rings:
A faucet handle is held into place by a stem screw. The screw has a small disk attached to it, known as an O ring. In most cases, the kitchen sink leaking occurs here. Due to regular use, the O ring wears out over time. This causes leaking of the faucet near the handle.
When you get certain that the O ring is damaged, take the call of replacing it as it would be the best option to stop the problem of leaking.
How to Fix a Leaky Sink Trap?
After noticing that your sink trap is leaking, it’s better to fix it ASAP to prevent more damage. To fix a leaky sink trap correctly, the tools and equipment below would be handy;
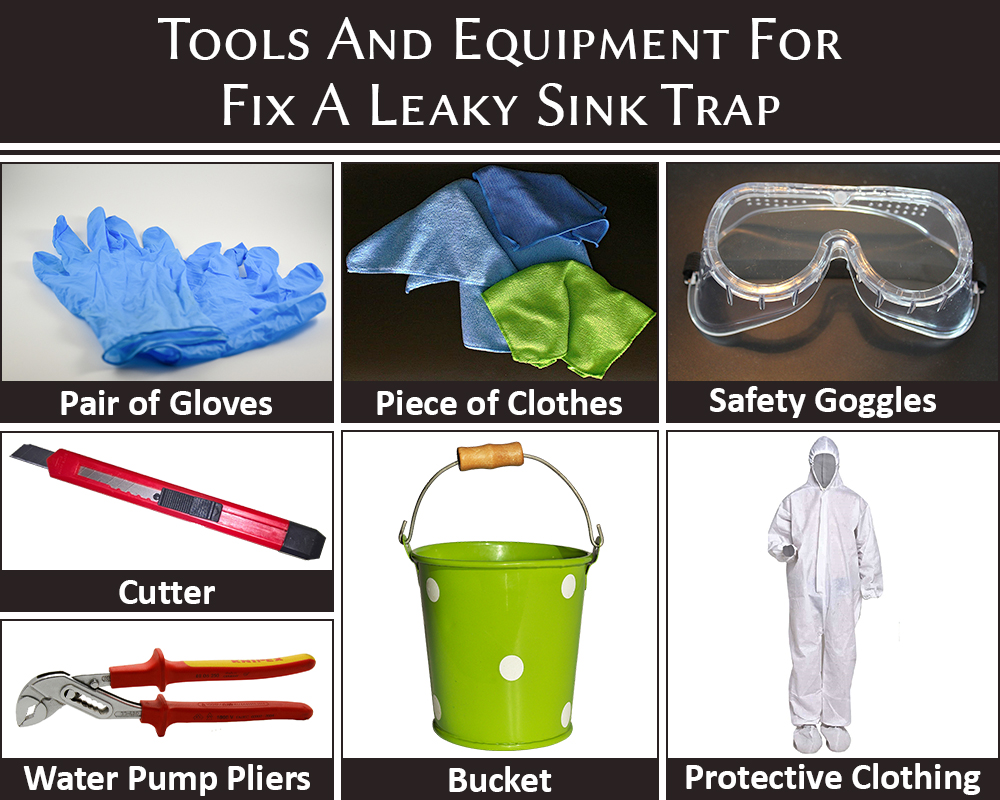
Are you now set to go? If yes, here is what you should do:
01. Identify the Location of the Leak:
First, locate the source of the leak. Wondering how? Use the old plumber’s trick- dip your finger in a powder, and wipe it along with every connection. If the powder would be replaced by water, know that you have a leak in that connection, and if the powder remains on your figure, there is no leak.
Applying this method, you can even identify the smallest drips which cannot be noticed in bare eyes.
02. Replace a Tapered Compressed Seal:
If you find that the leak is located around the drainpipe, the issue is definitely with the compressed seal. In this case, you’ll have no alternative but to replace the seal following the steps narrated below:
- From the drainpipe, unscrew the coupling nut.
- Check the seal’s condition. If it is found damaged, replace it with a new one and clean everything.
- Now you need to put the screw cap in place, insert the compression seal that links the trap to the drainpipe, and then you should tight the screw cap around the pipe. You are done!
03. Tighten the Nuts:


Plastics expand and contract due to the temperature fluctuation. If the connections have not been properly tightened, some screw parts will start unscrewing slightly causing dripping of the trap. If it is the cause behind the leaking trap, you have to tighten the connection of the leak source by hand and then run some water to check if the issue has been solved.
04. Replace the O Rings:
As time goes by, rubber washers wear out and begin to break down. If the problem has not been solved, you’d have to replace the O rings. To replace them, you will have to remove the sink trap to check its condition and replace. Here is how to do it;
- Under the trap, place a bucket to collect the water that is stored in it.
- Using a pair of water pump pliers, unscrew the trap. To avoid damaging the plastic, place a piece of cloth over the screw couplings.
- Down to the waste pipe, clean all parts from the tailpiece, and then replace the O ring with a new one.
- You can now reassemble the parts and attach the waste back to the drain pipe and on the plug’s base.
Sometimes the leaking might occur if the O ring has been shifted out of its true position. However, it mostly occurs at the time of screwing together two parts. When this happens, unscrew the two parts and then screw them back together, ensuring that the O ring is housed in its place.
05. Check If the Leak has been Fixed:
To check if the leak has been resolved, run water in your sink and use the finger test as described earlier. If everything looks good, pat yourself on the shoulder for the work well done. Your leaky sink trap has been fixed.
Summing Up
The list as above on how to identify a leak in the P-trap is not exhaustive. There are many other ways to do it. However, the important thing is to fix a leaky sink trap ASAP since it can cause severe damage in your premise.
Before you leave, don’t miss to read the following blogs –


Image Courtesy: Image 1, Image 4
Author Bio
Fidelis Kinai – Fidelis Muti possess a bachelor’s in English and Journalism and have over four years of professional experienced writing and proofreading materials for print and online platforms, including newspapers, magazines, websites, blogs, and social media accounts. He also have over three years of experience as a marketing assistant and social media manager.
He is versatile and diligent and will produce exemplary content within time to meet your deadline.
He can deliver most work within 2-3 days; rush orders are accepted whenever possible. He is based in the Kenya but travel often and work for clients all over the world.