
Is your water refusing to drain around the sink pop-up drain stopper, and you are wondering what has caused this mess? Don’t fret!

This situation may have been caused because of an ill-fitting sink pop-up or because the clevis is out of adjustment or because there is a broken piece of component. With the right tips and tools, you can make sure that the sink drain stopper installation has happened in the perfect way.
Are You Asking What A Sink Pop-Up Stopper Is?
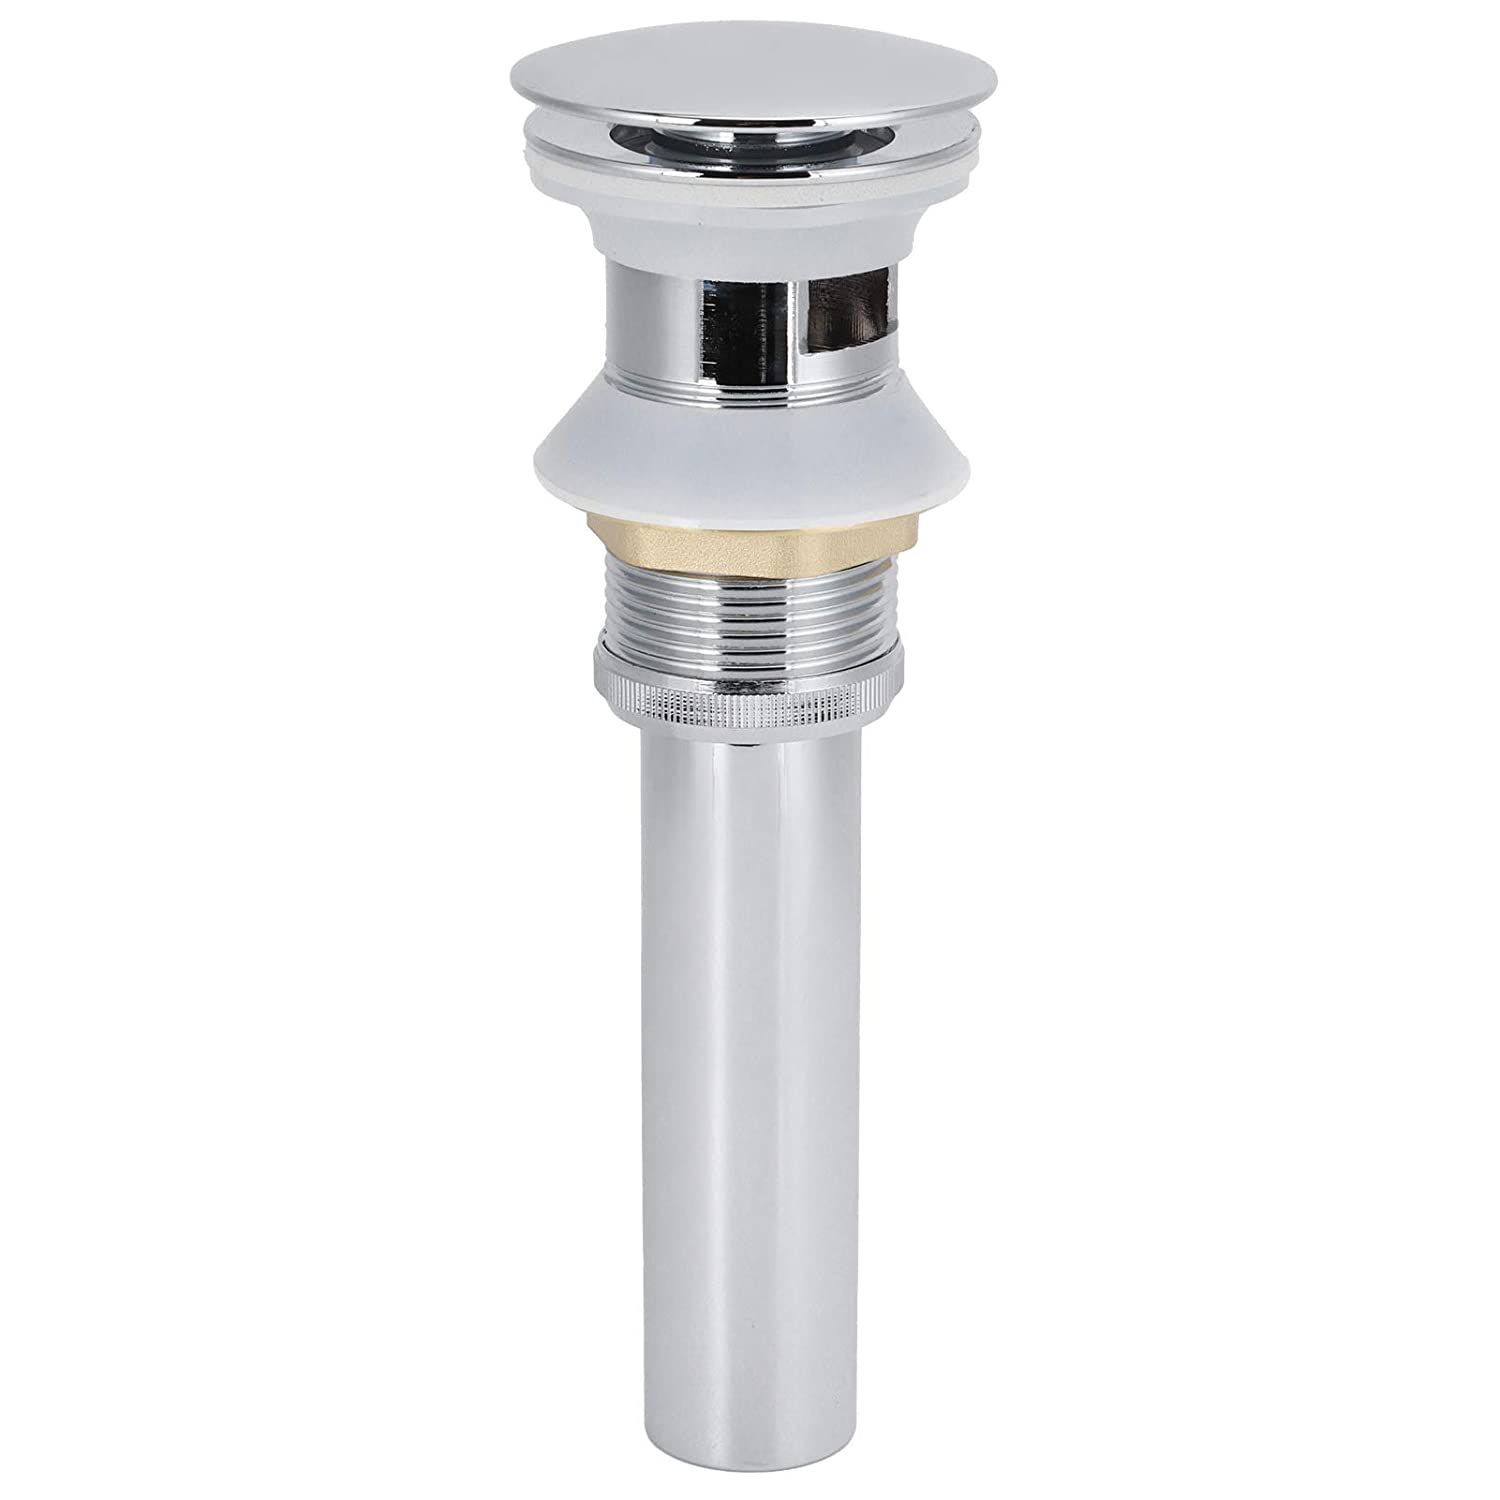
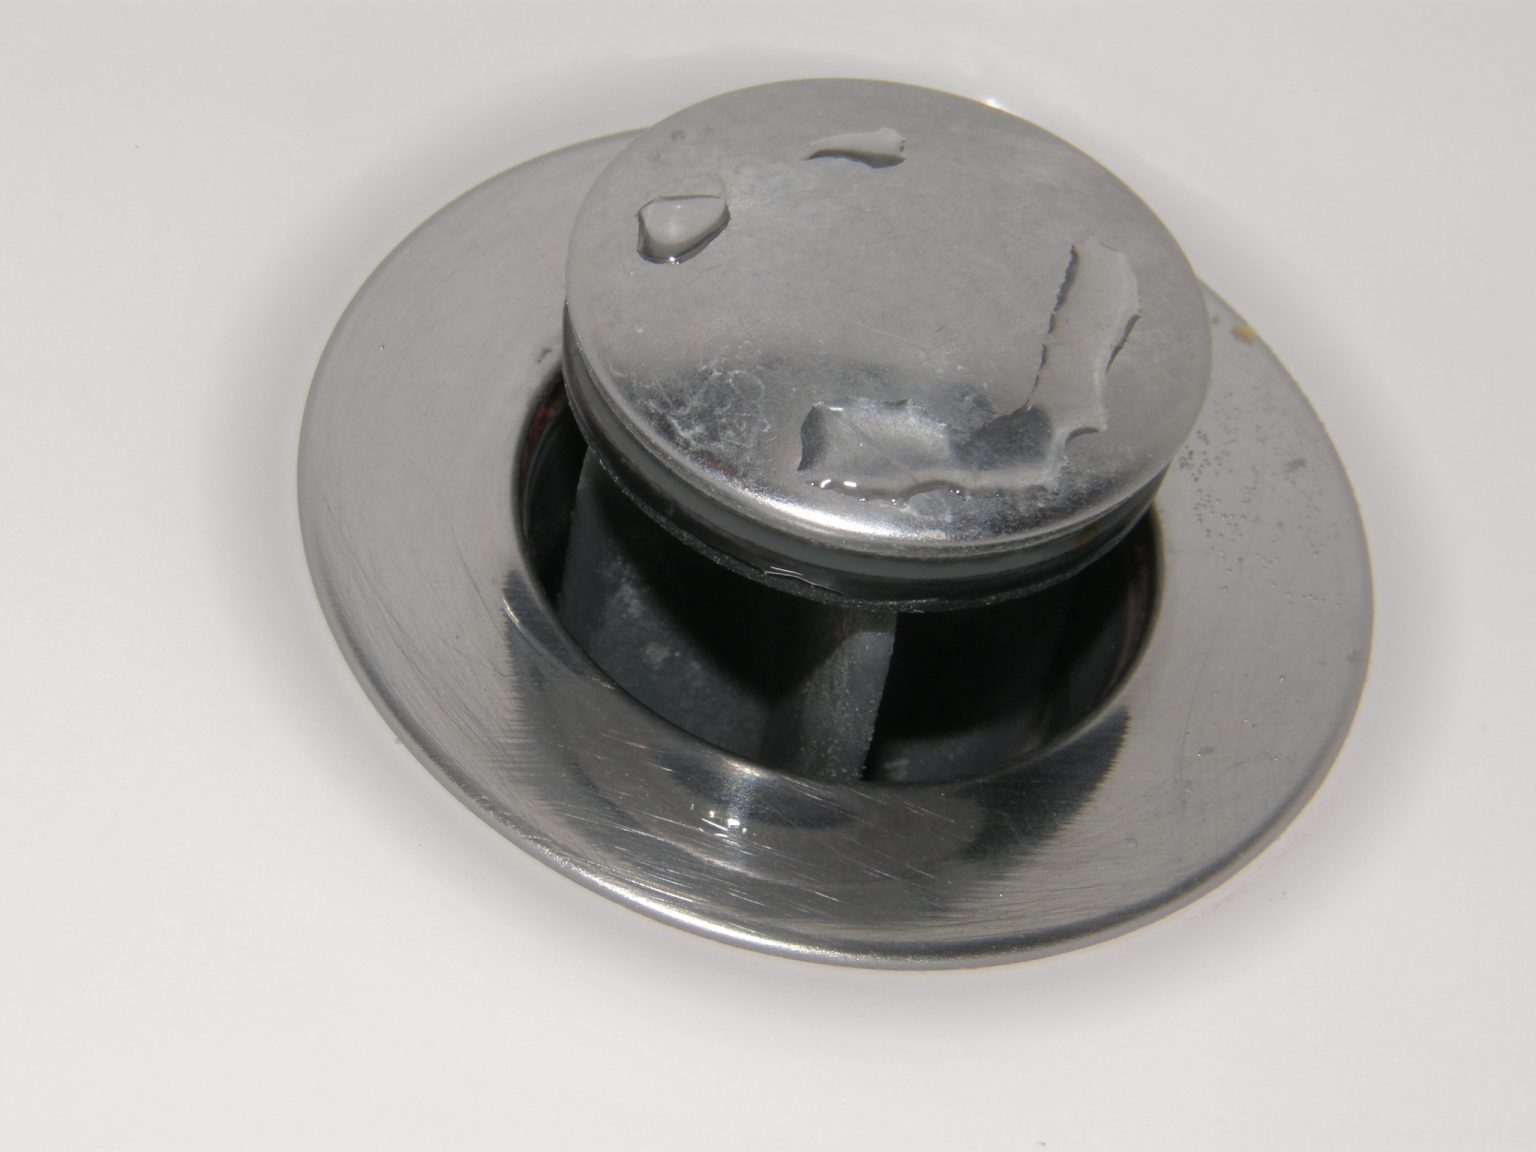
Well, a sink pop-up stopper is an object used to close a drainage outlet firmly to allow the container to be filled with water. The drain stopper is mostly made from soft materials like rubber to form a tight seal.
How Does A Sink Pop-Up Stopper Work?
Before you start installing your sink pop-up stopper, it is important for you to first understand how it works. The pop-up drain stopper’s mechanism is pretty simple; the lift rod’s handle sits on the sink’s top, between the faucets and behind the spout.
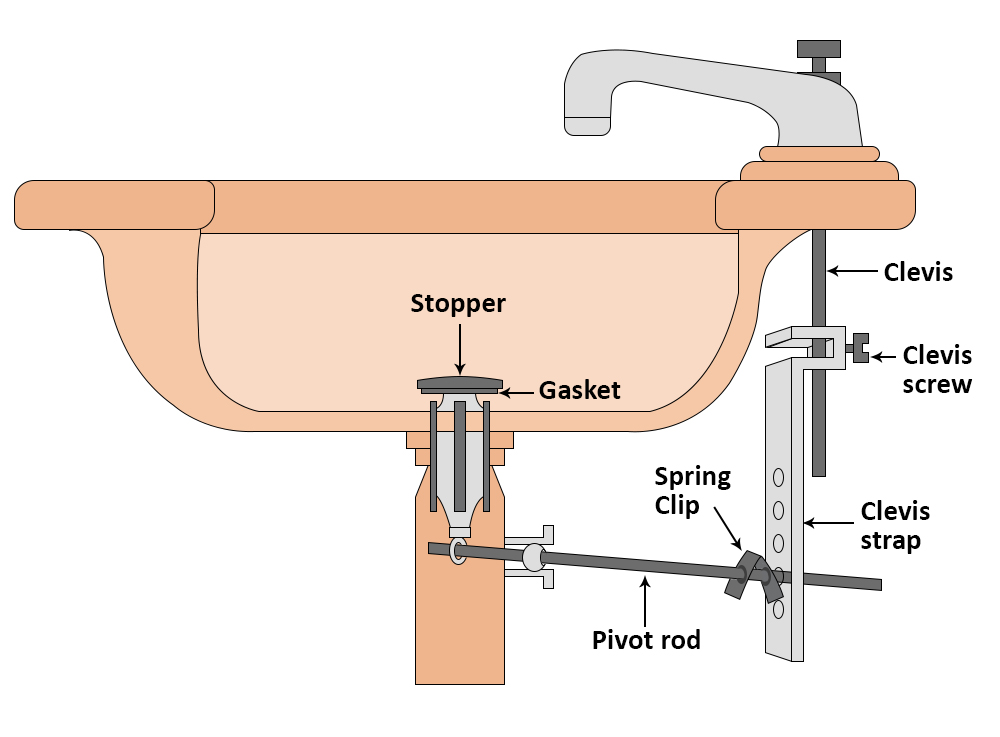
When you raise the handle, the pop-up drain closes and when pushed down, the drain opens.Under the sink, the lift rod is attached to a perforated metal bar known as clevis that’s held by a clevis screw, which again can be tightened or loosened by a screwdriver or hand. Also, a pivot rod is attached to the clevis with a spring clip that passes into a retaining nut into the drain.
The pivot rod also passes through a washer, pivot ball, and a plastic gasket behind the retaining nut and then through a small loop in the pop-up stopper tail end.
In other words, the lift rod is linked to the clevis, the clevis is linked to pivot rod and the pivot rod is linked to the pop-up stopper.
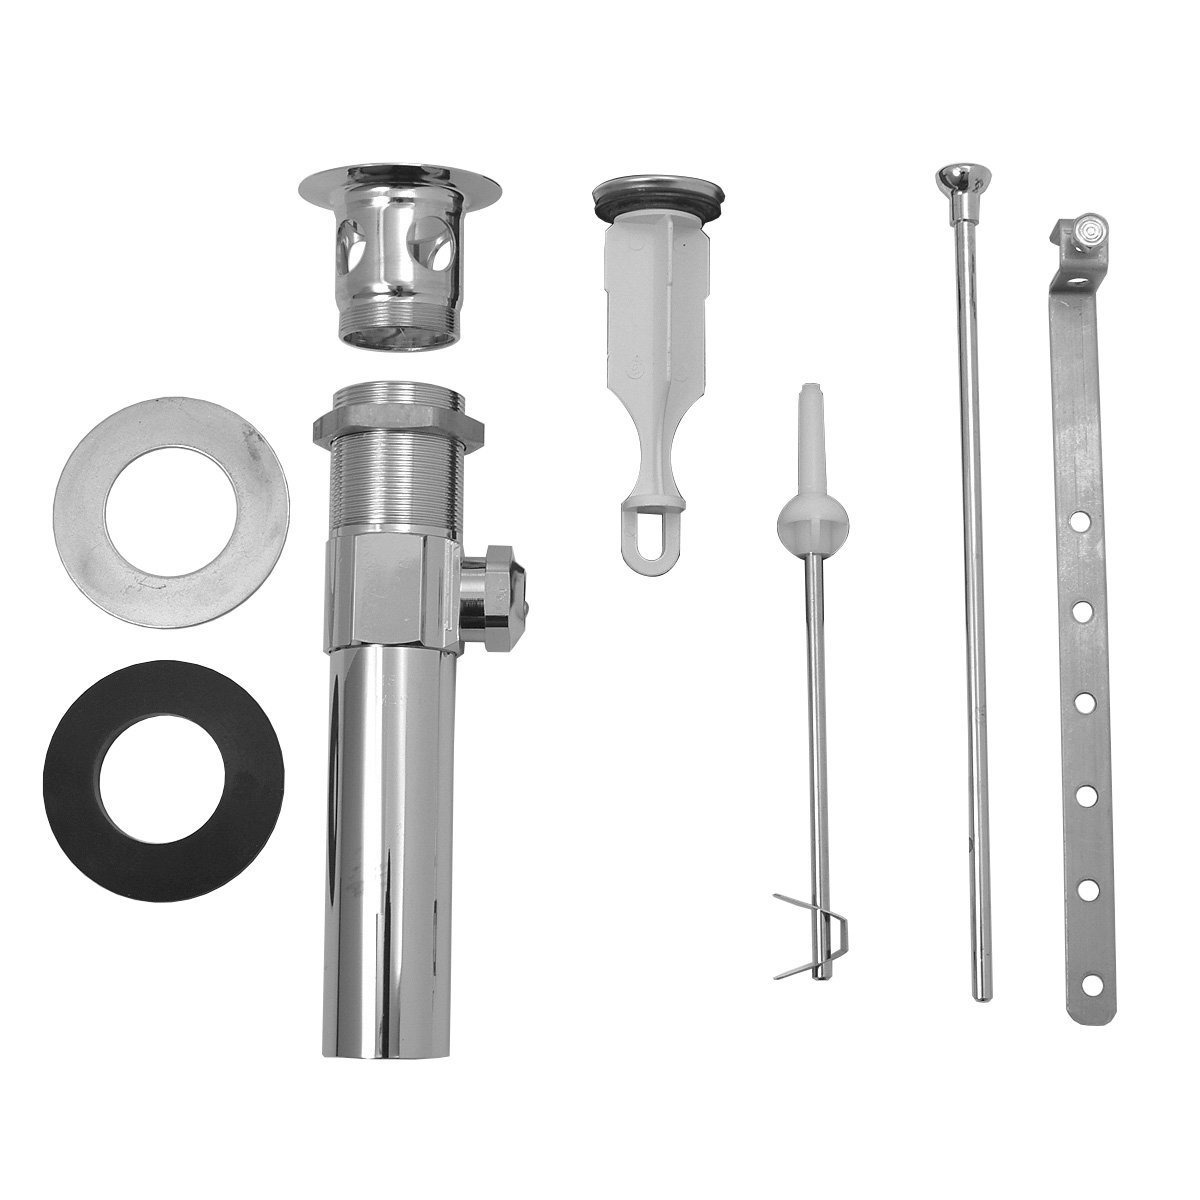
What You’ll Need For Sink Drain Stopper Installation?
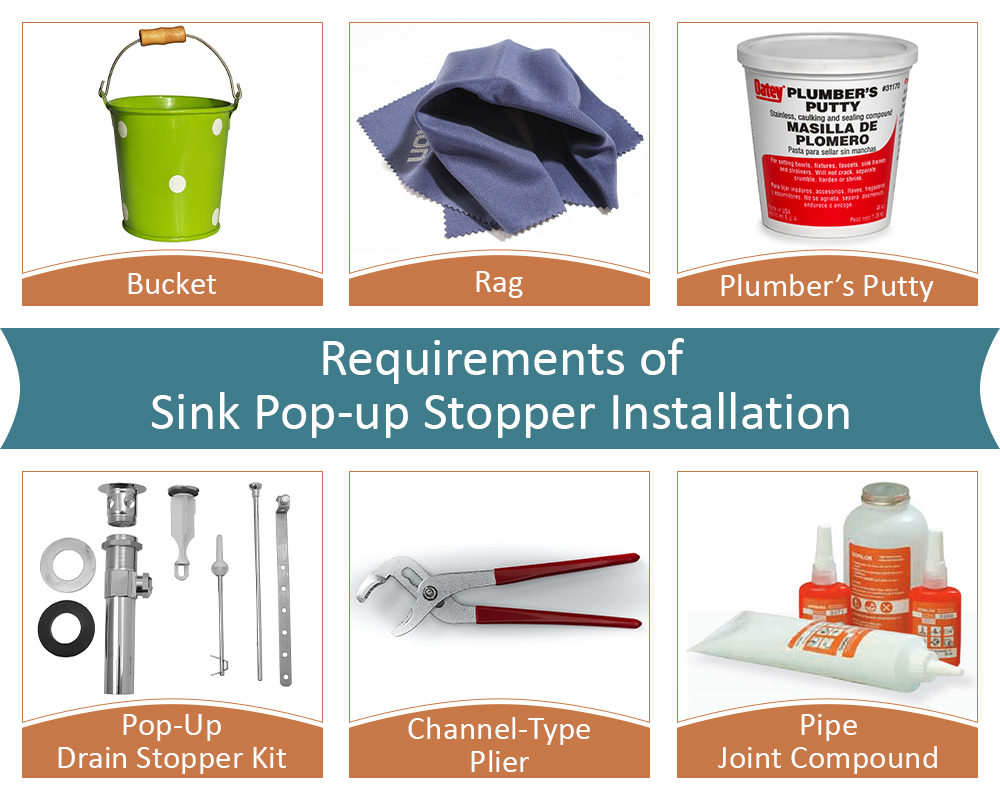
To install a sink pop-up drain stopper, you would need;
- Channel-Type Pliers
- Plumber’s Putty
- Pipe Joint Compound
- Pop-Up Drain Stopper Kit
- Rag
- Bucket
You are now aware of all the requirements to install sink pop-up drain stopper. Follow the step by step instructions given below for sink drain stopper installation.
How To Install Sink Pop-up Drain Stopper?
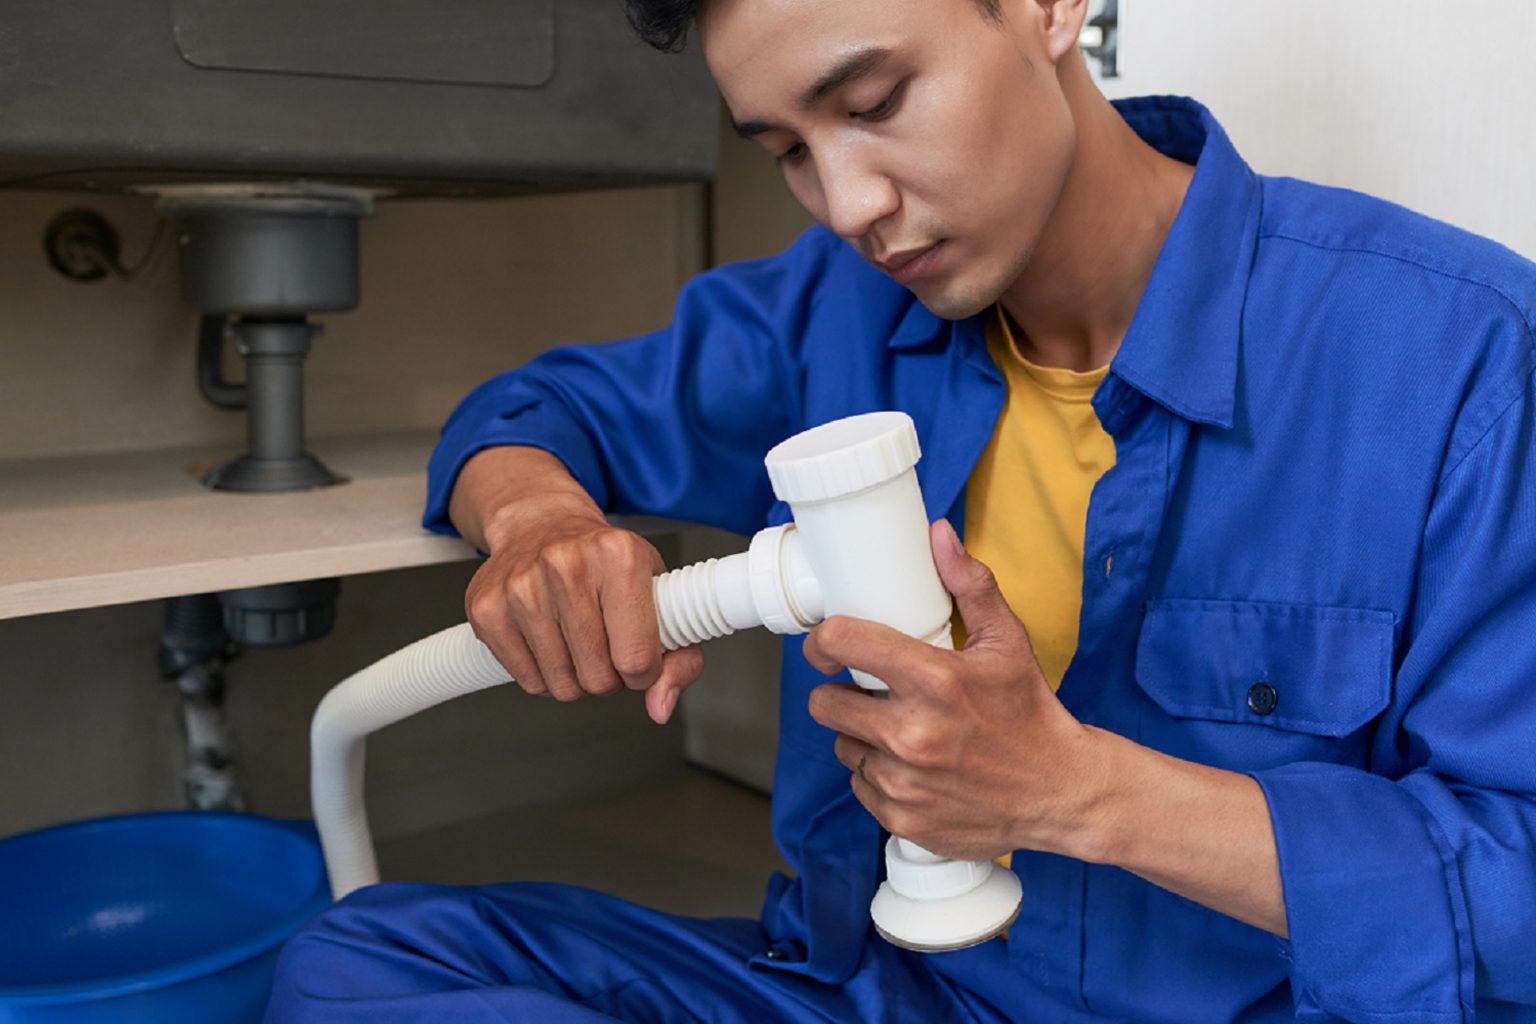
01. First, Remove The Old Drain Assembly
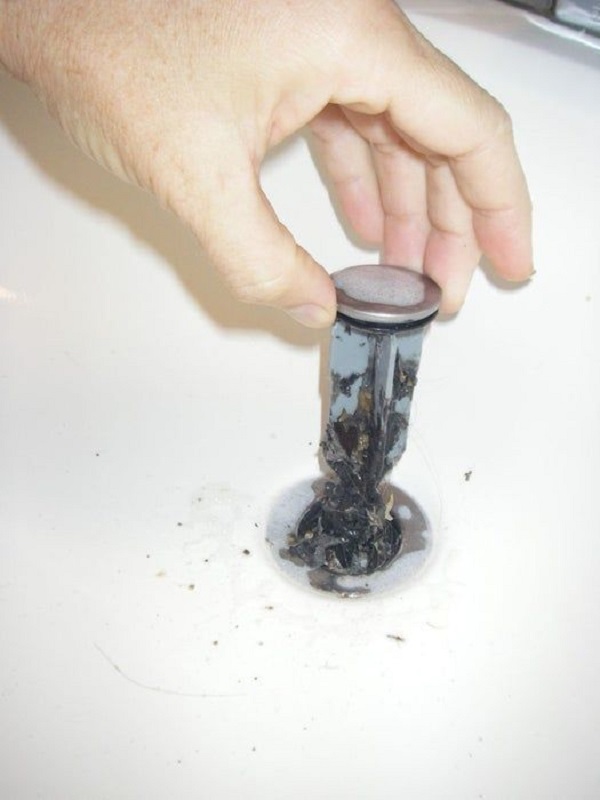
Removing the old sink pop-up stopper can be a messy and smelly affair. Hence, first put on your rubber gloves and be prepared.
- Clear everything under the sink to make room to carry on the work.
- Place a bucket under the piping right below the sink.
- Next, raise the lift rod so that the drain stopper would close all the way to make a tight seal.
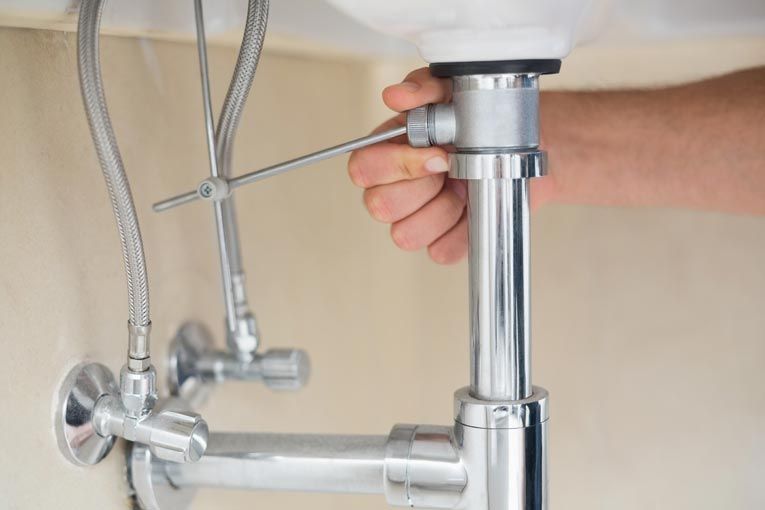
- Using channel-type pliers, loosen and take out the P-strap from the sink drain and branch drain.
- Remove the mounting nut from the tailpiece on the old drain assembly using the channel-type pliers and lift the assembly.
- Thoroughly clean off all hair and debris and replace the sink pop-up stopper if it’s broken or its seal is worn out.
02. Disassemble The New Pop-Up Assembly Pieces
After removing the old drain assembly, prepare the new pop-up drain stopper by disassembling all the pieces, unscrewing and removing the mounting nut from the drain’s tailpiece.
Now, install the plastic washer and the rubber washer, then push them down on the mounting nut top.
03. Apply A Thin Layer Of Pipe Joint Compound

Apply a thin layer of pipe joint compound on the rubber washer’s topside that would fit against the sink. The pipe joint compound on the rubber seals the drain opening of the sink bottom completely.
04. Apply Sealant To Flange

Apply sealant to the flange’s underside on the sink drain ring. The sealant would help the drain’s assembly upper side to seal the opening of the sink drain.
05. Join All Drain Parts
Through the drain opening, push the pop-up drain tailpiece assembly under the sink as high as you can. Fit the drain ring into the opening from the sink’s top as you hold the drain piece in place.
Onto the tailpiece of the drain, thread the ring by hand as far as you can. Ensure that the parts are correctly threaded.
06. Tighten Up The Body Nut
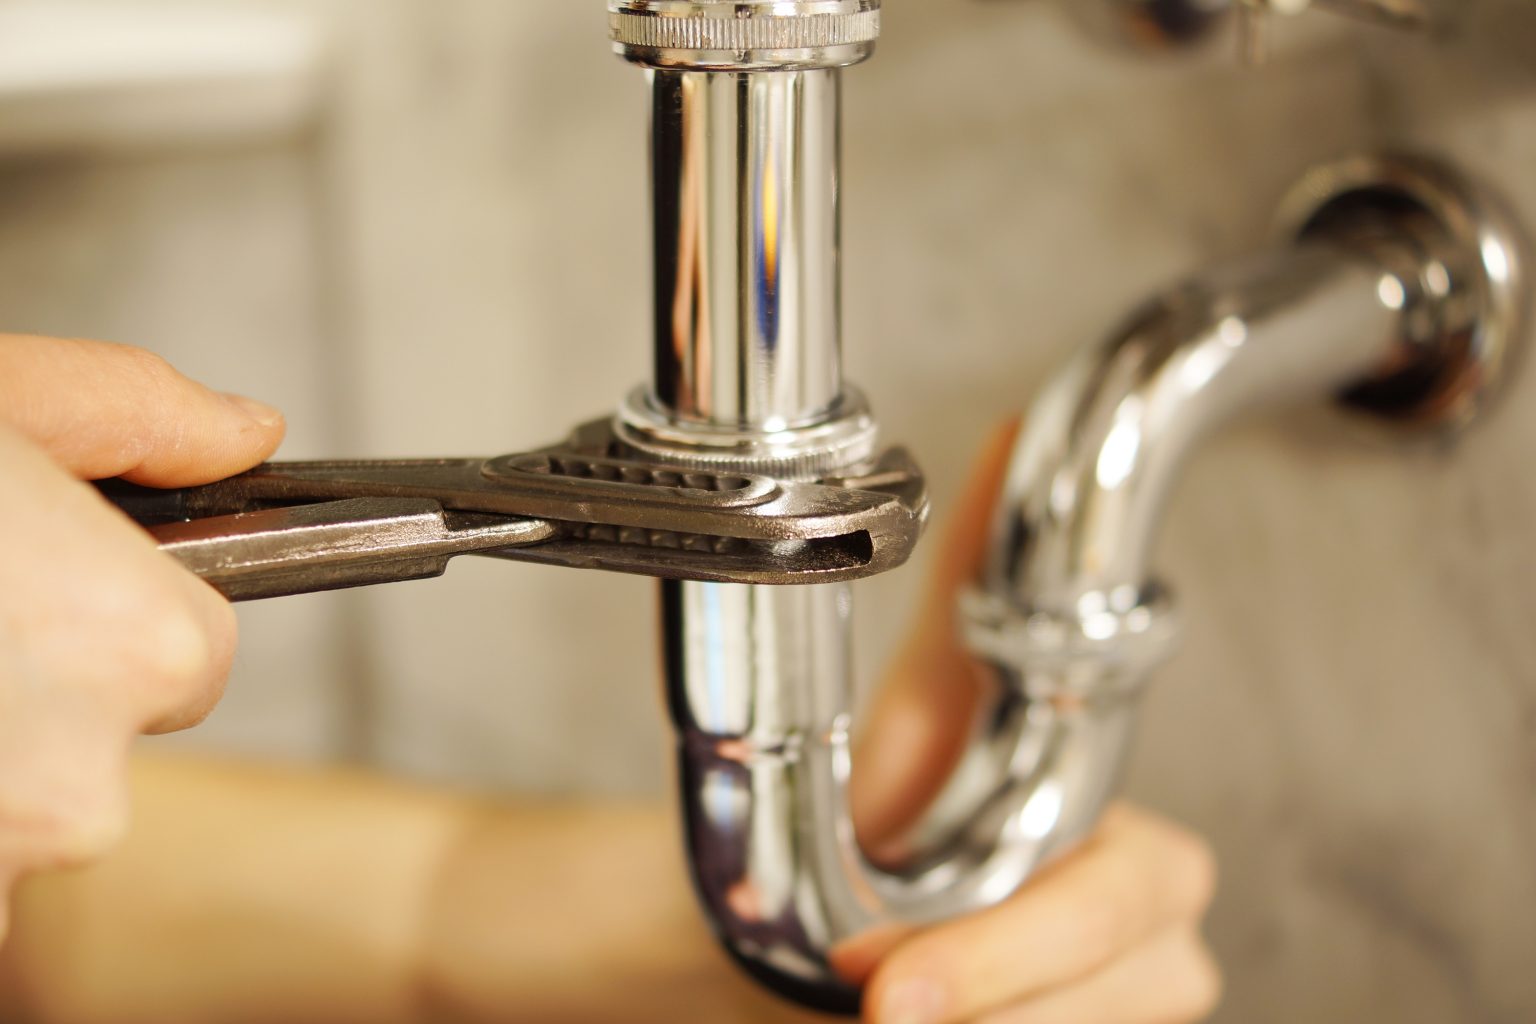
Tighten up the mounting nut upwards to the sink’s bottom as you hold the drain tailpiece with one hand. While still holding the tailpiece in place, use channel-type pliers to tighten the mounting nut. However, ensure that you don’t overtighten it. Just ensure that it is secure enough that the drain assembly isn’t spinning in the opening’s drain.
07. Install Sink Pop-Up Drain Stopper
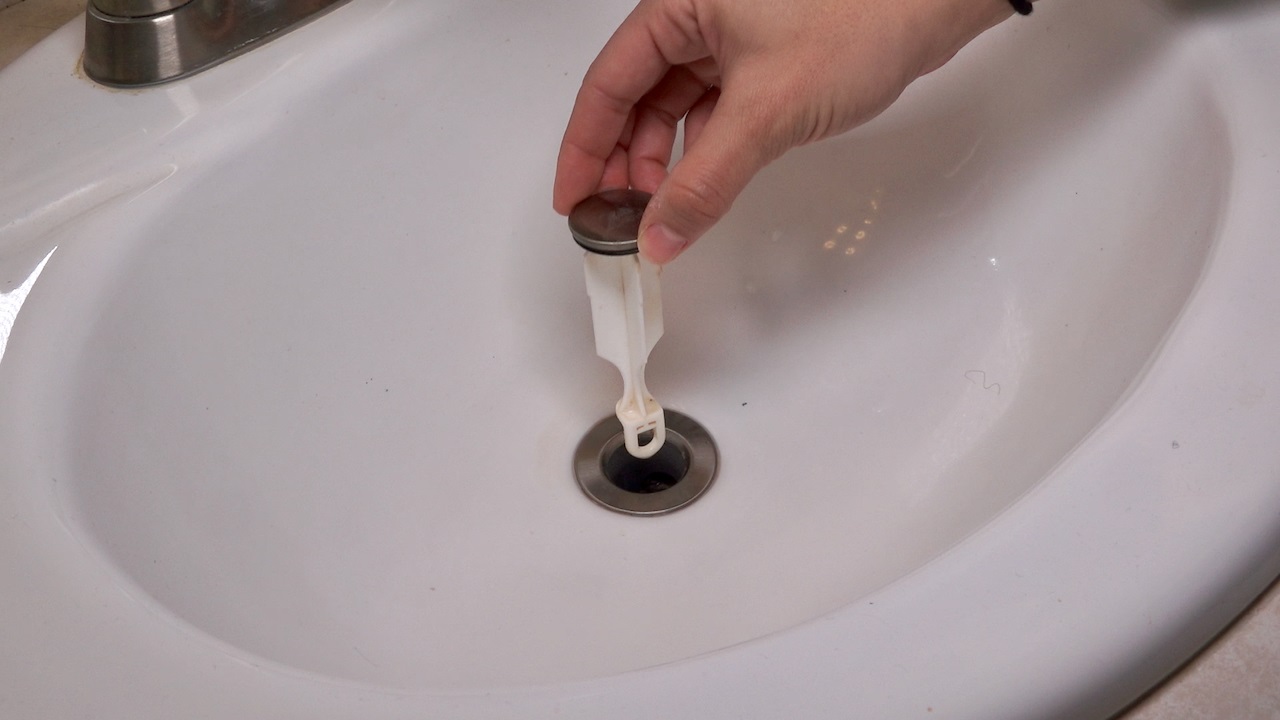
Ensure the hole is facing toward the back of the sink, then push the stopper down into the drain from the top. From under the sink, insert the pivot rod into the opening in the tailpiece side. Ensure that you can feel the pivot rod tip sliding through the stopper linkage opening inside the drain assembly.
On the bottom side, thread the nut with the ball on the inside into the drain pipe. Push the pivot rod to ensure that the stopper moves freely in the drain up and down.
If it’s working properly, hand-tight the nut. If not, reposition the pivot rod and the stopper so that the pieces would connect properly.
08. Position The Pop-Up Lever
Feed the pop-up lever into the sink’s hole behind the faucet spout. Before you attach the horizontal pivot rod with the vertical lever, ensure that the stopper is in position.
From under the sink, attach the joining strap to the vertical pop-up’s lever end. To secure the connecting strap to the pivot rod, tighten the screw on it.
If you want to adjust the pop-up’s height, shift the extension pin up or down, to a different slot.
09. Join The Pivot Rod And Pop-Up Lever
Thread the spring clip onto the rod to connect the vertical strap to the horizontal pivot- one clip end should attach on each strap’s side.
Check if the pop-up stopper closes and opens fully inside the opening of the drain. If it does not, pinch and move the spring clip to make some adjustments.
10. Finish Up Sink Drain Stopper Installation Job And Do Necessary Check
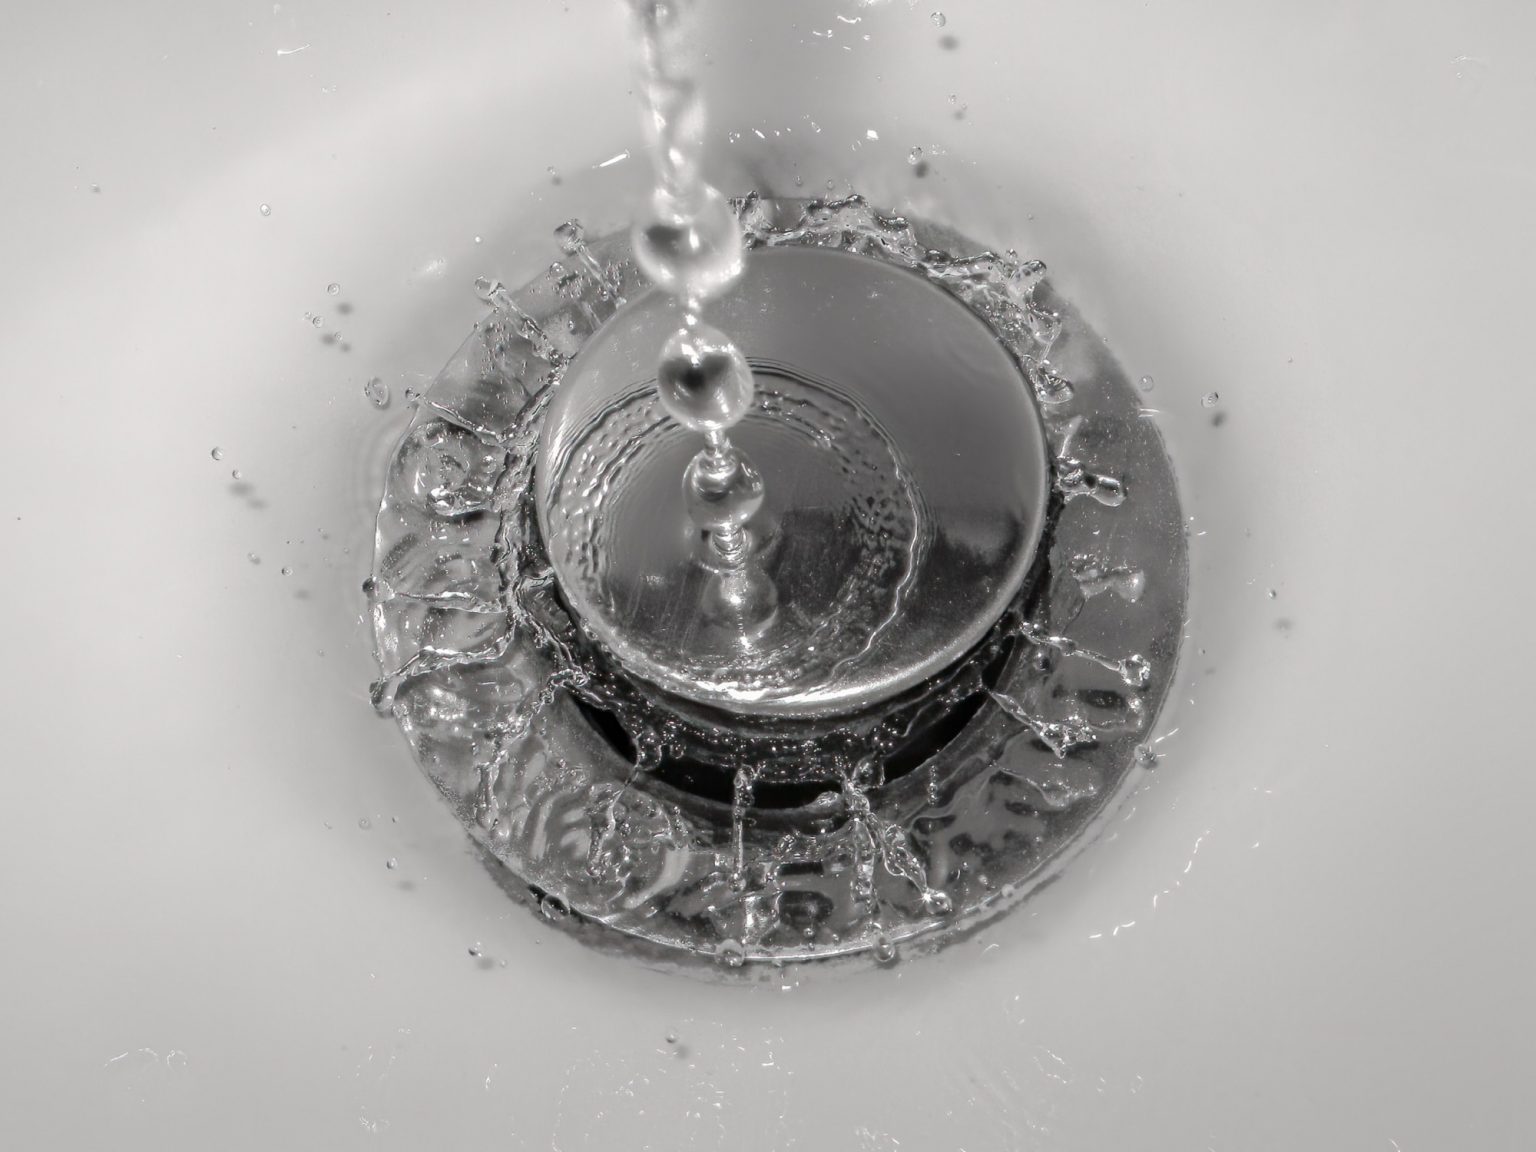
To finish up your job, reconnect the P-trap to the drain tailpiece and drain pipe and then remove the blue protective film. Clean up any extra sealant around the finished edges.Now, close the drain stopper, fill up the sink with water, and then let the water drain as you check for leaks around the pipe connections and the pivot nut.
To check for small leaks, run dry tissue around every connection. If the connections still leak, replace the washers or the section of the pipe.
With this, you are now ready to enjoy using your new working sink pop-up stopper.
If you have diligently followed this article, you have no reason to stay with a drain stopper that’s not properly working.
Hopefully, the step by step instructions of sink drain stopper installation will have use for your DIY project. Similarly, you may also like the following article of Gharpedia –

Image Courtesy: Image 1, Image 2, Image 5, Image 6, Image 7, Image 8, Image 9, Image 10, Image 11, Image 12, Image 13, Image 14
Author Bio
Jennifer Kiminza – Jennifer Kiminza is a content writer and content marketing professional at Hub Spot, an inbound marketing and sales platform that helps companies attract visitors, convert leads, and close customers. Previously, Jennifer worked as a marketing manager for a tech software startup. She graduated with honors from Nairobi University with a dual degree in Business Administration and Creative Writing.


