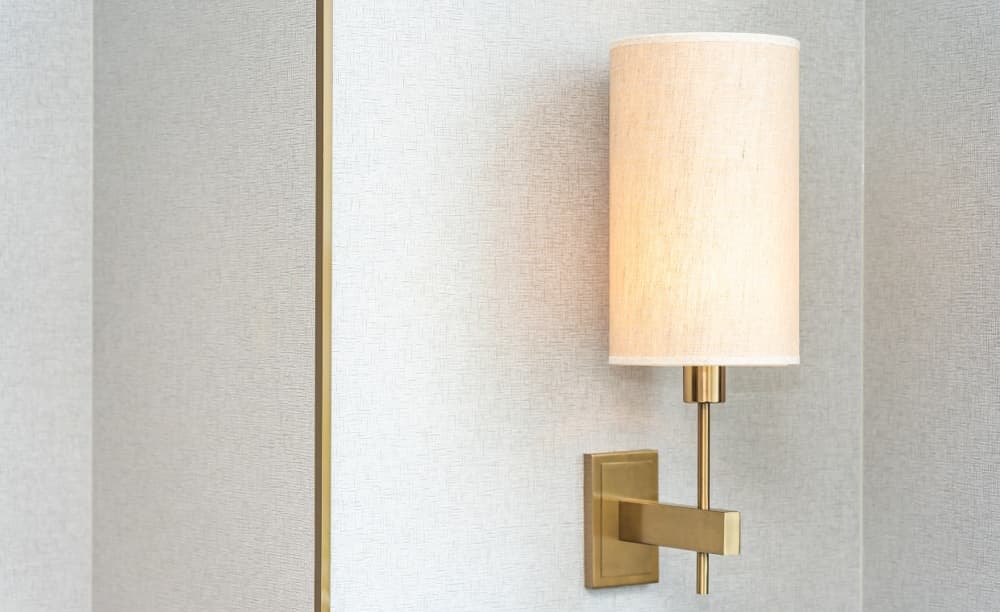
Do you know that sconces are a fantastic way to modernise your home and add style to your room? They’re the perfect accent for providing indirect lighting in corridors, bathrooms, and other compact spaces.
Also, sconces enhance the look of blank walls. Even if your house has adequate general illumination, wall sconces add the finishing touch by combining aesthetics and functionality
Through this article, Gharpedia will answer all your queries, such as what a wall sconce is, types of sconces, wall sconce height suggestions, safety considerations, and most importantly how to install a wall sconce.
What is a Wall Sconce?

Have you heard of a wall sconce but have no idea what it is? Okay, here’s what you need to know: A wall sconce is a wall-mounted device that holds electric lights or candles.
If you want to install some in your home but don’t know how to, don’t worry less. This article will lead you through the process and help you understand how to install a wall sconce in your home without even breaking a sweat. So, sit back, relax, and enjoy the read. If you want to know more about wall sconces and other types of lighting for your home interiors, visit our blog.
What are the Types of Sconces?
Sconces come in two types:
01. Hard Wired Sconces

These have no exposed wires and are connected to your home’s electrical system permanently. Either a wall switch or a switch built into the fixture controls them.
02. Plug-in Sconces

It is a wall-mounted type but has an extension cord that must be plugged into a wall outlet. It is significantly more straightforward and less expensive to install than hard-wired sconces. In plug-in sconces, switches are situated at the fixture.
What is the Wall Sconce Height Suggestion?
Wall sconces are installed between 60” and 72” from the finished floor. However, its placement and intended use would also determine its height. For example, for a reading light, a sconce close to the front door should be higher than a sconce next to the bed. Also, the type of the wall sconce and its height would determine its height during the wall sconce installation process.
Safety Consideration Before Installing Wall Sconces
Turn off the electricity to the working area at the electric service panel. Also, before cutting into the drywall, turn off the water at the main water shut-off if you suspect water pipes are running through the walls. Follow these tips to prevent electrical hazards.
Step-By-Step Sconce Installation Guide
Sconce Installation Tools and Equipment

- Manual drywall jab saw
- Cordless drill
- Wire ripper
- Wire stripper
- Non-contact voltage tester
- Stud finder
- Fish tape
- Pencil
Wall Sconce Installation Materials

- 4-inch rope
- 2- old work electrical box
- Tiu/9+3 electrical wire
- Light switch
- Old work switch box
- Light switch faceplate
Instructions For How to Install Wall Sconce
Step 1: Turn off Electricity
Before you start installing wall sconces, make sure to turn off electricity in the work area by shutting down circuits at the electric service panel.

Step 2: Label The Wall Studs

- Using the stud finder, identify the two vertical wall studs behind the drywall that will support the sconce.
- Make a mark with painter’s tape. Studs are typically 14-1/2 inches apart on either side.
Step 3: Mark The Locations Of The Lights And Switches

- Mark the intended location of the sconce lamp and wall switch using tape; ensure that they’re positioned between the two studs. The electrical code does not mandate light switch heights; switches are typically 48-inches high.
Step 4: Measure and Cut the Light Box Hole

Paper templates for cutting into the drywall are included with round electrical boxes. If this is the case, snip it out using scissors and draw a circle around the sconce light spot. A 4-inch box necessitates a 4-inch hole.
Hand-cut the hole with a drywall jab saw or a hole saw. Take away the drywall cutout.
Step 5: Make A Mark And Cut A Hole For The Light Switch Box

Mark a hole in the wall using the light switch paper template (if provided). Otherwise, reverse the box and use its edges as a template. Remove the cut-out and cut the hole.
Step 6: Assess the Outlet Box Type

Remove the faceplate from the outlet from which you will be taking power. Using the non-contact voltage tester, double-check that no electricity is available at the outlet. Unscrew the outlet, and remove it from the box, but keep it connected to its cables.
Determine whether the outlet box is an old-work or a nail-in (or screw-in) box:
- Old-Work Box: The box will resemble the one you bought for the sconce light switch. It will have two screws that will help you remove the box.
- Nail-in or Screw-in: These boxes will not have the two screws the old-work box had. You need to remove them without removing the drywall.
Step 7: Remove the Out-of-Service Outlet Box

Remove the two screws on the old-work outlet box using a manual screwdriver. Turn the screws counterclockwise to loosen the box. Then, grasping one of the box’s edges, drag it into the room while leaving it connected to its wires.
Step 8: Connect the Wiring from the Switch Box to the Light Box

Fish 14/2 wire manually from the light box hole to the switch box hole. Cut the wire to ensure that it is 8 to 10 inches long from every hole.
Step 9: Mount the Light Box to the Wall

Insert the top end of the 14/2 wire into one of the 4-inch round box’s holes. Place the box in the hole. Secure the box to the wall by turning the screws clockwise.
Step 10: Secure the Mounting Hardware

Rip the outer casing of the 14/2 wire with the cable ripper, cut it off, and discard it. Remove the wires’ ends. The sconce lamp kit should have a metal ring or strip that you screw to the electrical box. Ensure that the three wires are threaded through the mounting hardware.
Step 11: Connect the Sconce to the Wire and the Box

Connect the wires from the sconce to the 14/2 wires. Light wires are frequently pre-stripped, so you must peel off the cut ends by hand and twist the stranded wires. Connect black wire to black wire, white wire to white wire, bare copper to bare copper, or green/yellow-green wire to green/yellow-green wire.
Use the wire nuts included with the light kit to secure each connection. Using the provided fasteners, attach the sconce to the mounting hardware.
Step 12: Connect the Switch Box to the Outlet

Run a 14/2 wire length from the switch box hole to the outlet.
Drop the wire from the switch box hole to the opening outlet hole if you are using an old-work box. For a nail-in or screw-in box, run wire upward through the rear of the outlet box and up to the switch box hole using fish tape.
Leave about 8 to 10 inches of wire protruding from each hole in either box style.
Step 13: Mount the Switch Box to the Wall

Insert the two 14/2 wires into the switch box’s back. Insert the box into the hole and turn the screws clockwise until the box is securely fastened to the drywall.
Step 14: Connect the Wires to the Light Switch

- Black: Connect one end of the light switch to the line (or powered) black wire and the other to the load black wire (the side facing the sconce light).
- White: Connect two white wires, bypassing the light switch.
- Bare (Copper) Ground: Connect the two bare copper wires and add a third 5 to 6-inch copper wire. Twist the three wires together and use a wire nut to secure them. Connect the loose end of the third copper wire to the green screw on the light switch and screw it firmly into place. Attach the light switch to the box. Insert the faceplate.
Step 15: Connect the Wire to the Outlet

Connect the wire from the light switch to the outlet to finish the wiring. Remove the ripped cable sheathing and paper from the 14/2 wire. Then take out the wires’ ends. Connect the black wire to a gold terminal and the white wire to a silver terminal on the outlet’s spare (unused) side. Remove the outlet’s existing bare copper wire.
Attach three ground wires: the existing bare copper wire, the 14/2 cables bare copper wire, the 14/2 cables bare copper wire, and a third bare copper wire. Twist together the three wires and use a wire nut to attach them, and then connect the third bare copper wire to the outlet.
When you have wired both sides of an outlet, you should not attempt to cram extra wires under the terminals. Instead, separate the line wires from the outlet and form a third, pigtailed wire that connects to the outlet.
Connect the black wire to the black wire on the 14/2 cable of the switch, creating a third black wire. Twist together the three wires and use a wire nut to attach them. Connect the other end of the third black wire to the outlet’s gold terminal. Repeat with the white and bare copper wires.
Step 16: Close the Outlet

Replace the cables in the box. Join the outlet to the box. Insert the faceplate.
Step 17: Switch on the Sconce Light

Reconnect the circuit at the service panel. Turn the sconce light on and off with the light switch to test it. Is it working? If yes, pat yourself on the back for the work done.
As said earlier, wall sconces are incredibly versatile. You can place them in any dark nook, hallway, or corner. They are ideal for task lighting in the bathroom or kitchen. So, installing some in your home would go a long way. We hope you are now aware of how to install a wall sconce on your own. Don’t forget to take care of the safety measures mentioned above.
Also read,
Types of Lamps You Can Use to Make Your Home Bright & Beautiful
Image Courtesy: Image 4, Image 5(a), Image 5(b), Image 6(a), Image 6(b), Image 10, Image 11, Image 12, Image 13, Image 15, Image 16, Image 18, Image 19, Image 20, Image 22
Fidelis Kinai – Fidelis Muti possess a bachelor’s in English and Journalism and have over four years of professional experienced writing and proofreading materials for print and online platforms, including newspapers, magazines, websites, blogs, and social media accounts. He also have over three years of experience as a marketing assistant and social media manager.
He is versatile and diligent and will produce exemplary content within time to meet your deadline.
He can deliver most work within 2-3 days; rush orders are accepted whenever possible. He is based in the Kenya but travel often and work for clients all over the world.


