Table of Contents
Adding wood panels to your walls is an excellent way to elevate your space with warmth, texture, and character. Whether you’re looking for a rustic charm or a sleek modern finish, wood paneling can transform a room dramatically. Not only does it serve as a stunning focal point, but it also provides practical benefits such as insulation and soundproofing. With the right approach, wood paneling can be an affordable and achievable project, even for DIY enthusiasts. In this guide, we’ll walk you through the entire process of how to install wood wall panels, from choosing the right materials to the final installation, ensuring you get professional results with minimal hassle.
What are Wood Panels?

Wood panels are decorative and functional elements used to enhance interior walls. They come in a variety of materials, styles, and finishes, allowing homeowners to achieve different aesthetic effects, from rustic to modern. Wood paneling has been used for centuries to add warmth and character to rooms, and today, innovations in materials and installation techniques make it easier than ever to incorporate them into any space. Whether made from solid wood, engineered wood, or reclaimed materials, wood panels provide an elegant and durable wall covering solution.
Why Choose Wood Paneling?

Wood panels bring a timeless aesthetic to interiors by adding warmth, durability, and texture. They are incredibly versatile and work with various design styles, from rustic farmhouse to sleek modern aesthetics. Additionally, wood paneling serves functional purposes, such as providing insulation and soundproofing while hiding imperfections on walls. With many finishes, colors, and materials available, wood panels offer an excellent way to enhance your space’s beauty and practicality.
Types of Wood Panels

Before installation, it’s essential to understand the different types of wood panels available:
- Shiplap: Overlapping wooden planks that give a rustic, farmhouse-style look. Shiplap is one of the most popular choices for wood paneling because of its clean lines and subtle texture. The overlapping edges create a tight, secure fit that minimizes gaps and provides a seamless finish. It works well in living rooms, bedrooms, and accent walls, bringing a warm, cozy ambiance to any space.
- Beadboard: Composed of narrow planks with grooves, ideal for classic or coastal-style homes. Beadboard panels add an elegant, traditional touch and are often used in wainscoting. Their distinctive ridges create visual interest and are excellent for spaces where a vintage or cottage-style aesthetic is desired. They can be painted in light shades to brighten a room or left natural for a more organic look.
- Reclaimed Wood: Provides a distressed, vintage appearance, perfect for rustic interiors. Reclaimed wood paneling is a sustainable choice that adds character and history to your space. Each piece has unique grains, textures, and colors, making every wall one-of-a-kind. This type of paneling works exceptionally well in industrial, farmhouse, or eclectic decor styles, bringing authenticity and charm to the environment.
- Plywood Panels: Affordable and easy to install, suitable for DIY projects. Plywood paneling offers a cost-effective way to achieve the look of real wood without the hefty price tag. It comes in various grades and finishes, allowing for customization through painting, staining, or texturing. Plywood panels are lightweight, making them easy to handle and install, making them a great option for renters or those on a budget.
- MDF (Medium Density Fiberboard) Panels: A budget-friendly option that mimics the look of real wood. MDF panels are engineered wood products that offer smooth surfaces and consistent quality. They are highly customizable, making them suitable for modern and minimalist designs. MDF panels can be painted in any color, making them a versatile choice for homeowners looking to match specific interior themes. However, they are less resistant to moisture, so they may not be ideal for bathrooms or kitchens.
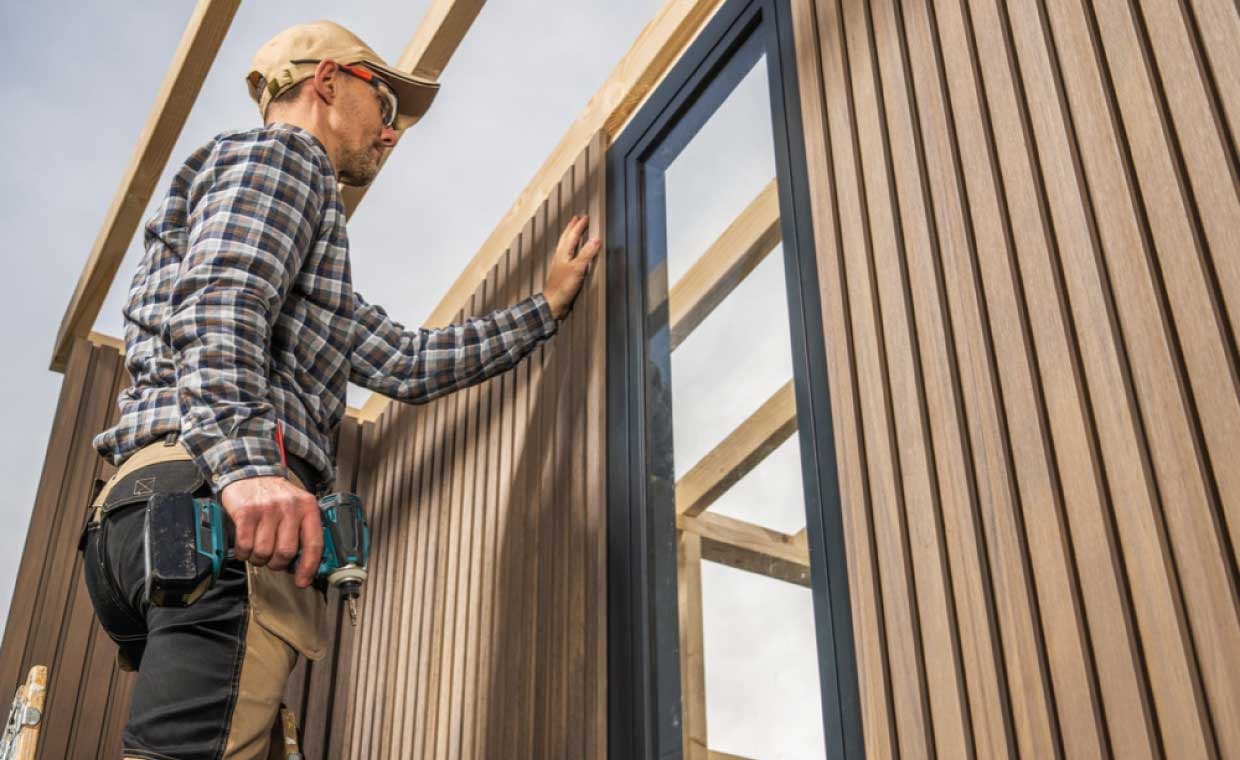
- Reeded Wall Panels: A stylish and modern option featuring vertical grooves that add texture and depth to walls. These panels create a sophisticated aesthetic and can be used in a variety of spaces, from living rooms to offices. Reeded wall panels work well with contemporary and mid-century modern interiors, providing a sleek and elegant finish that enhances visual appeal.
Tools and Materials You’ll Need
Gathering the right tools and materials ensures a smooth installation process:
- Wood panels
- Measuring tape
- Level
- Stud finder
- Circular saw or jigsaw
- Nail gun or construction adhesive
- Sandpaper
- Paint or stain (if desired)
- Painter’s tape
- Safety gear (gloves, goggles, mask)
Preparing the Wall
Before installing the wood panels, follow these essential preparation steps:
1. Measure and Plan
Use a measuring tape to determine the height and width of your wall, ensuring you have enough materials for full coverage. Sketch a layout to visualize panel placement and consider outlet and switch locations to avoid cutting issues.
2. Locate and Mark Studs
Use a stud finder to locate wall studs and mark their positions with a pencil. This ensures you attach panels securely for long-lasting results, preventing warping or detachment over time.
3. Prepare the Wall Surface
Clean the wall to remove dust and dirt. If necessary, remove old wallpaper or peeling paint and patch any holes or cracks for a smooth surface to ensure better adhesion and durability.
Step-by-Step Installation Guide

Follow these steps to install wood panels efficiently:
Step 1: Cut the Panels
Use a circular saw or jigsaw to cut panels to the desired size and sand rough edges for a smooth finish before installation.
Step 2: Apply Adhesive or Use a Nail Gun
Apply construction adhesive to the back of each panel for extra hold. If using nails, align the panel with the marked studs and secure it with a nail gun, working from the bottom up to ensure even alignment.
Step 3: Ensure Proper Alignment
Use a level to check that each panel is straight before securing it, pressing firmly against the wall to remove air pockets if using adhesive.
Step 4: Make Necessary Cutouts
Use a jigsaw to cut out areas for outlets, light switches, or vents, and sand the edges for a polished look.
Step 5: Fill Gaps and Sand
Fill any small gaps with wood filler, then sand the entire surface for a seamless finish that ensures a professional appearance.
Step 6: Paint or Stain (Optional)
Apply primer if painting the panels, then use a brush or roller for even coverage. If staining, use a cloth to rub the stain evenly across the surface for a natural look.
Step 7: Seal and Finish
Apply a protective topcoat to enhance durability and let it dry completely before moving furniture back into place.
Conclusion
Wood paneling is a stylish and practical way to enhance any interior space, adding warmth, texture, and character. By following the right preparation and installation steps, you can achieve a professional-looking finish that will stand the test of time. Whether you opt for rustic shiplap, elegant beadboard, or contemporary plywood panels, your walls will gain depth and sophistication. Wood panels can also increase your home’s value by providing an upscale aesthetic that appeals to buyers. Get started on your DIY project today and transform your home with beautiful wood panels that reflect your style and personality!
Also Read: Bedroom Design with MDF Wall Panelling!


