


Many of us have cabinets in good condition, but the finish is cringe-inducing. Fortunately, there’s an easy, albeit time-consuming, fix that doesn’t involve taking a sledgehammer to the room! You can follow some kitchen cabinets facelift ideas like you can paint the cabinets any colour you like and top them off with new hardware. Here’s how to go about doing it…
Imagine purchasing a bungalow and then noticing that the kitchen is dark and gloomy, like something straight out of a horror film! You see that the dirty brown shade of the cabinets and the worn-out and greasy wallpaper add to the depressing ambience. You roll up your sleeves and decide to give it a facelift. If that is the case, then this is a piece of article you will surely not want to miss.
Realizing the significant role that cabinets play in upping the design quotient of a house, Gharpedia through this blog shares how to update kitchen cabinets or how to make old cabinets look modern.
Kitchen Cabinets Facelift Ideas
Followings are the best kitchen cabinets facelift ideas –
Painting of Kitchen Cabinets
- Required Time
- Stuff You’ll Need for Painting Kitchen Cabinets
- Confirm Your Cabinet Finishes Material
- Get the Right Materials
How to Paint a Kitchen Cabinet?
- Set the Working Area
- Get Your Cabinets Ready for Paint
- A Primer/Sealer First
- It’s A Panting Time
Replacing Hinges and Pulls of Your Cabinets
- Required Time
- Stuff You’ll Need
How to Replace Pulls and Hinges?
- Be Sure while Drilling
- Set the Hinges
- Placing a Cabinet Door
Let’s have a detailed look,
Painting of Kitchen Cabinets

Required Time
For painting kitchen cabinets, you’ll need to remove the items from your cabinets and set up a work area for painting doors and drawers. Your kitchen will be unusable during this time, so you’ll want to work as quickly as possible. However, this kitchen cabinet idea’s required time depends on your kitchen’s size; it may take a couple of days to apply the first coat. Set aside at least four days, including drying time.
Stuff You’ll Need for Painting Kitchen Cabinets
You’ll need the following stuff for painting kitchen cabinets:
- Screwdriver
- Work tables or sawhorses
- Rubber gloves
- Trisodium phosphate cleaner (TSP)
- Sponge
- Wood putty (if necessary)
- Small putty knife (if necessary)
- 150-grit sandpaper
- Vacuum
- Cleaning Cloth
- Painter’s tape
- Primer/sealer
- 4” or 6” paint roller with foam roller cover and paint tray or spray gun
- Paintbrush (if necessary)
- Plastic sheeting and scrap wood (if using a spray gun)
- Paint
- Ziplock bags, pencil and paper


")


Confirm Your Cabinet Finishes Material

Hold your horses! Prior to embarking on the DIY kitchen cabinet painting project, do ascertain that your cabinets can be painted. Confused? Well, here are some cues for the untutored. The materials that take paint well are metals, wood veneer and wood. While cabinet finishes that out rightly reject paint are melamine and laminate. Hang on! Don’t log out from this blog if your house has a melamine or laminate cabinet. We’ve got a solution for this issue as well. All you’ve got to do is simply check out the yellow pages for professional cabinet resurfacing companies. You can buy new doors and drawer fronts and commission them to lay a thin outer layer of superior quality wood atop your present cabinet slides and frames.
Get the Right Painting Materials

The primary requirement for this DIY kitchen cabinet painting project is superior-quality paint. You can compromise on this front only if you are fine with your hours and tons of effort going down the drain with the paint peeling off just within two months of the Herculean exercise! A couple of options worth exploring in this segment are satin or semi-gloss paint. We leave the decision to you to select an appropriate finish.
If you love to paint-DIY projects, click on the below link to know the different types of paint. This will help you to opt right one for your next DIY project.

Gathered All Painting Devices

In this kitchen cabinet idea, the next step is zeroing in on a painting device. Well, as we all are well aware, paintbrushes leave visible marks, which may spoil the appearance of the cabinets. The best option here would be a spray gun as it would give you the cleanest finish. Go ahead and lease one, but always remember to run some rehearsal rounds on some scrap wood before you embark on the painting exercise. Don’t forget to keep all surfaces covered with plastic sheets unless you’re looking at a microscopic spattering of the paint on them! What Gharpedia recommends is a foam roller … trust us it’s a swift and easy way to paint your cabinets and it leaves an extremely sheer pattern on the surface. For the frames and doors, opt for a four-inch or six-inch roller.
In case you are going to paint anything, you must know all about the paintbrush, which will make your task easy-peasy. And for that, the below blogs prove more helpful to you.
Paint Brush: Know All the Trait Before Painting Your Home!
Types of Paint Brushes for Different Painting Jobs!
How to Paint a Kitchen Cabinet?
Painting kitchen cabinets is the best idea for your kitchen cabinet makeover, so let’s see the procedure for how to paint a kitchen cabinet.
Set the Working Area

Take out the items from your cabinets that you want to protect from dust or paint. And keep all the other surfaces covered with plastic sheets to protect them with a screwdriver or drill. In case you’re being economic and intend to reuse the hinges or pulls, then do place them in zip lock bags with a chit mentioning their origin, else you’ll waste a lot of time and effort in trying to match them post the painting project! Set up your painting space in the open where there’s a lot of light and air; lug all your doors and drawers and also put up some sawhorses or work tables to get going.
Get Your Cabinets Ready for Paint

Put on a pair of rubber gloves and meticulously clean up all the surfaces that you want to paint with a solution of trisodium phosphate. Use a wrung-out sponge to thoroughly rinse them and then keep the surfaces in the sunlight to dry out. In case you intend to opt for the installation of new hardware which organically won’t fit into the existing screw holes then do remember to stuff the old holes with wood putty; once it dries up then use the 150-grit sandpaper to sand the surfaces lightly, and then after vacuuming to remove the dust wipe off the residual dust with a damp cloth. The last leg of this step is covering the counters and floors with drop cloths and masking the surfaces surrounding the cabinet boxes with the painter’s tape.
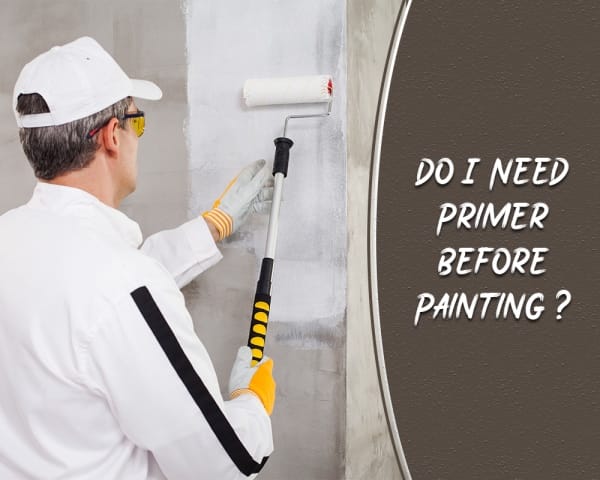
A Primer/Sealer First

Now we reach the main process! Initiate it with a primer/sealer coat. In case you’ve decided to do up your cabinets in a colour other than white, then remember to request the paint store to tint the primer in order to match the topcoat. The logic behind this is it will save you energy and time (and of course the cost of supplies too) as you may manage with just one finishing coat. Else, you may need a minimum of two coats of paint over the white primer. The decision to paint only the exterior of the cabinet boxes or both the exteriors and the interiors of the cabinet boxes depends on you. The only word of counsel from Gharpedia in case you decide to paint the interiors is to use a brush for this task.
Well, you understand the procedure now, but have you thought about this once that why you have initiated with prime? Yes, primer is most important for painting; read our below blog as it’s dedicated to the importance of primer.
It’s a Painting Time

Go ahead and start with painting one side of the doors and the edges. Then as that side dries, start painting the faces of the drawer; and end this exercise with painting the leftover side of the doors and the edges. Give the surfaces some breathing time by allowing them to dry overnight and then grab the 220-grit dry/wet sandpaper and gently sand everything that you laboriously painted; then vacuum the surfaces and after wiping them with a piece of cloth, start applying the second coat.
Replacing Hinges and Pulls of Your Cabinets

Replacement of pulls and hinges is one of the best kitchen cabinet refacing ideas. Well, let’s be honest, when it comes to replacement of pulls and hinges the best path would be to purchase new hardware of the same size as the original versions…else trust us you’ll go crazy filling the holes of the old hinges and pulls and drilling new ones!
Required Time
When you replacing the pulls and hinges of kitchen cabinets, if you are using the existing holes, then you can wrap up the entire process well within an hour. However, if you decide otherwise, then you’ll be spending quite some time and effort on drilling holes that are consistently spaced.
Stuff You’ll Need
You’ll need the following stuff for replacing the pulls and hinges of kitchen cabinets:
- Drawer pull jig (if required)
- Drill and bits to fit cabinet hardware
- New pulls and hinges
- Pencil
- Screwdriver
- Tape measure


When you go to the market to pick the required stuff for your kitchen cabinets facelift work, our blog – Kitchen Hardware Trends to Floor You!, will help you choose new and trendy hardware for your kitchen.
How to Replace Pulls and Hinges?
Be Sure while Drilling

A quick brief of what a jig is for the less versed. Well, it’s basically a template that ascertains that the holes which you are drilling are consistent and evenly placed… We don’t want crooked and uneven sized holes, do we?
So here’s how you go about it… After measuring the exact centre of the drawer face, place the centre of the jig on the centre mark of the drawer face. Then, with the help of a pencil, flag the spot(s) that the jig indicates for the style of the pull selected by you. A point worth noting here is that the jig will have holes for pulls of various widths.
Drill pilot holes before screwing the pulls of the drawer into their designated place from the inside portion.
Set the Hinges

Now let’s move on to the hinges. To install hinges, go ahead and place the door face down on a robust work surface. A golden rule to remember is that the topmost hinge needs to go one hinge-length down from the top of the door (in case there is a lip on the door, then the top of the lipped section of the door). Then set the hinge in place on the back of the door, and use a pencil to mark the holes. Follow the same process for the bottom hinge too.
With the help of the drill, make pilot holes where you’ve made the marks and then simply screw in the hinges to the door.
Installing a Cabinet Door

Place the cabinet door such that it opens in the right direction; line it up in a way that it’s centred over then opening. Then put the hinges over the cabinet frame, use a pencil to mark the holes and go ahead and drill pilot holes. Remember to screw in the top hinge first and thereafter the bottom one.
Now tell us… Isn’t giving your cabinets a face-lift a cakewalk? If you think you have the creative spark in you, then plan out your own kitchen cabinet makeover project and do let us know in the comment section about your experience with these kitchen cabinet refacing ideas.
And before you take a leave, we also have some interesting blogs on kitchen cabinets exclusively for you. They will definitely help in your kitchen cabinets facelift project:
Cues for Organizing Kitchen Cabinets
Luxury Kitchen Cabinets: Elements and Features!
Ideas to Pep-up your Kitchen Backsplash
Image Courtesy: Image 1, Image 6, Image 8, Image 17, Image 26, Image 28, Image 31
Author Bio
Huta Raval – An English Literature and Journalism Topper, Huta Raval has graduated from the L D Arts College, Ahmedabad. Post serving for 23 years in the NBFC and Public Library Sectors her desire for ‘writing the unwritten’ brought her to the creative field of content writing. Her clientele comprises of NGOs, Blogging Platforms, Newspapers, Academic Institutions, et al.


