
Painting is a fundamental aspect of home improvement that can dramatically transform the look and feel of any space. Nevertheless, achieving a professional-looking finish requires more than selecting a colour and applying paint. It implicates meticulous preparation, the right tools, and skilled application techniques. Whether you are painting a room, furniture, or exterior surface, understanding and employing effective painting methods can significantly affect the outcome. We will explore various painting techniques by painters in Philadelphia to help you achieve a flawless, professional-looking finish, ensuring your project looks polished and expertly done.Gharpedia shares various painting techniques for professional finish.
5+ Painting Techniques for Professional Finish
Let us explore the painting techniques for professional finish for a professional looking finish.
01. Proper Surface Preparation

Before you begin painting, proper surface preparation is paramount to achieving a smooth and lasting finish. Initiate by cleaning the surface to remove dirt, dust, and grease. Use a mild detergent solution for walls, and appropriate cleaners should be used for wood or metal surfaces. After cleaning, inspect the surface for imperfections such as cracks, holes, or peeling paint. Fill any gaps or holes with spackle or wood filler and smooth the area once it dries. Sanding is paramount as it creates a rough surface for the paint to adhere to, ensuring better coverage and durability. Additionally, a primer is paramount as it provides a uniform base and improves paint adhesion, especially on new drywall, raw wood, or previously painted surfaces with stains.
02. Choosing the Right Tools

Selecting the right tools is fundamental to achieving a professional-looking finish. High-quality brushes, rollers, and sprayers can make a significant difference in the application and final appearance of the paint. For brush painting, choose a brush with synthetic bristles for latex paints and natural bristles for oil-based paints. Angled brushes are excellent for cutting in and detail work, while flat brushes are suitable for larger, flat surfaces. Select the appropriate nap length based on the surface texture when using rollers. Short naps (1/4 to 3/8 inch) are ideal for smooth surfaces, while longer naps (1/2 to 3/4 inch) work better on textured surfaces like stucco or brick. Paint sprayers are useful for large areas and intricate surfaces, providing an even and smooth finish, but require effective practice.
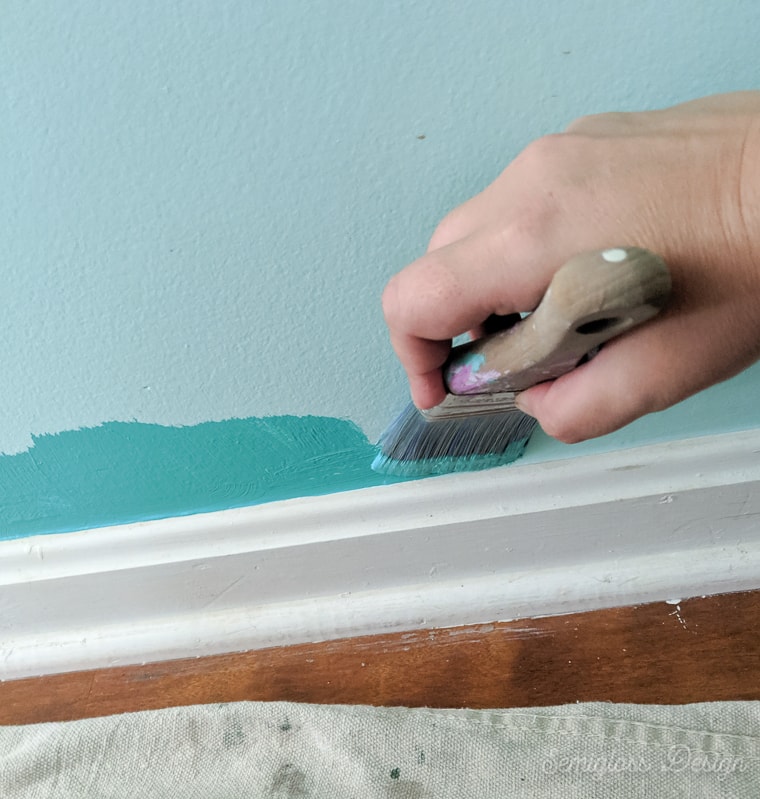
03. Cutting In and Edging

Cutting in is crucial for creating clean, sharp lines where walls meet ceilings, trim, or other walls. Use an angled brush to paint along the edges carefully, ensuring a straight line. Start by dipping the brush lightly in the paint and wiping off any excess. Hold the brush at an angle and paint a strip about two inches wide along the edge, keeping a steady hand and consistent pressure for areas with intricate details, such as window frames or molding. Use painter’s tape to mask off adjacent surfaces and achieve precise lines. Taking the time to cut in properly can significantly enhance the overall appearance of your paint job, making it look neat and professional. It is one of the top painting techniques to achieve a perfection on your walls.
04. Rolling Technique

The right rolling technique is essential for even coverage and a smooth finish. Begin by loading the roller with paint, ensuring it is evenly coated but not dripping. Start painting by rolling in a “W” or “M” pattern on the wall, then fill in the gaps with horizontal or vertical strokes. This technique helps distribute the paint evenly and prevents visible roller marks. Apply light pressure and avoid overloading the roller to minimize drips and splatters. Additionally, maintain a wet edge by working in small sections and overlapping each pass to blend the paint seamlessly. Use a roller with a thicker nap to reach into crevices and ensure complete coverage for textured surfaces.
05. Layering and Drying

Applying multiple thin layers of paint rather than one thick coat is key to achieving a professional finish. Thin layers dry faster and more evenly, reducing the risk of runs, drips, and uneven color. After applying the first coat, allow it to dry completely according to the paint manufacturer’s instructions before applying the next layer. Lightly sanding between coats with fine-grit sandpaper can help smooth out imperfections and ensure a flawless final coat. Patience is crucial during this process, as rushing can lead to visible brush strokes, roller marks, and an uneven finish.
06. Using Painter’s Tape

Painter’s tape is invaluable for achieving crisp, clean lines and protecting surfaces you do not want to paint. Apply the tape to the edges of trim, baseboards, ceilings, and other areas requiring sharp lines. Press the tape firmly to ensure it adheres well and prevents paint from seeping underneath. After painting, remove the tape while the paint is still slightly wet to avoid peeling off dried paint along with the tape. Proper use of painter’s tape can significantly enhance the overall appearance of your paint job by providing sharp, professional-looking lines and preventing accidental paint splatters.
07. Spraying Technique

Paint sprayers are ideal for large surfaces and intricate details, providing a smooth and even finish. When using a paint sprayer, practice on a piece of cardboard or scrap material to get a feel for the spray pattern and adjust the settings as needed. Hold the sprayer consistently from the surface, usually about 12 to 18 inches, and move it in a steady, controlled motion. Overlap each pass slightly to ensure even coverage and sidestep streaks. Keep the sprayer moving to stem excessive paint buildup in one area. Spraying can be faster than a brush or roller application, but it requires careful preparation and technique to achieve professional results.
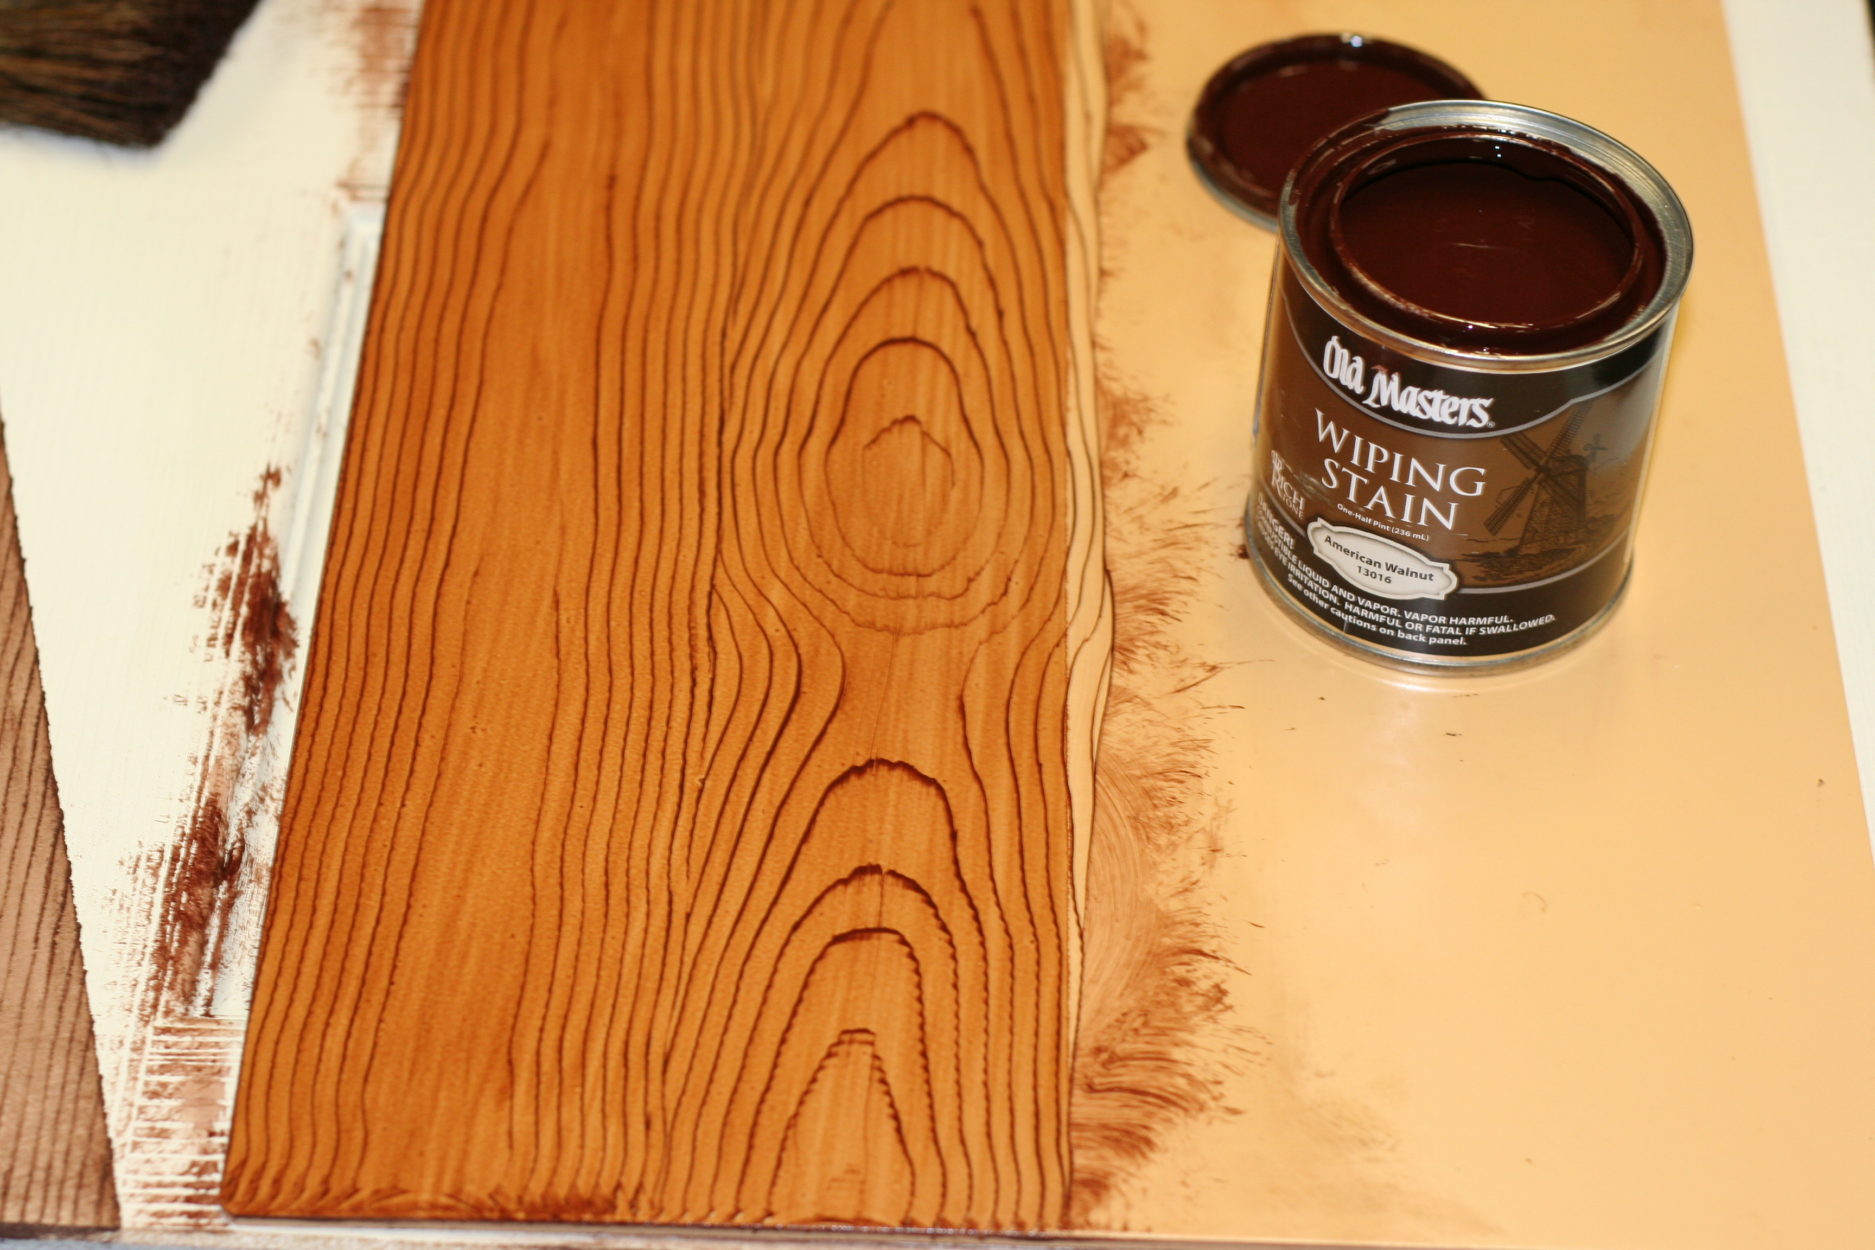
08. Faux Finishes

Faux finishes mimic the appearance of marble, wood, or stone materials, adding a touch of sophistication to your paint job. These techniques require patience and practice but can yield stunning results. One common faux finish is the marble effect, achieved by applying a base coat of paint and then adding veining with a feather or fine brush. Another popular technique is the wood grain effect, where a graining tool is dragged through wet paint to create the appearance of the wood grain. Faux finishes can transform ordinary surfaces into eye-catching focal points, adding a unique and professional touch to your painted spaces.
On a final note, achieving a professional-looking finish with your painting projects involves a combination of proper surface preparation, selecting the right tools, and employing effective techniques. Each step plays a crucial role in the outcome, from cutting in and rolling to using painter’s tape and experimenting with textured or faux finishes. By comprehending and applying these painting techniques, you can transform your space with a flawless, professional finish that enhances your home’s overall aesthetic and value. Whether you are a seasoned DIY enthusiast or a novice painter, these painting techniques for professional finish can help you achieve the desired results and enjoy creating a beautifully painted space.
In addition, we have pinned a complete guide to painting and choosing the right painters:
Revitalizing Your Home: Essential Guides to Painting and Choosing the Right Painters
And before you take a leave from us, we also share a detailed guide for finding the right house painting company.


