


Toilets are a must-have facility in every home, and they need to be correctly installed for them to work as intended. The critical component to every toilet installation is the fitting that links the toilet to the drain pipe. Yes, the toilet flange. When wrongly installed, it can cause significant damage. The toilets set without a securely installed toilet flange can wobble, leak and even crack. Follow the below step for toilet flange installation;
Toilet Flange Installation Steps
What do you need for Toilet Flange Installation?To install, replace or repair a toilet flange correctly, you would need the following;

Now that you’ve got the tools handy, let’s plunge into the toilet flange installation steps you would need to follow;
01. Cut off the old flange and obstructions
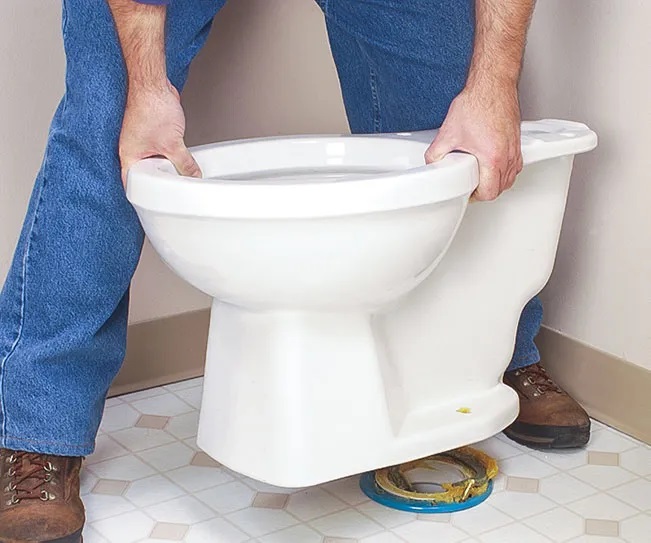
First of all, remove the old toilet from its place. After removing it, you would find the existing toilet flange. Use an angle grinder to remove the old flange and any other protruding obstruction before installing the new toilet flange.
The old toilet flange would be attached to the concrete slabs by bolts entrenched in the concrete. If you find the old bolts in good condition and perfectly match up with the new ones, you can use them to secure the new flange; however, if the bolts mismatches, cut them off before installing the new flange.
02. Scrap off the old wax ring
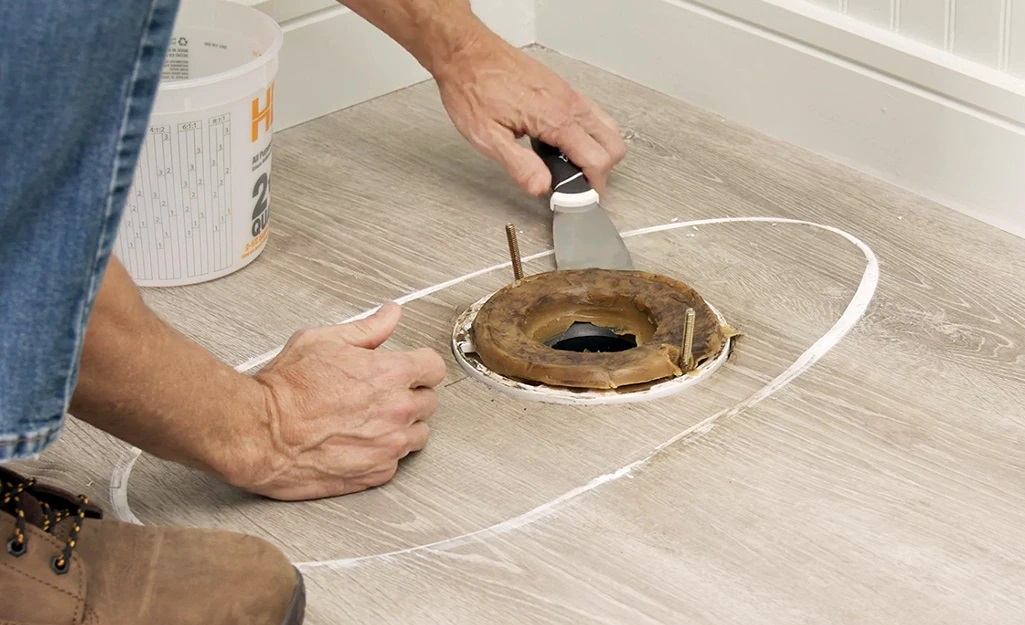
The old wax ring will remain in place around the opening of the drain after removing the obstructions. Most likely, the wax would be sticky, thick, and perhaps stained with sewage; thus, removing them, you need a putty knife, latex gloves, and patience. Remove all the old wax ring traces methodically and directly deposit the bits in a plastic bag for disposal.
03. Place the T-Bolts in the new toilet flange
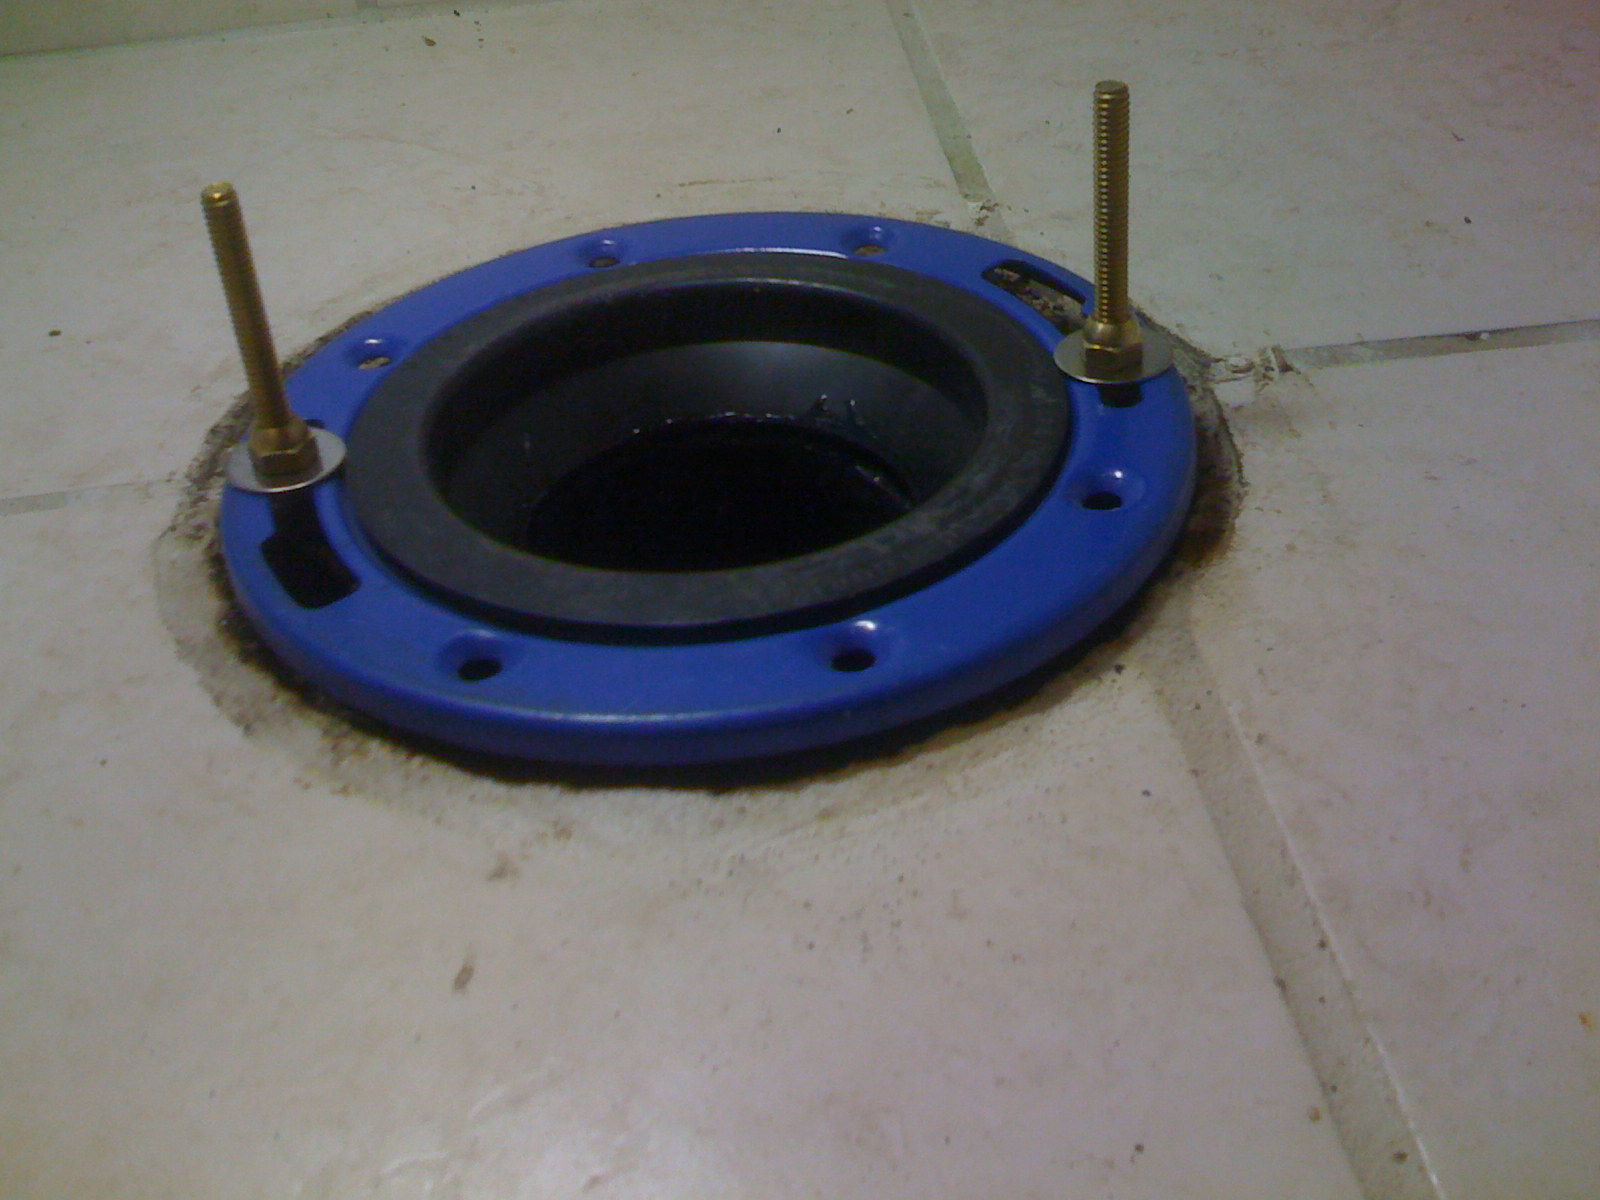
In the new toilet flange, place the bolts upside-down to stick up the threaded shafts. When the bolts are in place, it will help you visualize better how the toilet would be positioned.
04. Position the toilet flange
Using the T-bolts as the reference points for positioning, press the toilet flange down into the drain’s opening. Ensure that both bolts’ distances from the back wall are equal to ensure that the wall will be parallel to the toilet tank. Attaining proper positioning is ideal before securing the flange. Rotate the flange in any direction till you reach the required position.
05. Drill holes into the concrete
Bore the four holes using ¼ inch masonry bit and a hammer at equal distance around the ring- directly down into the subfloor and through the holes in the toilet flange. To reach the necessary depth, use the hammer drill’s depth gauge.
It would help if you were vigilant not to let the drill angle towards the sewer pipe avoid breaking the sewer pipe’s top lip, which would be difficult and costly to replace.
06. Bolt or screw the flange into the holes
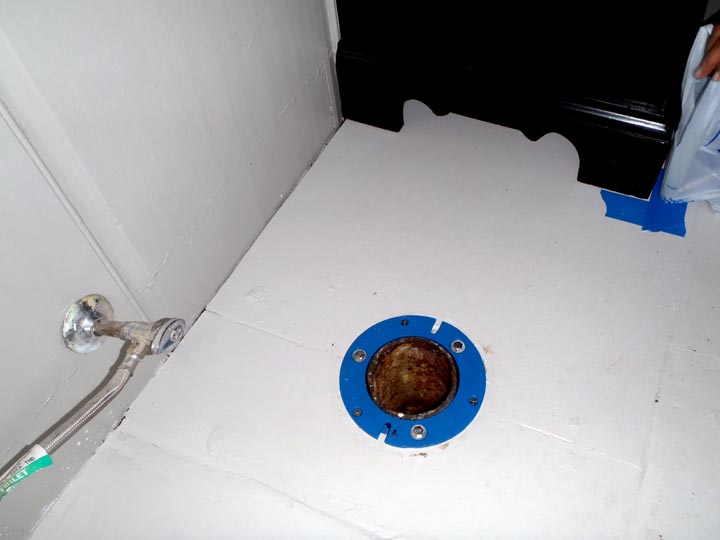
Using a screwdriver or adjustable wrench, screw or bolt the flange into the holes and twist the fasteners tightly into place. Ensure that the pins aren’t extending above the toilet flange’s top they may prevent the bowl of the toilet from seating to the floor.
07. Affix The Toilet Bowl Onto The Flange
Seal the toilet by affixing the wax bowl directly onto the flange; this is done to prevent sewer gas and water leakage.
08. Fit The Toilet Onto The Flange

After the wax bowl seal in place, fit the toilet onto the flange.
How to install a new toilet flange on new construction of concrete floor?
Fixing toilet flange in new construction is different from replacement- You won’t deal with irregular surfaces and so on. You need to follow the following steps, and your job will be a success.
- Cut the toilet flange’s soil stack to make it uniform with the concrete floor- A portable hacksaw would do the trick.
- Place the toilet flange’s closet into the adjacent drain pipe. Ensure that the flange closet would rotate
- Remove the toilet flange from the drainpipe to apply on it PVC premier. Apply the PVC premier on the exterior of the flange closet and the interior of the soil pipe. On both flange’s sides, use PVC cement and carefully reset the toilet flange on the drain pipe.
- Since the toilet flange should be parallel with the wall, ensure that you keep moving the rim until it comes in a similar position. It would help if you did it before the cement seats in to prevent any movements.
- After completing the installation, ensure that the toilet flange doesn’t move. Tighten the rim using nuts and screws to stop its movement. It’s advisable to use stainless steel screws to prevent them from rusting over time.
- You will see two closet bolts; fit them with flange collars, ensuring that the closet bolts’ threading faces upward. Now place the wax ring on the flange so that you can later install your toilet on it. That’s it- You’re now through with your task.
Why should I do it myself when I could call a professional to fix it ASAP?
Okay, calling a professional to do it for you is a wiser thing, but why should you call them while you can do it independently? Besides, there is no rocket science involved in it; you only need to know how to use the tools correctly and what to do with the water closet.
Also, if you do it by yourself, you’ll be able to save money, learn how to do it, and you won’t have to call a plumber again and again. Can you see some sense now? Now stop wasting any more time and get the work started.
Everyone wishes to live in a clean and healthy space; in this case, a good & clean toilet is an utmost necessity. And to get a good bathroom, you need to know how to install a toilet flange to avoid any gas or water leakage. However, if you’ve carefully gone through above content, the steps mentioned above should have come in handy for you as they’re straightforward.

Do let us know if you have any difficulties while following the above steps for toilet flange installation.
Image Courtesy: Image 3, Image 4, Image 7, Image 8
Author Bio
Jennifer Kiminza – Jennifer Kiminza is a content writer and content marketing professional at Hub Spot, an inbound marketing and sales platform that helps companies attract visitors, convert leads, and close customers. Previously, Jennifer worked as a marketing manager for a tech software startup. She graduated with honors from Nairobi University with a dual degree in Business Administration and Creative Writing.


