


Are you fed up of spending money on plumber for doing some simple plumbing jobs and you have now decided to give it a try yourself? Then, you’re at the right place. Read this article and know how to connect a bathroom sink drain.
Installing a bathroom sink drain in your bathroom is an ABC thing. Yes, it’s the easiest and the fastest DIY project in plumbing that every homeowner can handle.
However, before you attempt the installation job, it’s good to know the parts of a bathroom sink drain and the tools and materials you’d need.
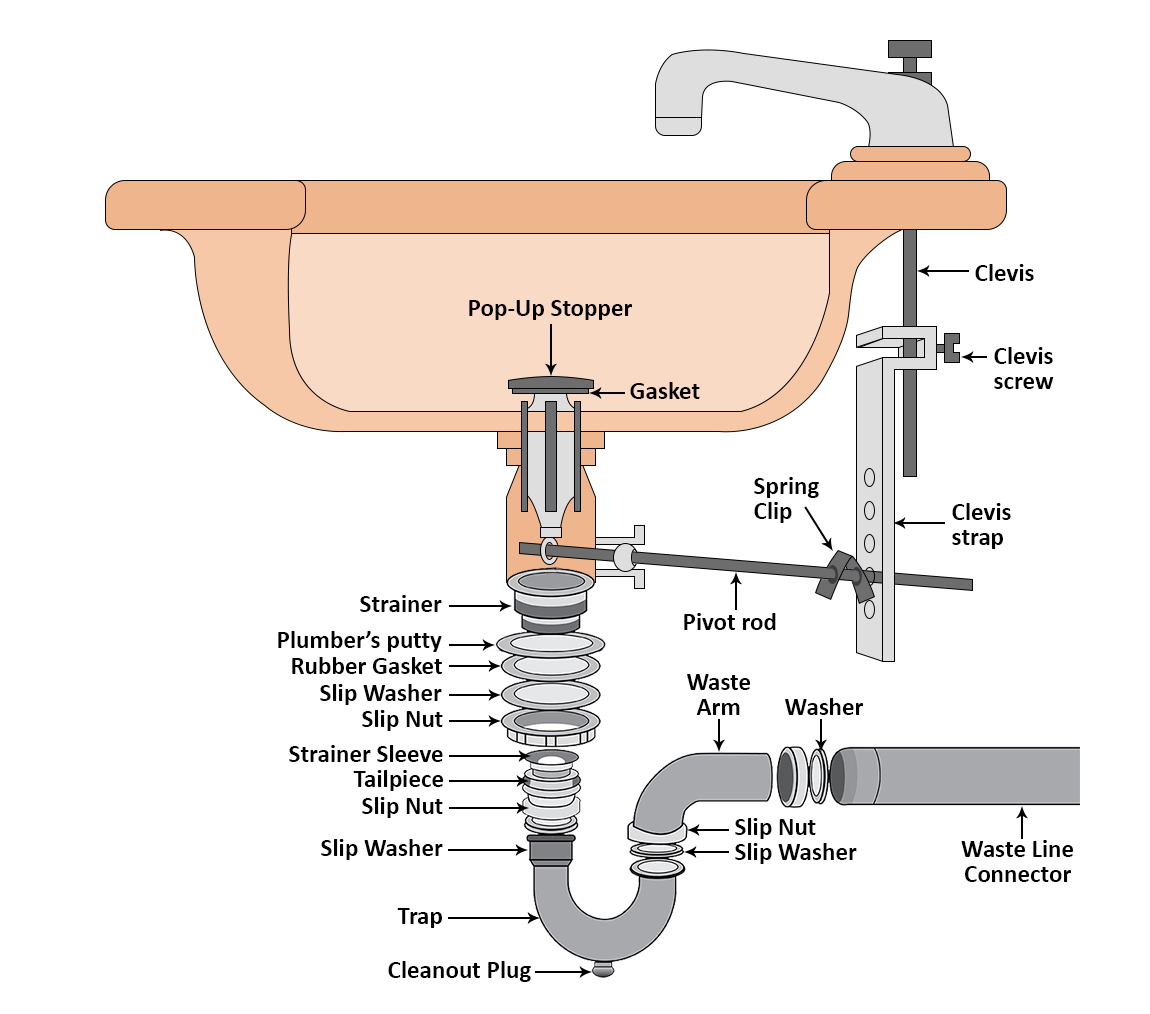
What are the Parts of a Sink Drain?
Tools and Materials You’d Need for Bathroom Sink Drain Connection
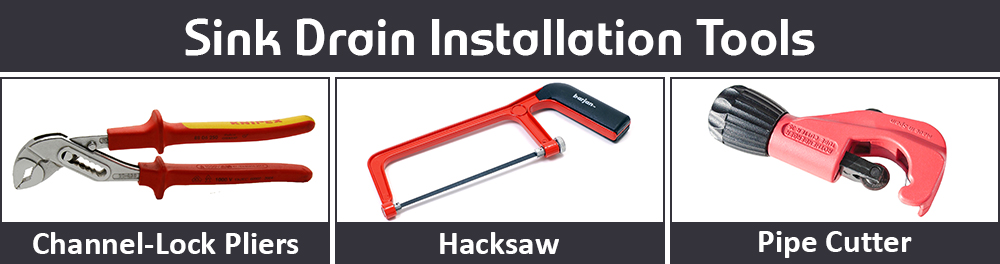
What are the Tools required for Connecting Bathroom Sink Drain?
- Pipe cutter
- Hacksaw
- Channel-lock pliers
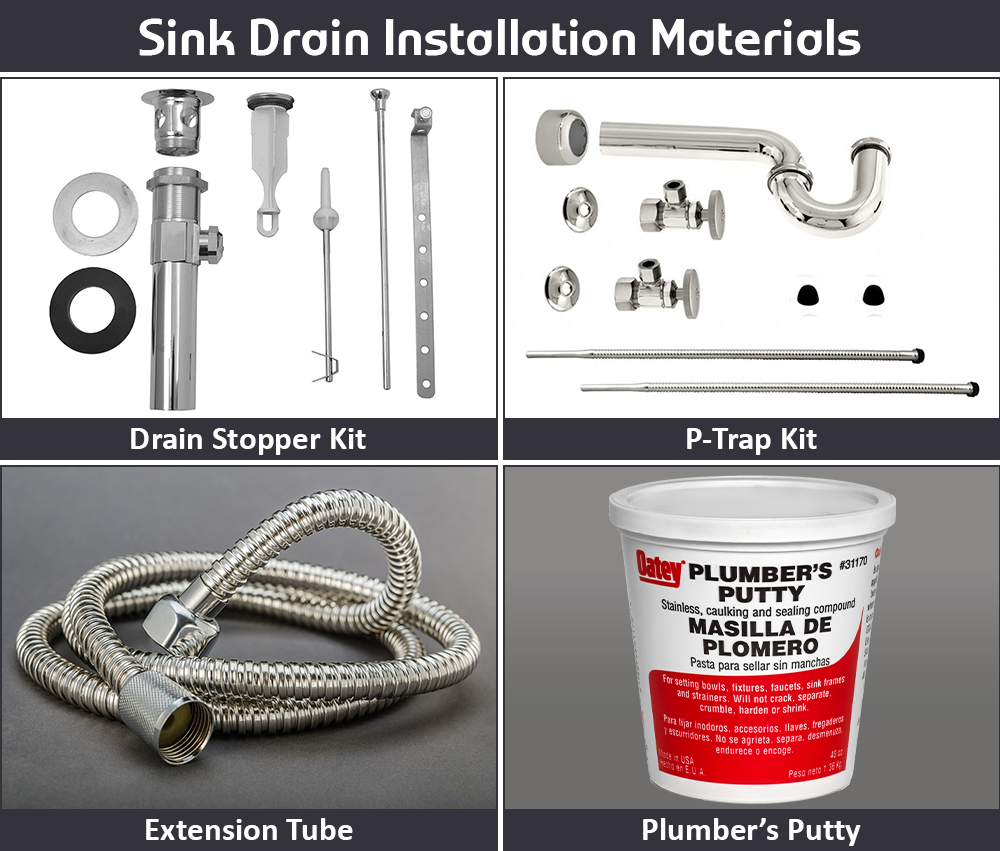
What are the Materials required for Connecting Bathroom Sink Drain?
- Plumber’s putty (It’s used if the drain kit didn’t come with washers which are used instead)
- P-Trap kit
- Extension tube
- Sink drain kit
It would also be good to master that;
- A preliminary test fit, measurements, and making the cuts are done before finalizing the installation.
- Gaskets and a slip washer are always placed with the bevel facing the two ends or the connection joint.
- The fittings of the plastic P-trap should be hand tightened; however, if there’s any leak in one of the connections, you can carefully use adjustable pliers to tighten them more.
- For the metal P-trap connections, use pliers to tighten them up.
- When tightening the filter, ensure that the tailpiece hole faces the wall if your sink has a pop-up stopper.
- If the pipes enter the compression fittings at an angle, they may not work correctly.
- If you’re replacing a damaged drainpipe, make sure that you buy it from the same manufacturer, or you buy one that can fit into the sink’s base opening and the drain stub on the wall.
What are the Common Mistakes Made While Installing a Bathroom Sink Drain?
When installing a new sink drain, avoid the following errors;
01. Over Tightening The Connections:
When fixing your sink drain, you must ensure that your pipe connections are well tightened lest you get leaks. However, you should avoid overtightening them. Overtightening the pipe connections breaks the pipes and causes other issues like warping, allowing water to pass through the pipe connection.
02. Choosing Shoddy Parts:
Avoid going for inefficient or cheap pipes when installing a new bathroom sink drain. Weak or cheap pipes can lead to severe issues later on. Hence, avoid them.
03. Using Too Much Putty:
When properly used, plumber’s putty gives you a leak-proof seal for decades. However, if too much of it is applied, it can damage your sink’s fixtures and other plumbing parts.
How to Connect a Bathroom Sink Drain?
Regardless of the type of the sink, the water supply, and the drain connections, you’ll follow the steps below;
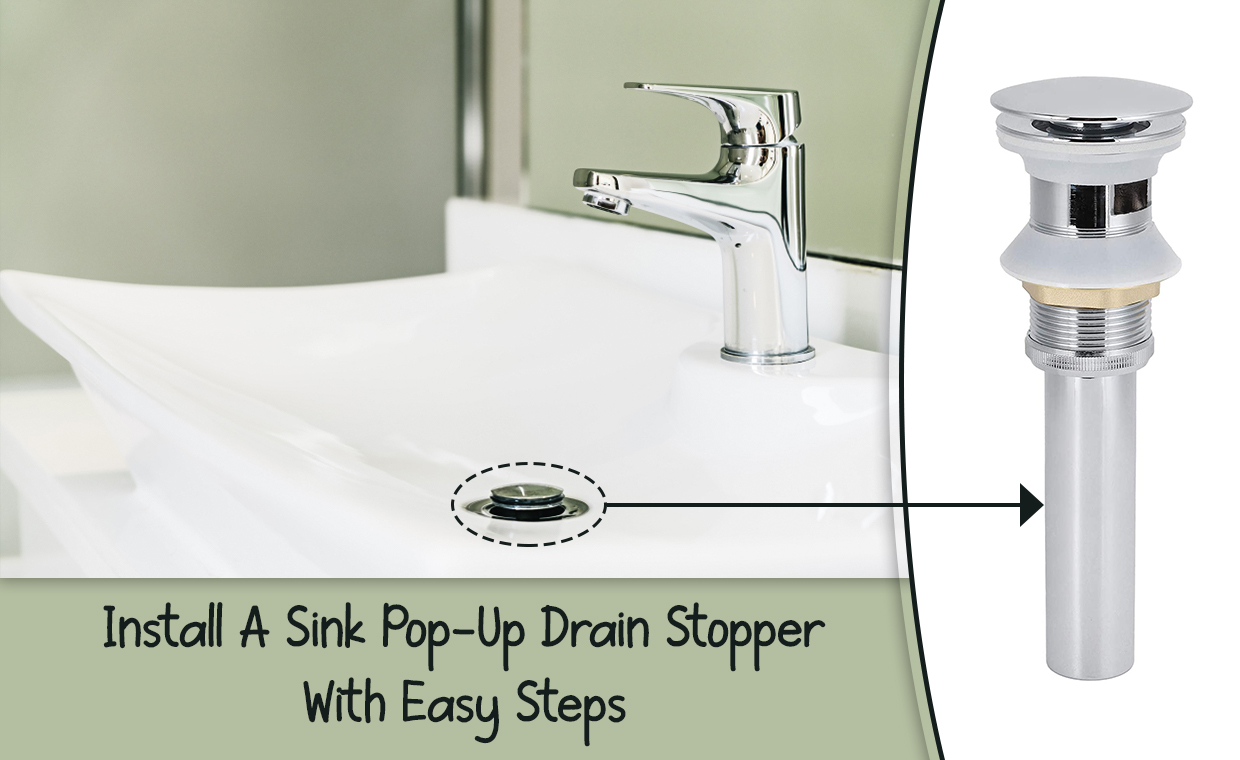
01. Install the Pop-Up Drain:
In most cases, the pop-up drain comes with the sink or can be separately bought as a kit.
Apply a silicone bead for a watertight seal around the drainpipe before dropping it into the sinkhole- Ensure that you use 100% silicone. Then, add the rubber ring under the sink- you can first add a dab to the threads to make it twist on smoothly.
Add the plastic ring and a nut. First, hand tighten the nut and then use slip-joint pliers to tighten it up. Next, use a clean damp rag to wipe off the silicone squeezed out from the sink and the drain.
Attach the pop-up drain’s last part, which comprises a rubber that creates a seal with the smooth metal pipe. You can hand tighten the nut first and then use pliers to tighten later.
Click here for additional information on installing a sink pop-up drain –
02. Install the P-Trap Adapter:
If you’re installing a new sink, you will see a pipe piece penetrating out of the wall. Here you’ll need a trap adapter glued onto the pipe to connect the P-trap. If you’re using ABS pipes, use ABS cement.
With some cement, swab the trap’s adapter inside- do the same on the drains outside, ensuring that you thoroughly coat both surfaces. Then, giving the adapter a slight twisty motion, push it in the drain.
03. Install the P-Trap:
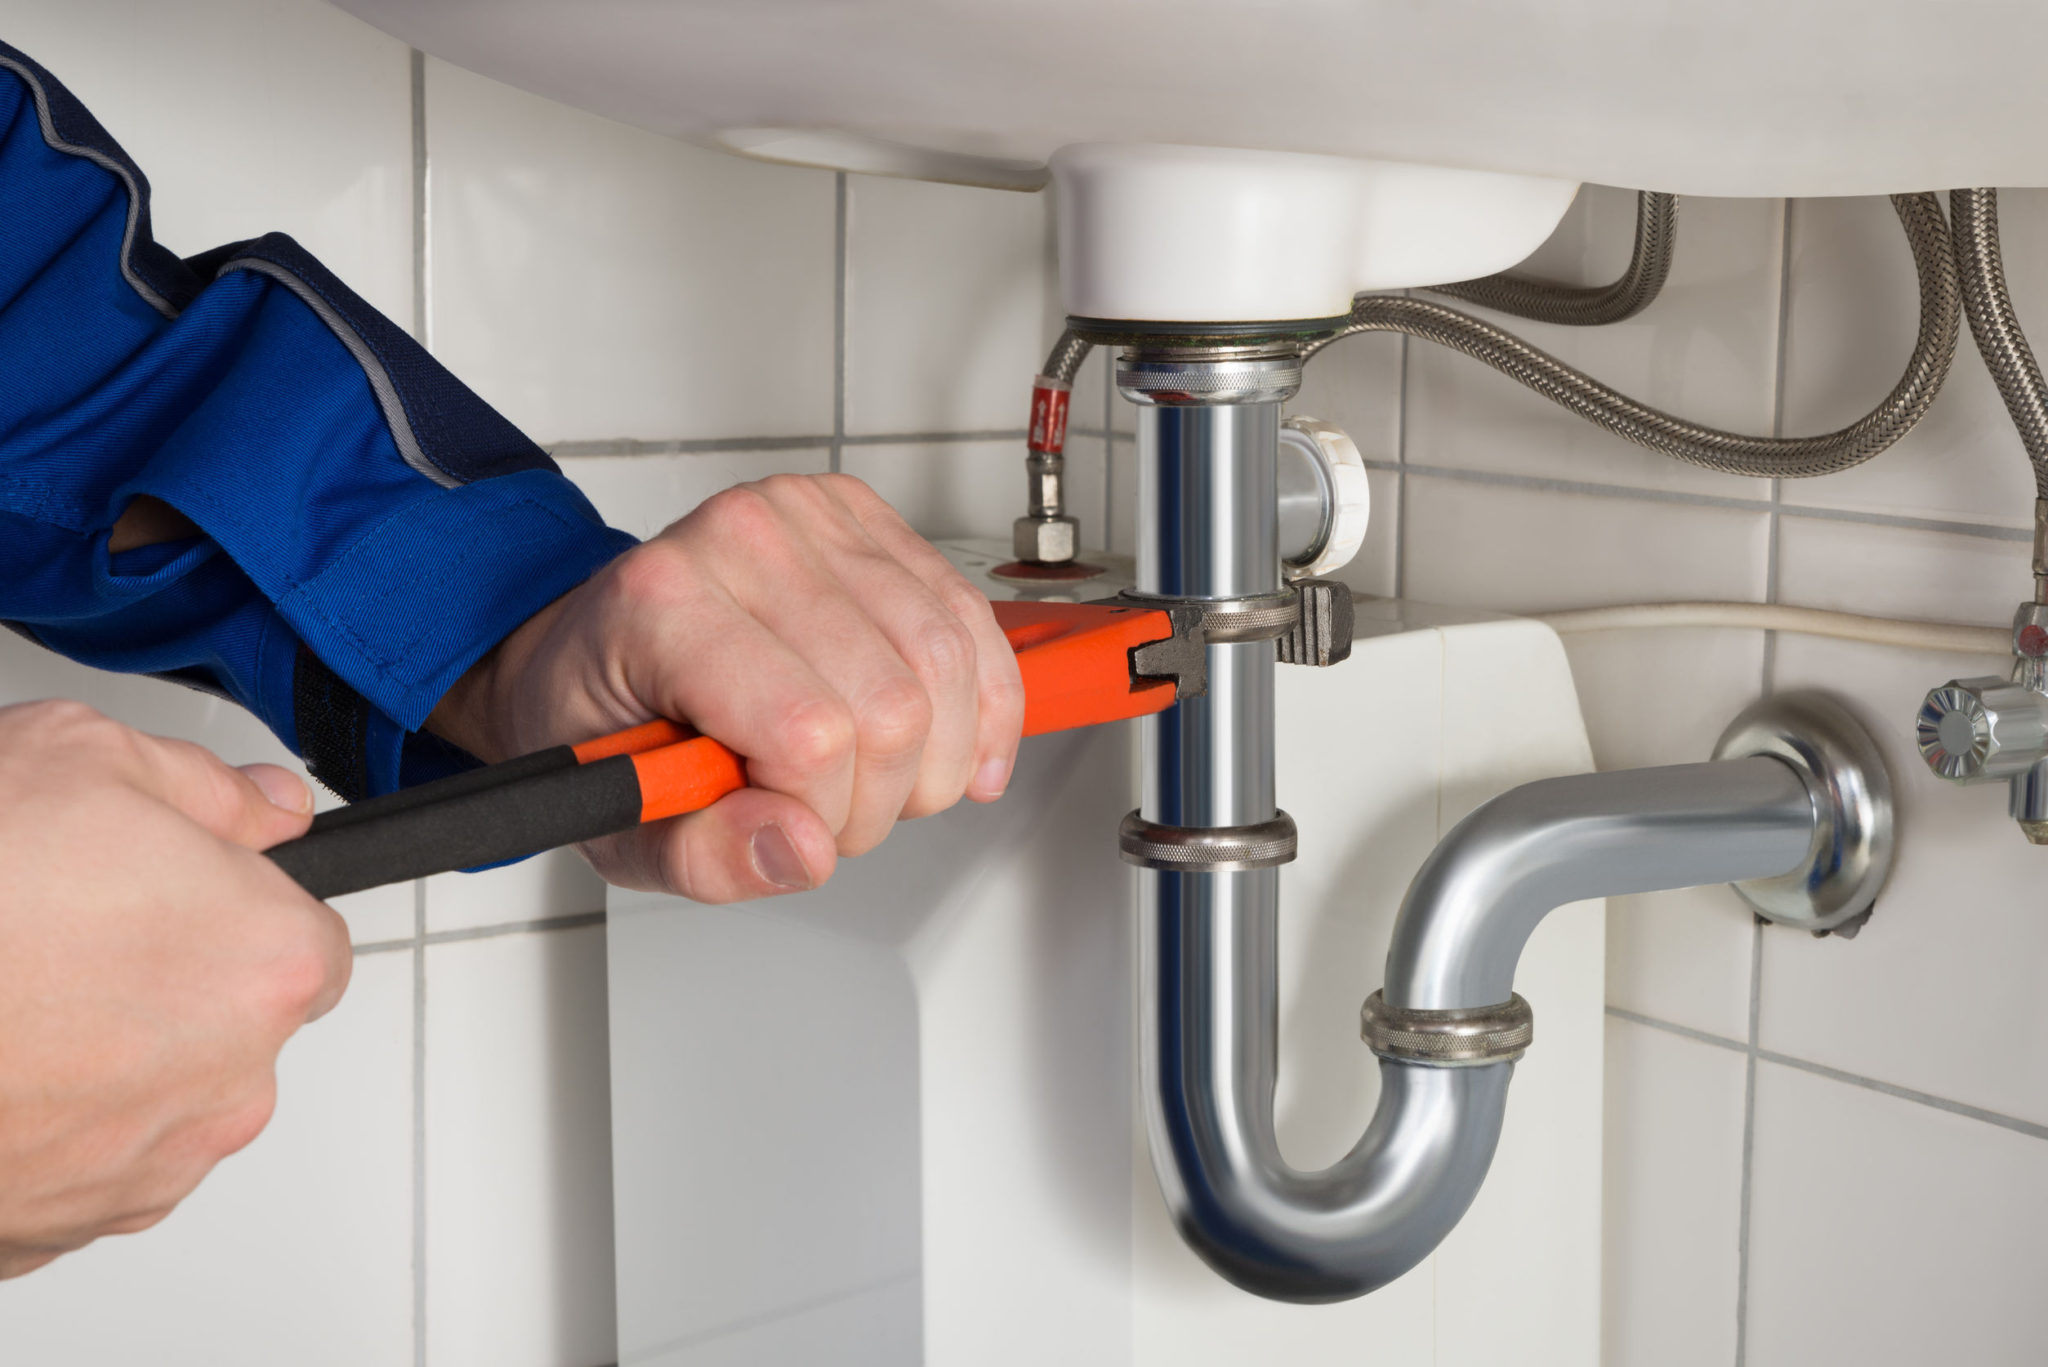
In the P-trap kit, you’ll find:
- Two slip joint nuts,
- The waste drain
- Two rubber or plastic washers.
Connect the two black pipes onto the waste drain by slipping a nut. Press the nut against the other pipe, and then use your hands to tighten it.
Look for a washer under the sink that fits right onto the drain. On the pipe, put the slip joint nut and then the washer. Ensure that the tapered side of the washer is facing the pipe. On the wall, connect the waste drain. If your pipe is too long, cut it using a hacksaw.
After cutting the waste drain, slide a slip joint nut facing you, and another one facing the wall, and then a washer- the washer’s tapered side should face towards the wall. Into the wall, insert the pipe and attach it to the adapter.
Now, add the U-shaped pipe and on each end, connect the slip-joint nuts. Tighten the nuts loosely as you adjust the parts as required to ensure that everything lines up without stressing any joint. If the parts are not lined up, you might end up with a leak.
After ensuring everything is aligned, tighten all the nuts by hand. Then use slip-joint pliers to tighten up the nuts a little more to make them nice and snug.
04. Test For the Leaks:
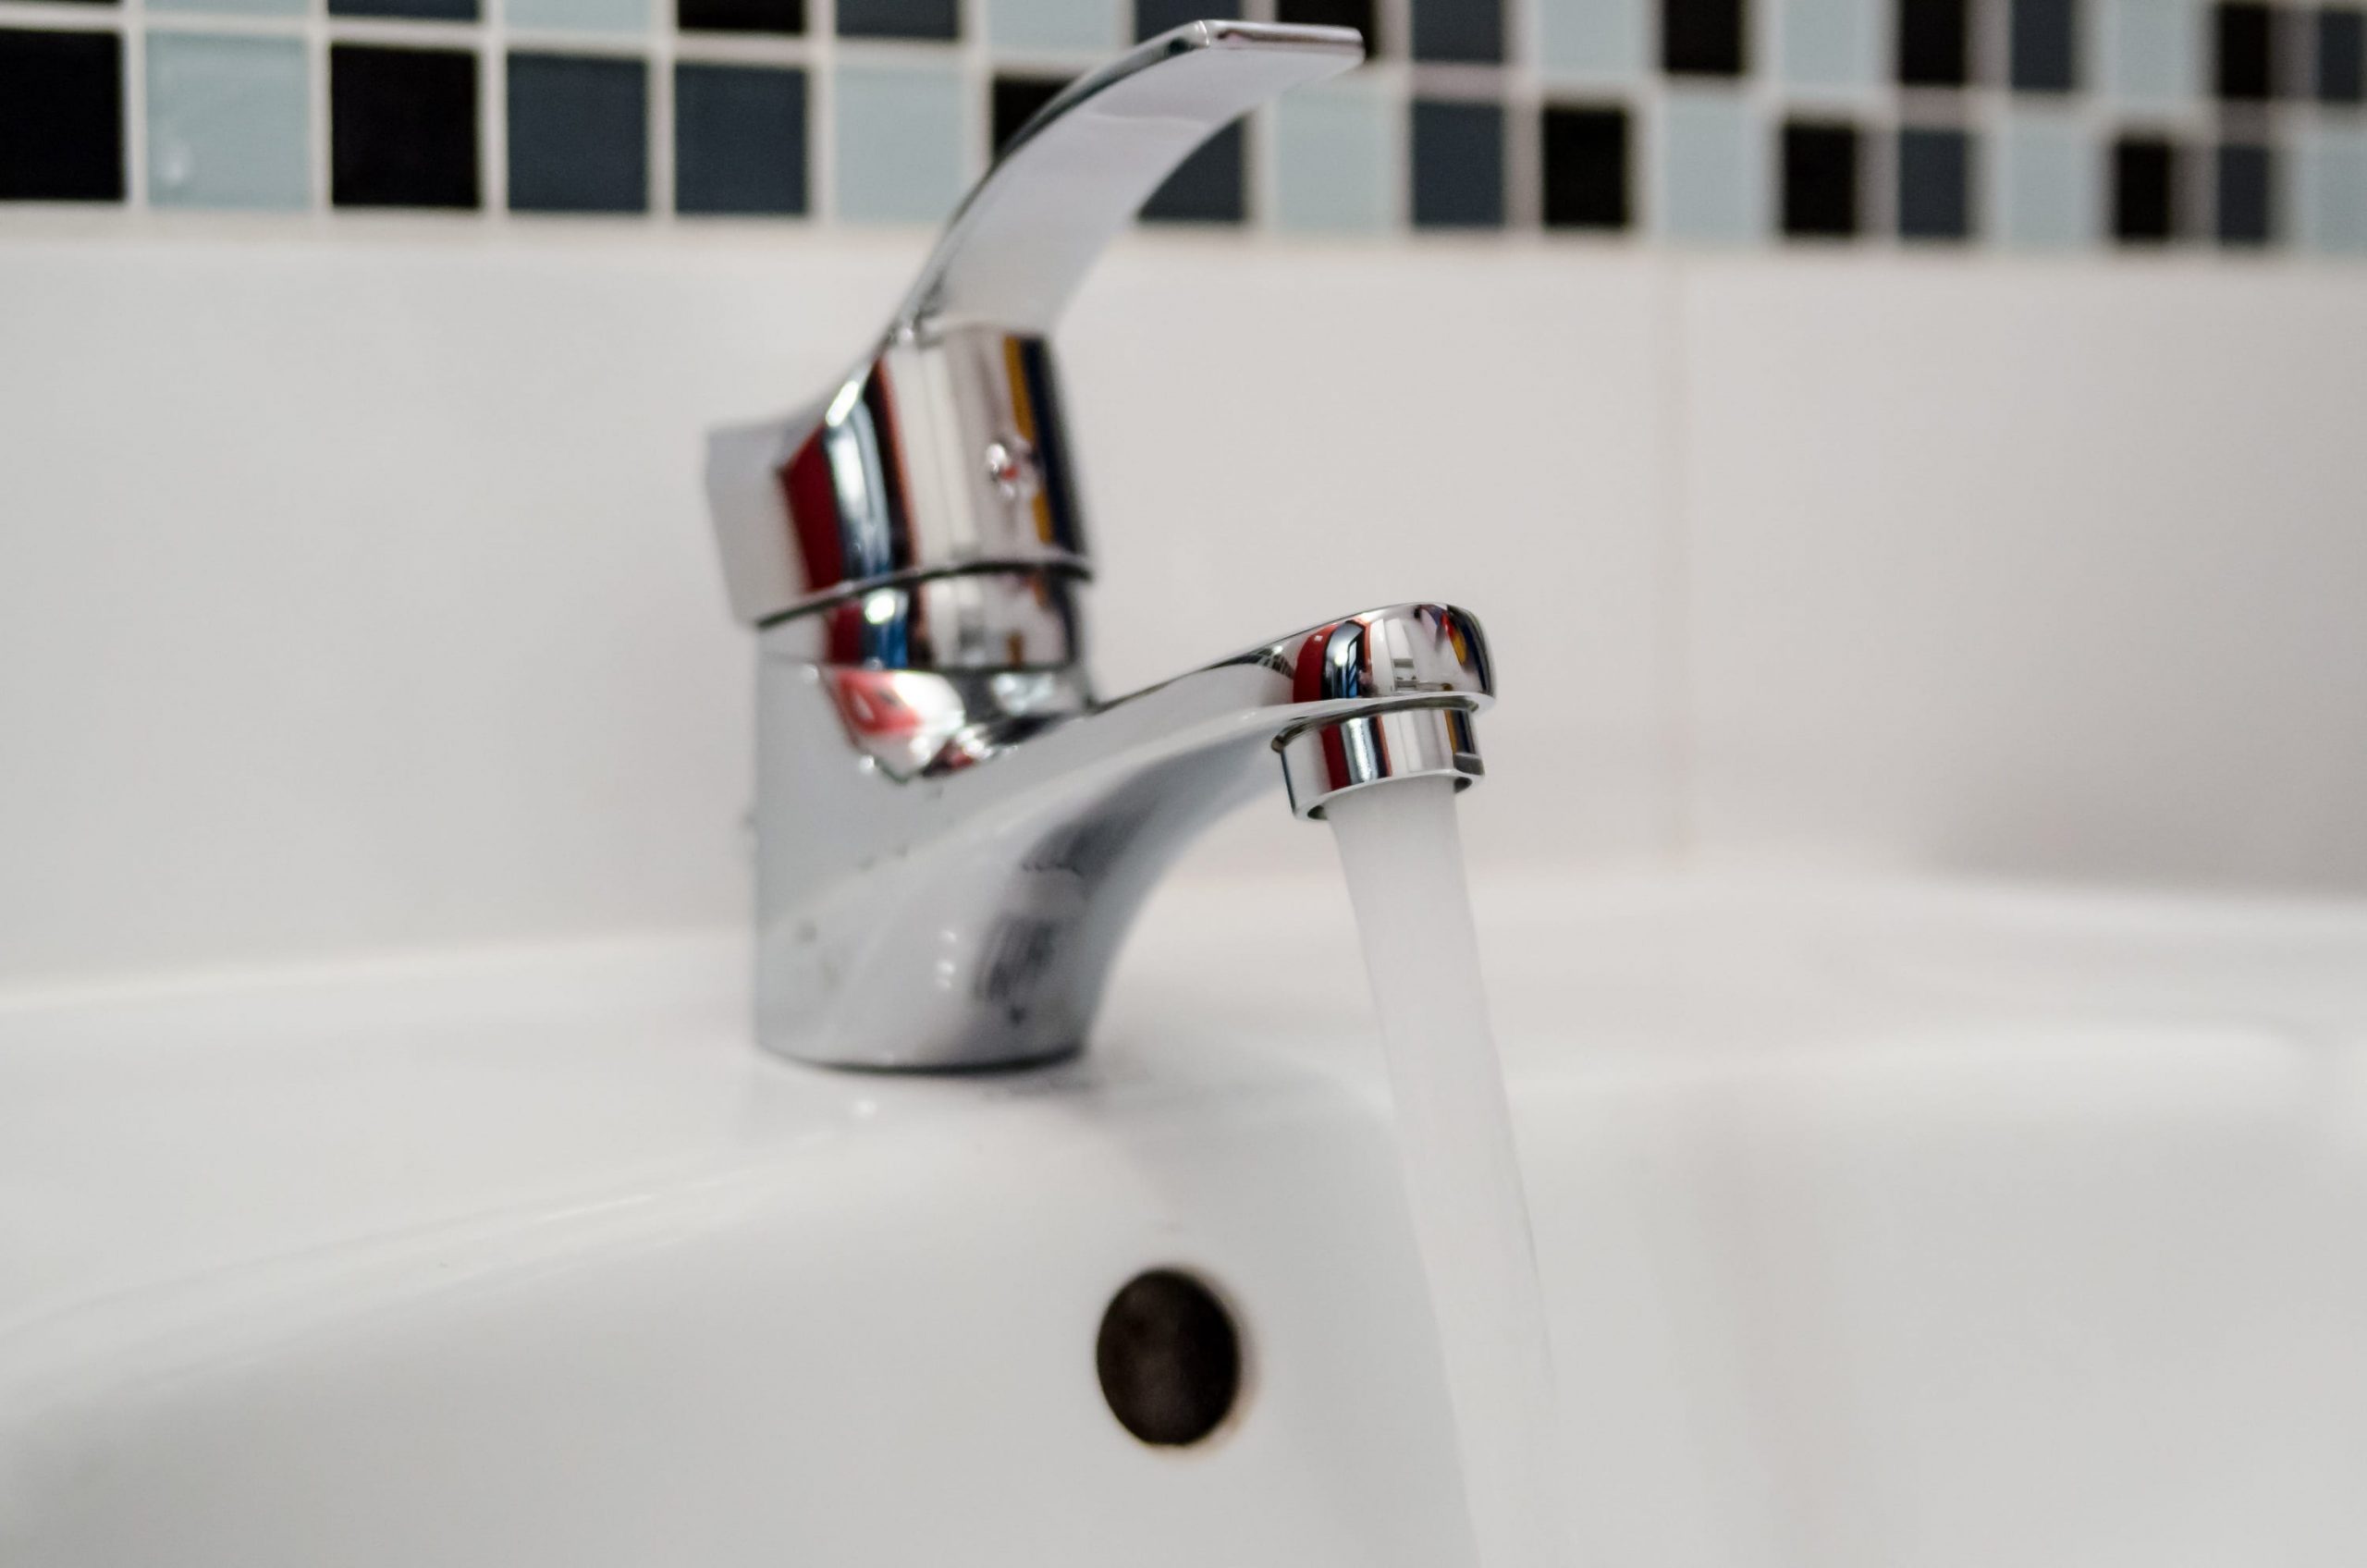
Let the faucet run as you check for leaks in the pipes. Is everything looking good so far? If yes, fill up the sink to test it and drain it out. Repeat the process several times.
No leaks! Congrats, you’ve made it! If there’s a leak, tighten the leaky joint and test it out again.This is the basic process for installing a bathroom sink drain. Sometimes there might be a slight deviation due to unique designs or situations; however, with the process at your fingertips, it is going to be a cakewalk for you to figure out any required changes.
Thank you for taking a time to read this article. We hope you are now familiar with how to connect a bathroom sink drain. If you haven’t started your project yet, use this DIY tutorial to get started right away. Don’t forget to share your experience with us once you install a bathroom sink drain by yourself.
You may find more DIY plumbing projects here –
DIY Toilet Flange Installation | Step-by-Step Instructions for You!
Step by Step Guide of Installing a Pedestal Sink in Your House!
Image Courtesy: Image 4(a), Image 4(b), Image 4(c), Image 6
Author Bio
Fidelis Kinai – Fidelis Muti possess a bachelor’s in English and Journalism and have over four years of professional experienced writing and proofreading materials for print and online platforms, including newspapers, magazines, websites, blogs, and social media accounts. He also have over three years of experience as a marketing assistant and social media manager.
He is versatile and diligent and will produce exemplary content within time to meet your deadline.
He can deliver most work within 2-3 days; rush orders are accepted whenever possible. He is based in the Kenya but travel often and work for clients all over the world.


