


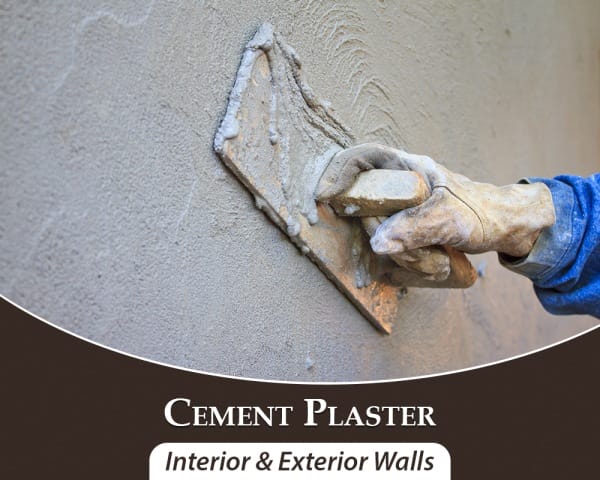
The external masonry walls of the buildings are finished with suitable material for one or more purposes such as, for producing decorative appearance, protection against rain- penetration, protection against atmospheric exposures for increased durability, etc. This process of finishing the external wall is known as ‘rendering’ and the surface so formed is called “Rendered finish”.
External plaster depends upon many factors like the desired performance of the building, a degree of maintenance, cost etc. There are various forms of external finishes. e.g. Sand faced, pebble-dashed, roughcast, smooth cast etc. The outer walls of the buildings are finished with suitable materials. Their specifications, and colour depending upon several factors such as,
- Decorative appearance desired
- Degree of maintenance
- Degree of protection desired against rain penetration
- Climatic conditions, affecting durability
- Background material of the surface intended to receive finish
- Period of year in which finish is required to be applie
- Cost
The durability of plaster depends to a great extent upon its adhesion with the background.Surface preparation is, therefore, prime important. All the projections which extend by more than 13 mm from the general surface of the masonry wall face are knocked off to obtain a uniform surface and to reduce consumption of plaster.
Following is the Preparation for the External Plaster
01. Before Plastering Work
- Before starting external plaster ensure that masonry work is complete in all respects
- Make scaffolding in advance where plaster is to be done
- Fill the external side gaps in masonry and joints of the beam and wall, which was not possible from outside earlier without scaffolding being done from
- Remove all wooden pieces, papers, kathya (rope) etc. and other unwanted material from the R.C.C and masonry surfaces
- Wet the surfaces a day before plastering
- Check the top level of the parapet walls before plastering
- Check all the windows, door frames etc. for plumb, line and level. In case of any defects, rectification is to be done before start of plastering
- Check all the elevational features as per the architectural drawing
- Mark level dots before starting the external plaster
- If the R.C.C surfaces are affected by green algae or efflorescence, clean the surface with a wire brush
- Put line Dori from top slab to bottom level, for all corners of the walls, corners of windows, a line of elevational features, line of R.C.C. grill and all straight line in that portion.
02. During Plaster Work
- The process should begin a minimum two days prior to plastering for gaining enough strength.
- Keep the thickness of the plaster to a minimum.
- All the joints and surface should be well cleaned with a wire brush and ensure that they are free from oil, grease, etc.
- For fixing chicken mesh to all joints of masonry and R.C.C work, make a hole on the wall, column and beam with a drilling machine.
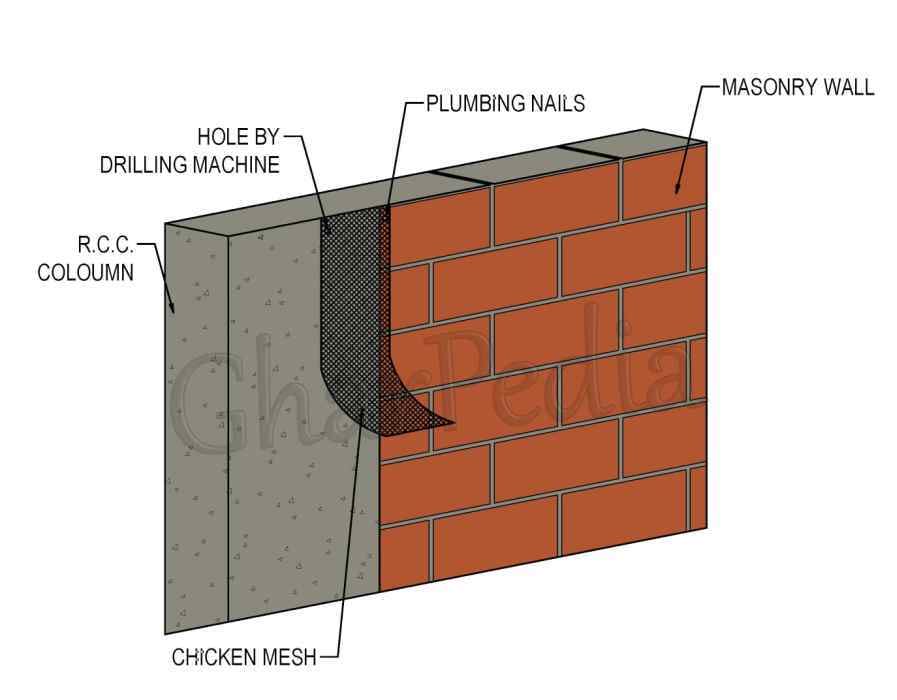
- Choose the chicken mesh of 12 mm mesh and 24 gauges for external plaster.
- Cut the chicken mesh in minimum 20 cm to 23 cm width by a cutter.
- Fix the chicken mesh on joint of R.C.C and masonry wall, by plumbing nails on R.C.C member and wire nails on masonry member.
- Half the width of the chicken mesh will be on the masonry wall and half will be on the R.C.C member
- Chicken mesh should be tight enough in both directions, vertical and horizontal.
- Spacing of nails should be less than 9” (23 cm) to avoid buckling and loosening of chicken mesh, which may then come out of the plaster.
- Alignment and fixing level pegs on outer wall surfaces will be done by using the surveying instrument/centre plumb bobs.
- Fix line Dori (string) from top slab to bottom level, for all corner of the walls, corners of windows, lines of elevational features, lines of R.C.C grill and all straight lines in that portion.
- The Projected surface of the wall which is out of plaster or which are due to an uneven surface will be cleared and after completing the levelling of walls.
- First coat mortar filling (1:4 Cement and Sand) up to 12 mm will be applied on surfaces where required mortar thicknesses exceed 20mm.
- External wall plaster will be finished with a rough surface.
03. After Plaster Work
- After completion of the plasterwork, minimum 7 days curing is necessary.
04. Scaffolding
For a project of high value, where resourceful contractors are there, they generally use “H” frame & steel tabular scaffolding, which is self-supporting and do not need any support in the wall for plastering.
But in small projects where bamboo scaffolding is used, normally double scaffolding is not used. Now when only single scaffolding is used, contractor erect only one raw of bamboo and take the support of external walls which is to be plastered. For taking such support, they normally drive hole in the wall to support wooden ballies on every floor. These holes remain there during first coat and are filled up only during second coat simultaneously when scaffolding is removed. This, therefore, create a joint in plaster which is not done skillfully.
It will not give only rise to a patch which will appear and look bad but it is also a source for water to enter. The moisture enters from here and make walls damp. It is needless to mention that curing of such scattered hole is difficult. Hence always use double scaffolding to the extent possible for external plaster.
The choice of particular plaster depends upon several factors like availability of material, a location of plastering surface, rainfall, weather condition, economy, decorative appearance desired, etc.
Also Read:
Cement Plaster VS Gypsum Plaster
Reasons behind Cracks in Plaster: An Incredibly Easy Guide
Is My Plastered Wall Ready to Receive Paint?


