
It is an old saying that “a good-looking patio is the neighbor’s envy and the owner’s pride”. It is true. A patio can be a premium attraction to your home. If you have a patio in your home premise, you can take few steps to make the area more beautiful and attractive.
In fact, there are numerous ways in which you can accentuate the exterior beauty of your house, patio beautification is one of them. If you have a patio and you can decorate it according to your aesthetic tastes, you are indeed lucky. But what if you don’t have a patio? Worry not! with the tips mentioned here, you can install a patio easily.
According to ‘Michael Agnes’ (Author of Webster’s New World College Dictionary), a patio is a paved area adjacent to a house. You can make it a functional place by decorating it with chairs, tables etc. for outdoor lounging, dining, etc. However, if you are lucky enough about selecting a right patio material for your house, there are wide varieties of materials available like concrete, natural stone, brick, etc. Usually, natural stone or paver is widely used to create a patio. However, setting up a combo of natural stone and paver is not a difficult task.
So here we have narrated a step-by-step guide on how to install a stone patio:
Stepwise Procedure to Install Stone Patio
Step 1 – Overview-Design of the Project

First and foremost, you must have an overall idea of execution of the whole project. Sketch out your project on a graph paper and estimate the amount of material you would probably need. Find out if any pipeline, gas connection are passing by the area, which may come as a reason of trouble later on. Along with the area, its layout should describe the floor level for the ease of constructional movement and finally about the drainage of water. Design finalization is the most important point before you start (i.e. size, area, levels, selections of materials).
Step 2 – Select a Stone
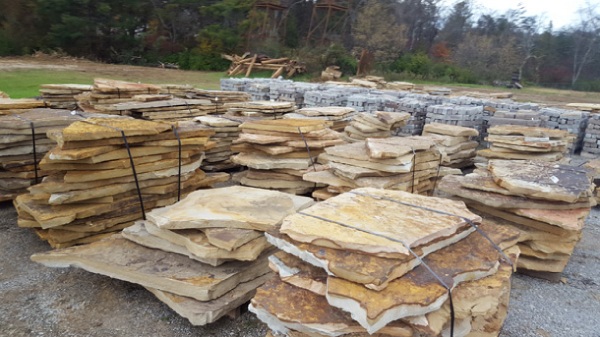
Before you start installing a stone patio, you need to choose the right natural stones. Sandstone, limestone, etc. are a few options available for building the patio. These natural stones offer timeless appeal for the making of a classy or casual patio. These patio stones are available in varieties of colors and sizes. The bigger the stones, less work your will have to do mixing them together. However, these patio stones are heavier, thicker and more expensive in price. Bluestone is found in rectangle and square shapes and the size of each are usually different. Find out which one is going to suit your patio. So, select the right colour and size of the stone before you start.
Step 3 – Laying Pattern
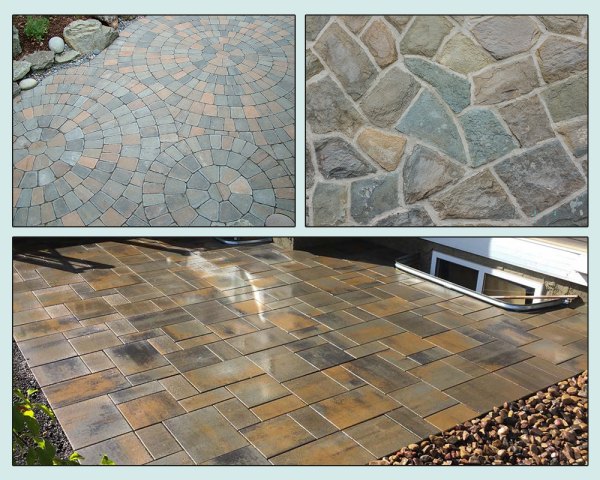
The stones can be install in different patterns like simple, diagonal, zigzag or any other. The greater the stone sizes, the greater number of patterns and can be created. So, choose the right pattern according to your need and likings.

Step 4 – Drainage

The patio should be designed with well build drainage system in mind and with a slight slope to direct water away from the house. According to ‘Mark Johanson’ (Author of Black & Decker – Complete Guide to Patio), “Never build your patio perfectly levelled. Instead build with slight slant or slope toward the drain so water easily gets drained off.” It is the best to consult local professionals to see what they are suggesting about the best for your site.

Now once the design is done and the choice of materials is decided, let us see how it is done.
Step 5 – Site Excavation
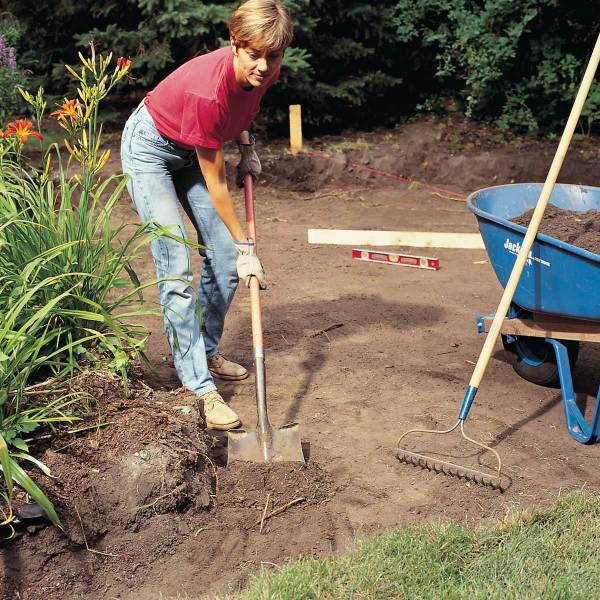
You need to drive 3-foot stakes into the ground outside the patio area. Now set the builder’s level in the middle of that area. Look through the scope in the level and arrange to move the rod marker till it falls into the scope’s crosshairs. Mark this stake at bottom of the rod and swivel the level to do so for the each stake. You need to dig 6 to 12 inches below the level you have marked to reach the subgrade area.
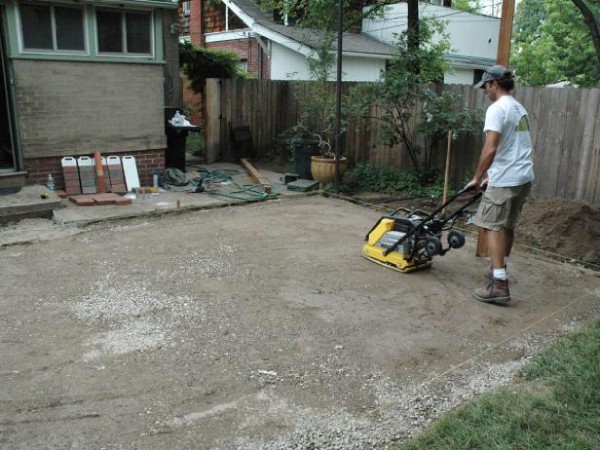
Step 6 – Base Setting
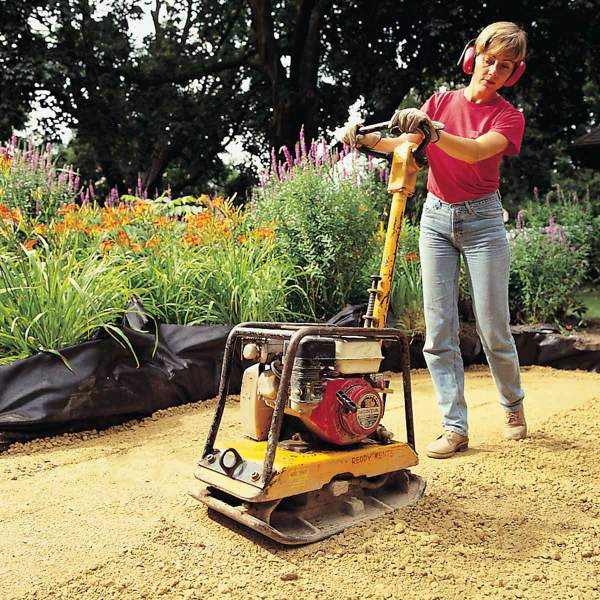
Cover this subgrade with 3-inch layers of crushed stone and stone dust. Wet the layers with water to make sure the dust remains down. Use a plate compactor to compact the entire portion. You can use hand tamper near sidewalks, foundations, and walls.
Repeat this process until you get to notice that you are around 2.5 inches below the marks you have made on the stakes. You can also drive any additional stake every 2 feet between the stakes that are in corners and lie at the closest to the house. Run strings along the pitch of the patio amidst the new stakes that you have just set up. Remember to get correct levels in this layer as you cannot adjust levels in final layer i.e. with stones as their thickness would be uniform. So, check your slope twice.
Step 7 – Spread the Setting Bed Over
In any wheelbarrow, you need to mix around one part dry cement along with 12 parts of stone dust. Slowly add water to this mixture so that it becomes a stiff mixture which can be used. Start from one corner and lay down enough material so that the stone can set down completely. You can use a rake or hand trowel to level the mixture. It is important that you measure the bed thickness by calculating the distance between it and the string that you have placed. If you have 1.5 inch thick stones, you would need to keep a gap of 1 inch so that setting can be managed smoothly.

Step 8 – Layout the Stones
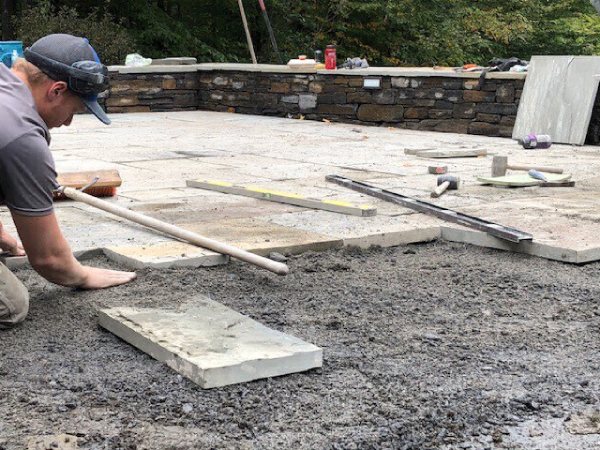
Now comes up the most important task of all of this phase. You have to lower one stone with its smooth side up on one corner of the setting bed. If your stones are heavy, you might need more than one person to that job done. You must twist the stone in a manner that it comes in strong contact with the bed. Next, use a mallet and tap the edges and center of the stones to ensure that it is firmly in place. In case the stones are quite heavy, you can even hold one of its edges on the ground and shift its weight from one of its corners to the other.
Step 9 – Levelling the Stones
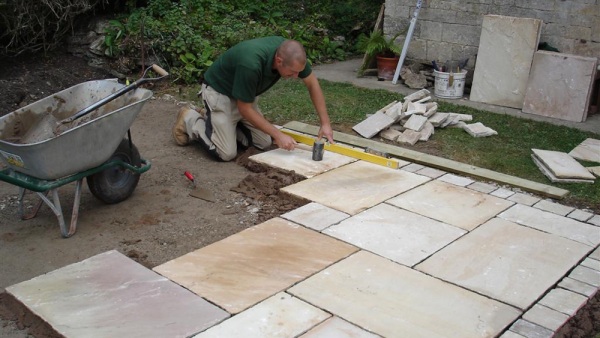
Use a level to check the edges of each stone and see if they have settled well with stone slabs that are adjacent to them. Also, check the strings to see if the stone has been pitched at the correct angle. The face of the stone should be quite close to the string but not touching it. Repeat all the above steps for each of the other stones and take care that you leave at least 3/8 to ½ inch gap between each of the stones placed. Use a level to see all the stones are being placed uniformly. Brush the stones for any extra material as once the wet mix dries it would be tough for you to do so.

Step 10 – Cutting the Stones as per the Fit
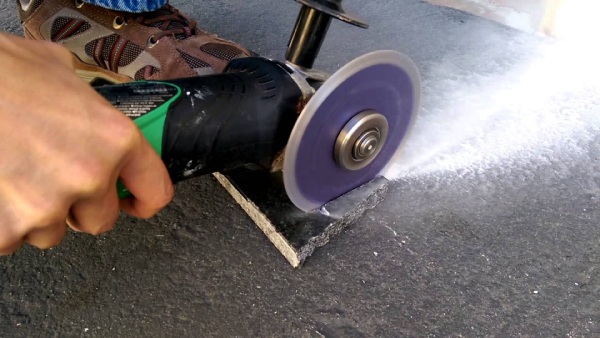
There is high probability that for certain portion of patio construction, you might have to cut any extra parts of the stone in use. Mark the portion from where you have to cut using a pencil and use a carbide-tipped awl for scribing through the cut line.
If you have to make a straight cut, you need to use a level to guide the scribe in place. Place a wood under the cut line to elevate the stone and it will turn easier for you to cut the stone. Always ensure that you are wearing protective gear for eyes, ears, and you are wearing a dust mask as well.
Step 11 – Fill Joints

Although a stone patio does not require edging to keep the stones in place, you can use cobblestone for enjoying the desired edging effect. In order to install them, you have to dig a trench, which can accommodate a 4-inch bed of concrete and make sure that each stone is set 3.5 inches below the finish grade. Once the patio is strong and has dried up, you can spray stone dust over it and then sweep it into joints and edges.

Step 12 – Finishing it up

This is the final part of making your stone patio. Use a hose to spray the stones with water in such way that the stone dust easily gets packed into the spaces. You may also use a pointing trowel to stamp the dust into the joints. Keep repeating until you are assured that your work has been done satisfactorily. Avoid the use of cement and sand in the joints as they would create problems for you later.
Conclusion:
Installing a stone patio may seem to be a tough task initially, but if you follow the above steps, the end result will probably be quite satisfactory. Once your stone patio is installed successfully, it will enhance the beauty of your home in more than one ways.
With little effort and planning you can really have a grand face lifting of your property by installing a patio. Besides aesthetics, the patio will add to your property’s resale value abruptly.
Also Read:
Patio Roof Materials: Know its Various Types & How to Choose?
Decorate Your Home Under INR 500 Products!
Home Renovation: Economical Ways to Renovate Home with Style!
Image Courtesy: Image 2, Image 3 (a), Image 3 (b) – allstarlandscaping, Image 5, Image 6, Image 7, Image 8, Image 9, Image 10, Image 11
Author Bio
Garima Bais – I am a blogger writing on topics like parenting, love, life, beauty and travel. Belonging to a country with a deep heritage India I am an eternal optimist and believe that whatever life gives to you should be taken with gratitude. Do let me know your take on my articles in the form of comments.


